

I don't contribute enough forum posts here. Since I've been enjoying cooking lately I shall do so here.
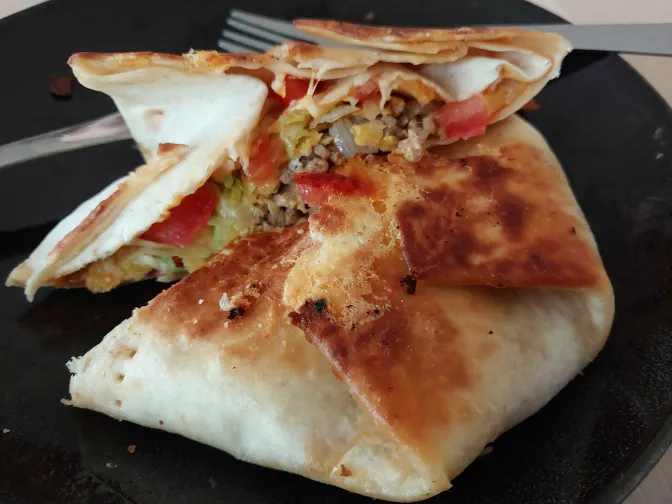
Made some taco bell crunchwrap supreme at home last night. Pain in the ass to fold the first time but easier once you get the hang of it.

Ingredients for ~6:
Tortillas, white (6)
Texmex cheese mix
I used 500g mixed ground pork and beef. Just beef is probably better but beef+pork mix is cheaper.
Jumbo nondescript "taco seasoning" 25g
4 Roma tomatoes diced
1 large white onion diced
1 Cayenne pepper finely chopped
100g sour cream
100g shredded iceberg lettuce
Nacho chips (an amount)
Instructions:
Fry ground meat + cayenne pepper + white onion in pan
Once meat browned add taco seasoning and mix in
Add ingredients to middle of tortilla: meat mix+onion+chilli, followed by 1 spoonful sourcream
Layer around 4 nacho chips on top
Followed by lettuce and tomatoes and cheese
A good place to add some extra sauce if you want it would be atop the nacho chips. I added some tobasco.
Fold closed in the following manner: Top+bottom, then CORNERS, then sides
Fry in olive oil seam down for like 90 seconds, then flip and fry the non-seam side for another 60
Nacho cheese would also be a nice addition if you can find it and like it. My partner doesn't, so I didn't add it. I would spread this on underneath the meat mix.
Roma tomatoes come highly recommended for dicing in this situation. Not too watery like other tomatoes I've tried.
Made some taco bell crunchwrap supreme at home last night. Pain in the ass to fold the first time but easier once you get the hang of it.
Ingredients for ~6:
Tortillas, white (6)
Texmex cheese mix
I used 500g mixed ground pork and beef. Just beef is probably better but beef+pork mix is cheaper.
Jumbo nondescript "taco seasoning" 25g
4 Roma tomatoes diced
1 large white onion diced
1 Cayenne pepper finely chopped
100g sour cream
100g shredded iceberg lettuce
Nacho chips (an amount)
Instructions:
Fry ground meat + cayenne pepper + white onion in pan
Once meat browned add taco seasoning and mix in
Add ingredients to middle of tortilla: meat mix+onion+chilli, followed by 1 spoonful sourcream
Layer around 4 nacho chips on top
Followed by lettuce and tomatoes and cheese
A good place to add some extra sauce if you want it would be atop the nacho chips. I added some tobasco.
Fold closed in the following manner: Top+bottom, then CORNERS, then sides
Fry in olive oil seam down for like 90 seconds, then flip and fry the non-seam side for another 60
Nacho cheese would also be a nice addition if you can find it and like it. My partner doesn't, so I didn't add it. I would spread this on underneath the meat mix.
Roma tomatoes come highly recommended for dicing in this situation. Not too watery like other tomatoes I've tried.
Followed a youtube recipe for "lemon chicken" that spawned in my recommended and it turned out really well. Served it with pasta but it would go insane with roast potatoes I imagine
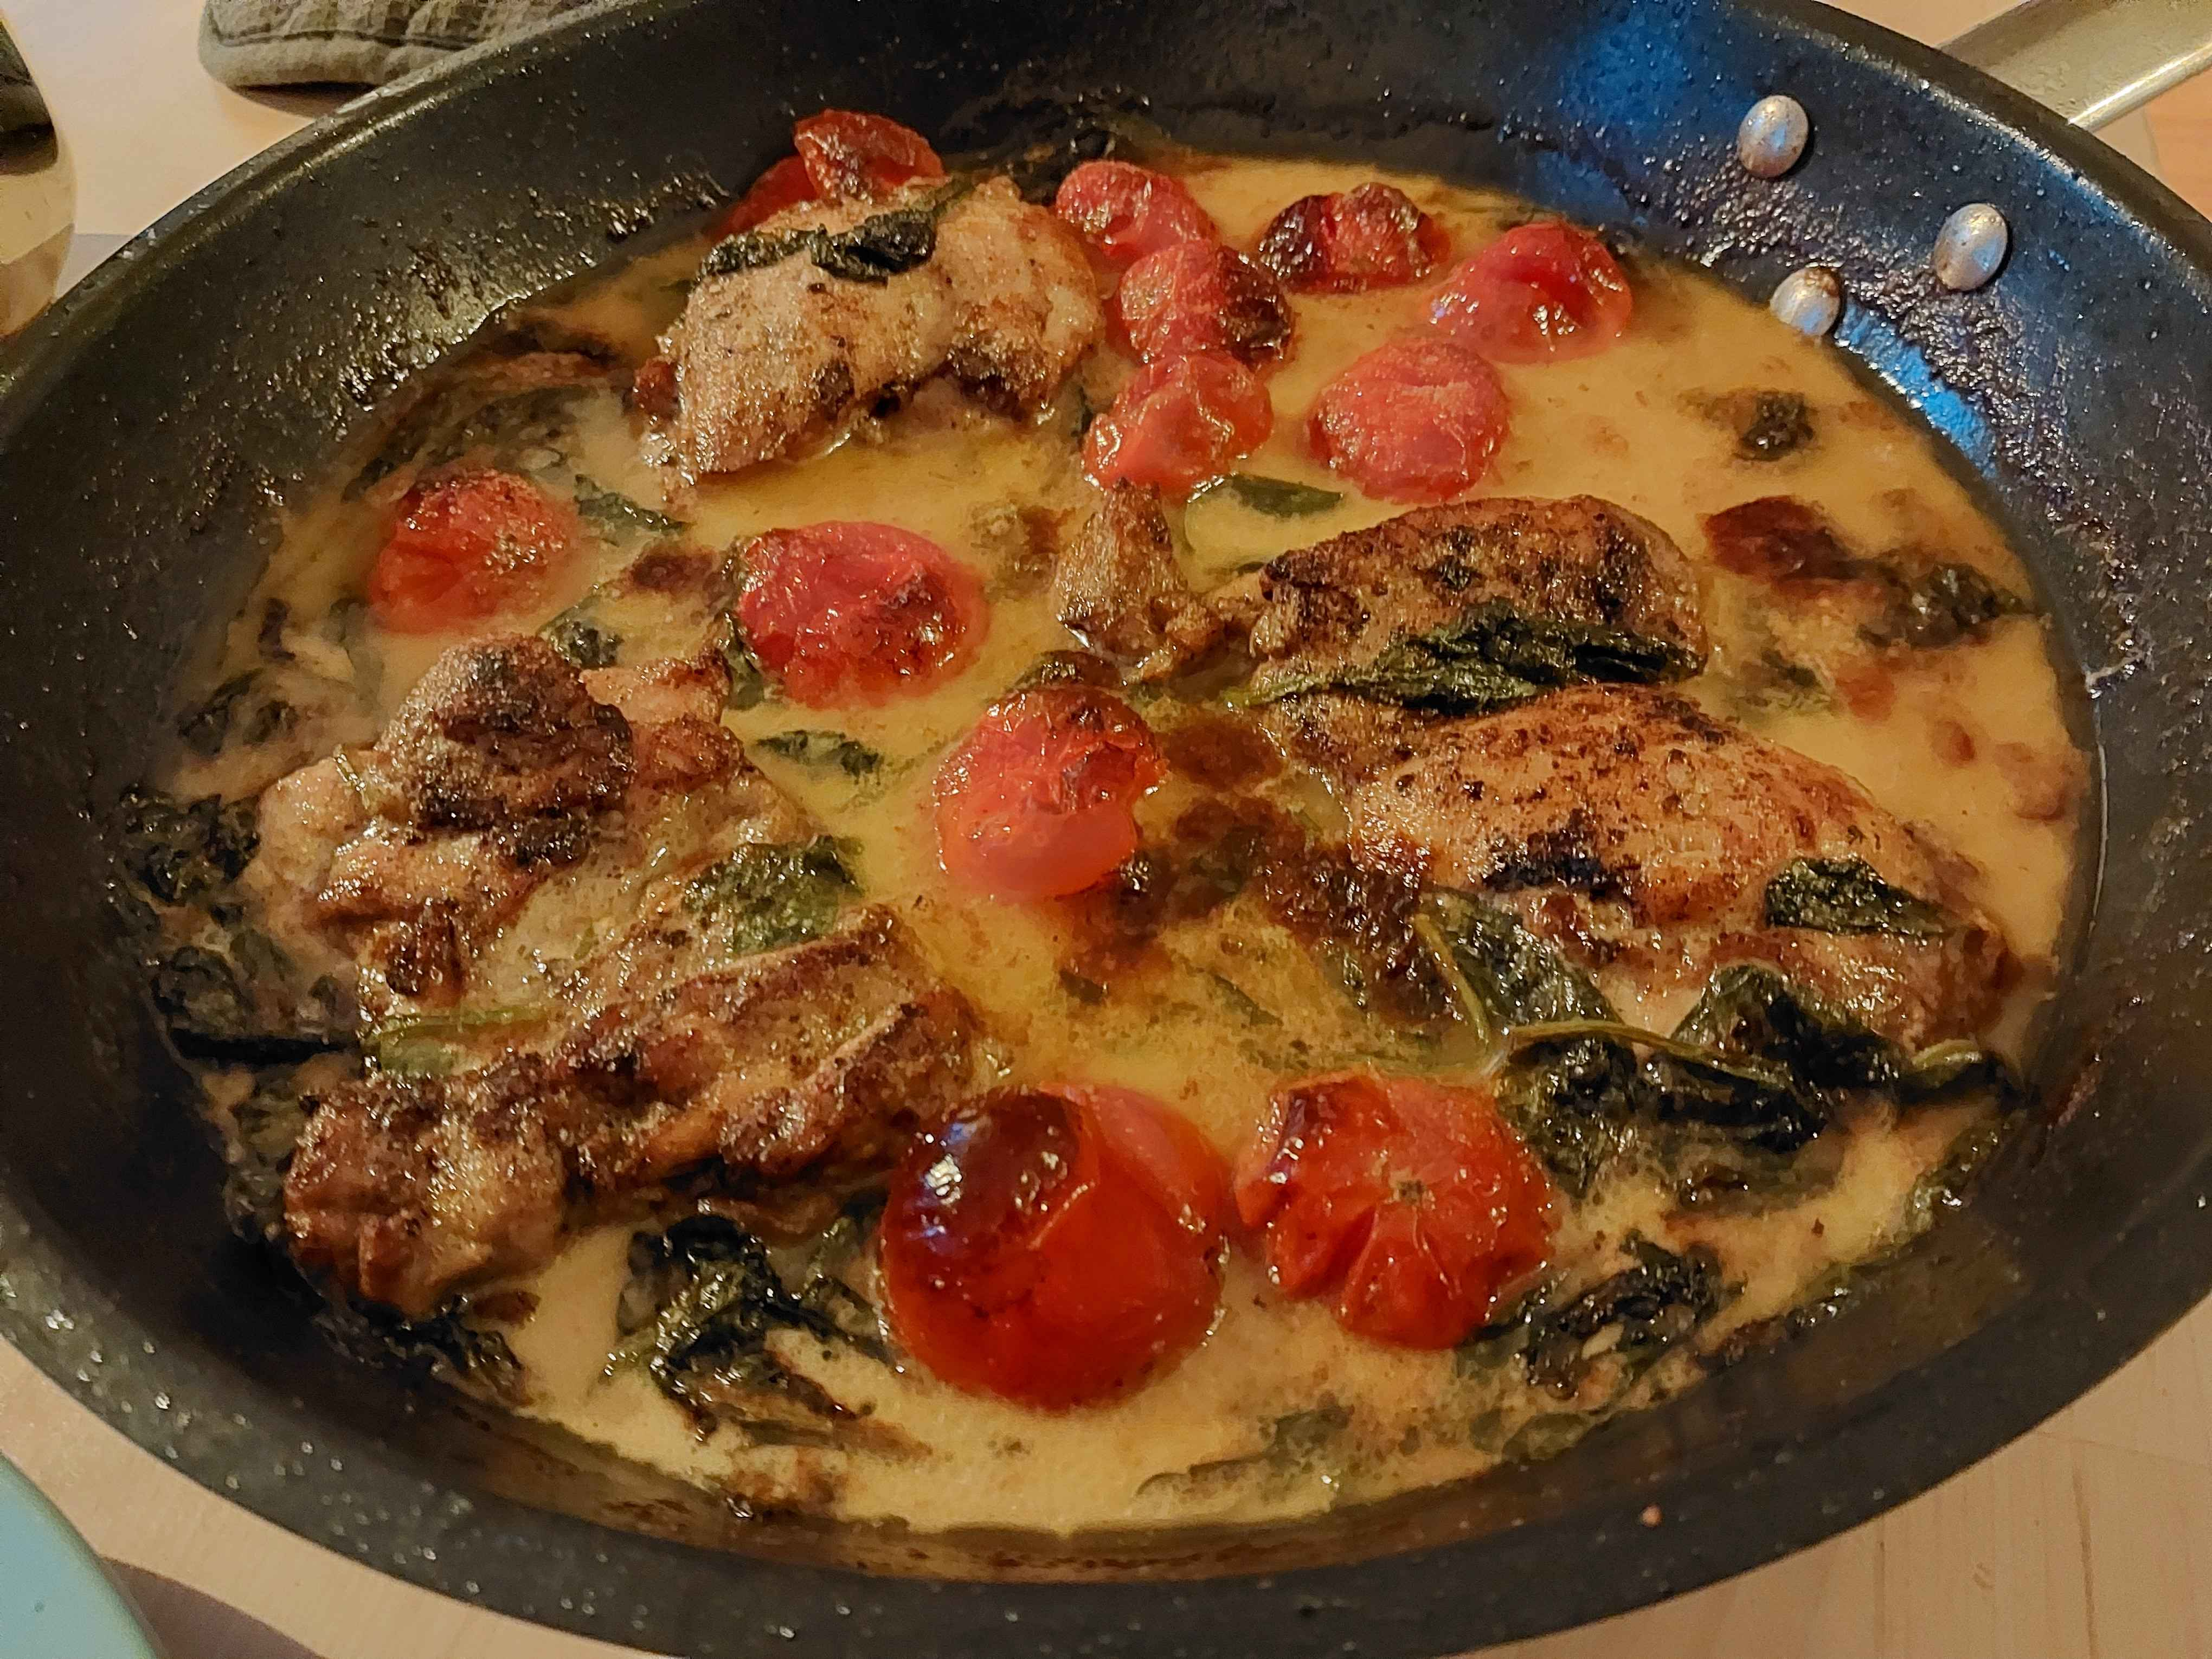
Video: https://www.youtube.com/watch?v=t3NqrJ90_X0
is there a spoilerbox bbcode on this site cuz the image is big and i cant be bothered shrinking it
Video: https://www.youtube.com/watch?v=t3NqrJ90_X0
is there a spoilerbox bbcode on this site cuz the image is big and i cant be bothered shrinking it


OK time to revive the thread this time with local cooking today I will be making slightly unconventional gumbo.
So for those who don't know it's a Cajun and Creole soup that largely came into existence after the Civil War, it's recently gained much popularity outside of home cooking and LA restaurants because of the efforts of Paul Prudhomme (PBUH). I will be making gumbo with chicken and sausage.
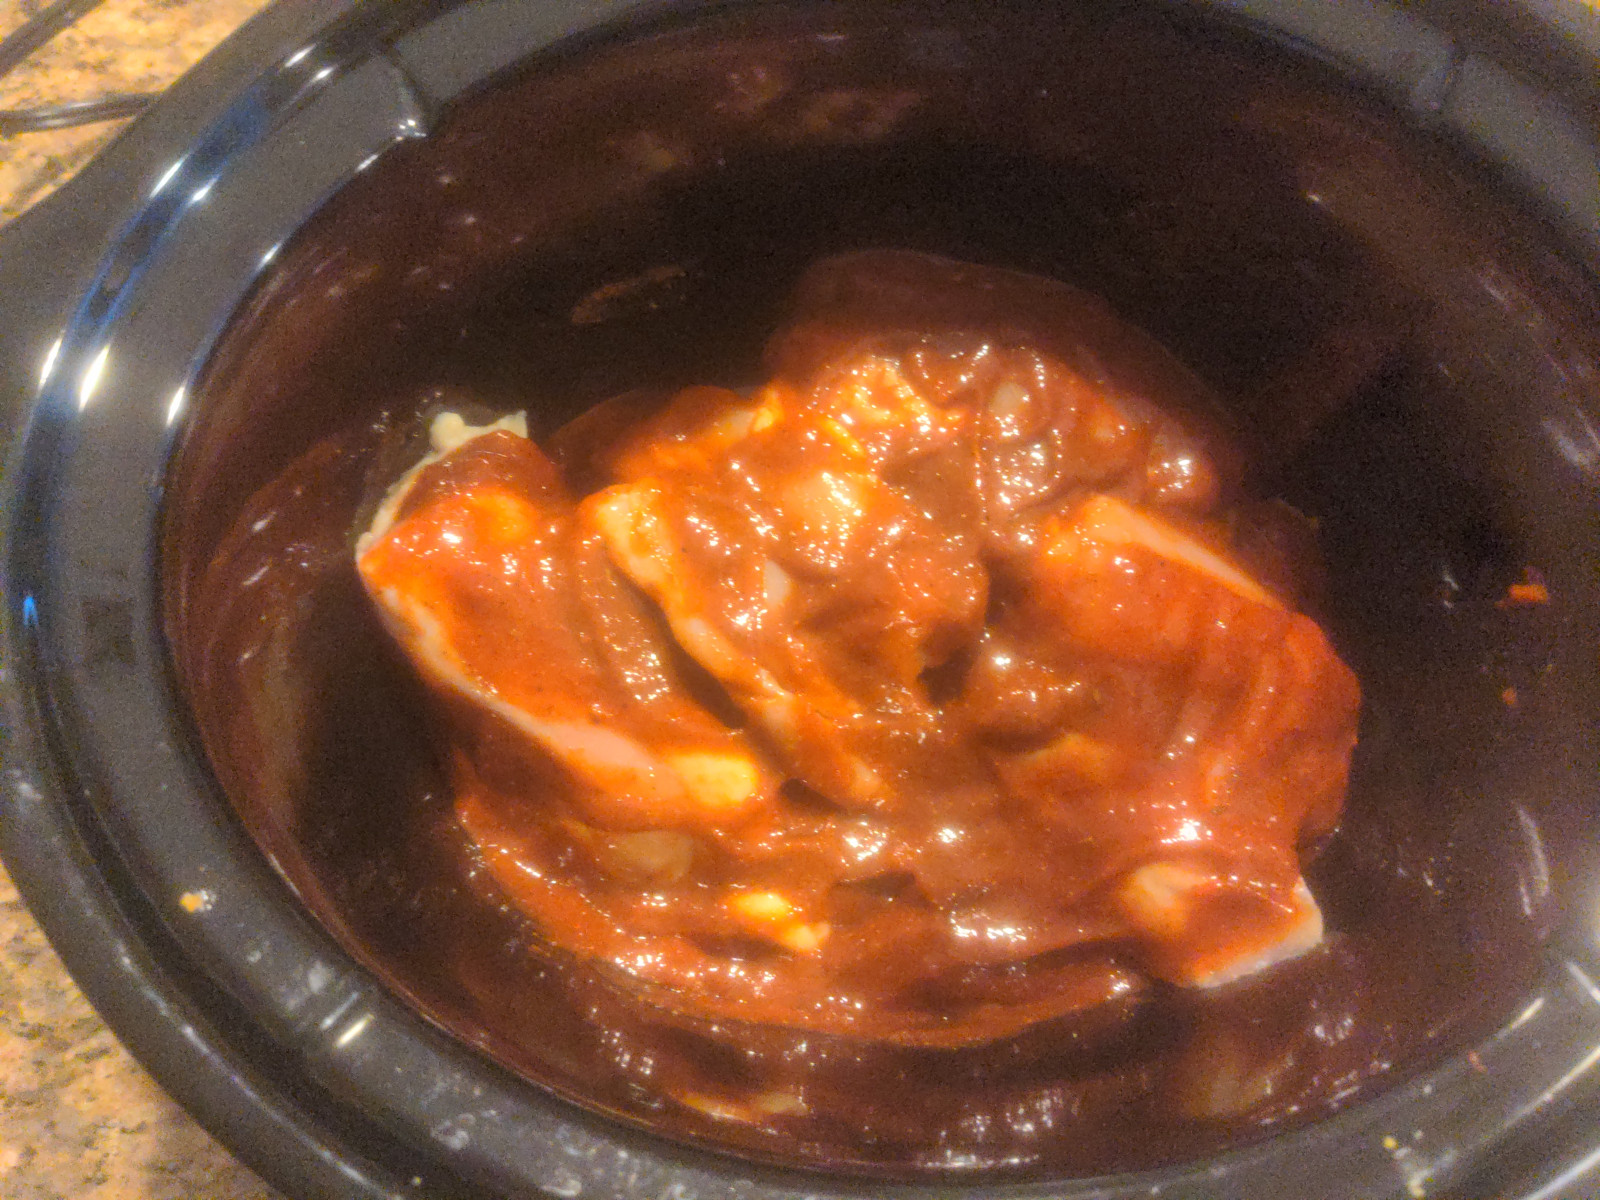
First I begin with chicken, I've seen it done every way possible from frying in a pan to grilling to BBQ. I will do none of them and instead prefer a slow roast cooking chicken thighs for six hours using gochujang, ketchup, vinegar, chili sauce and seasonings (including MSG). I wanted something unique to put my own flair on it.
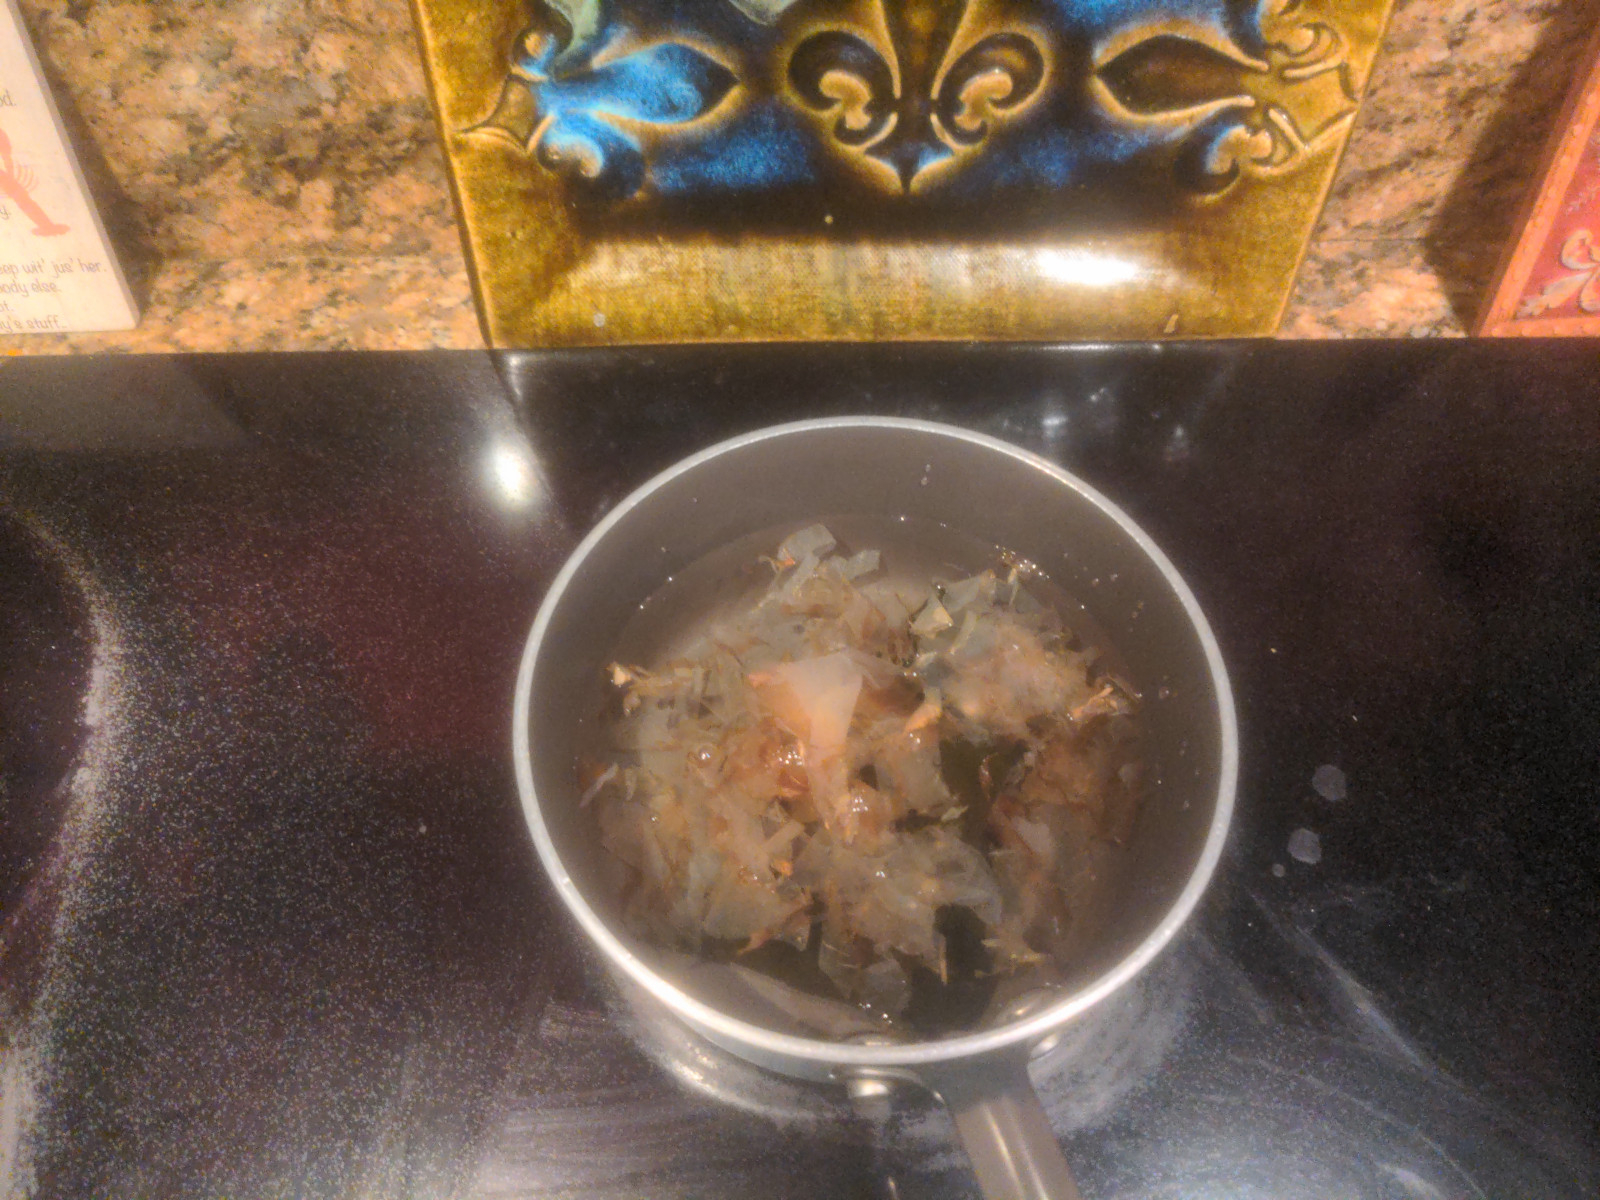
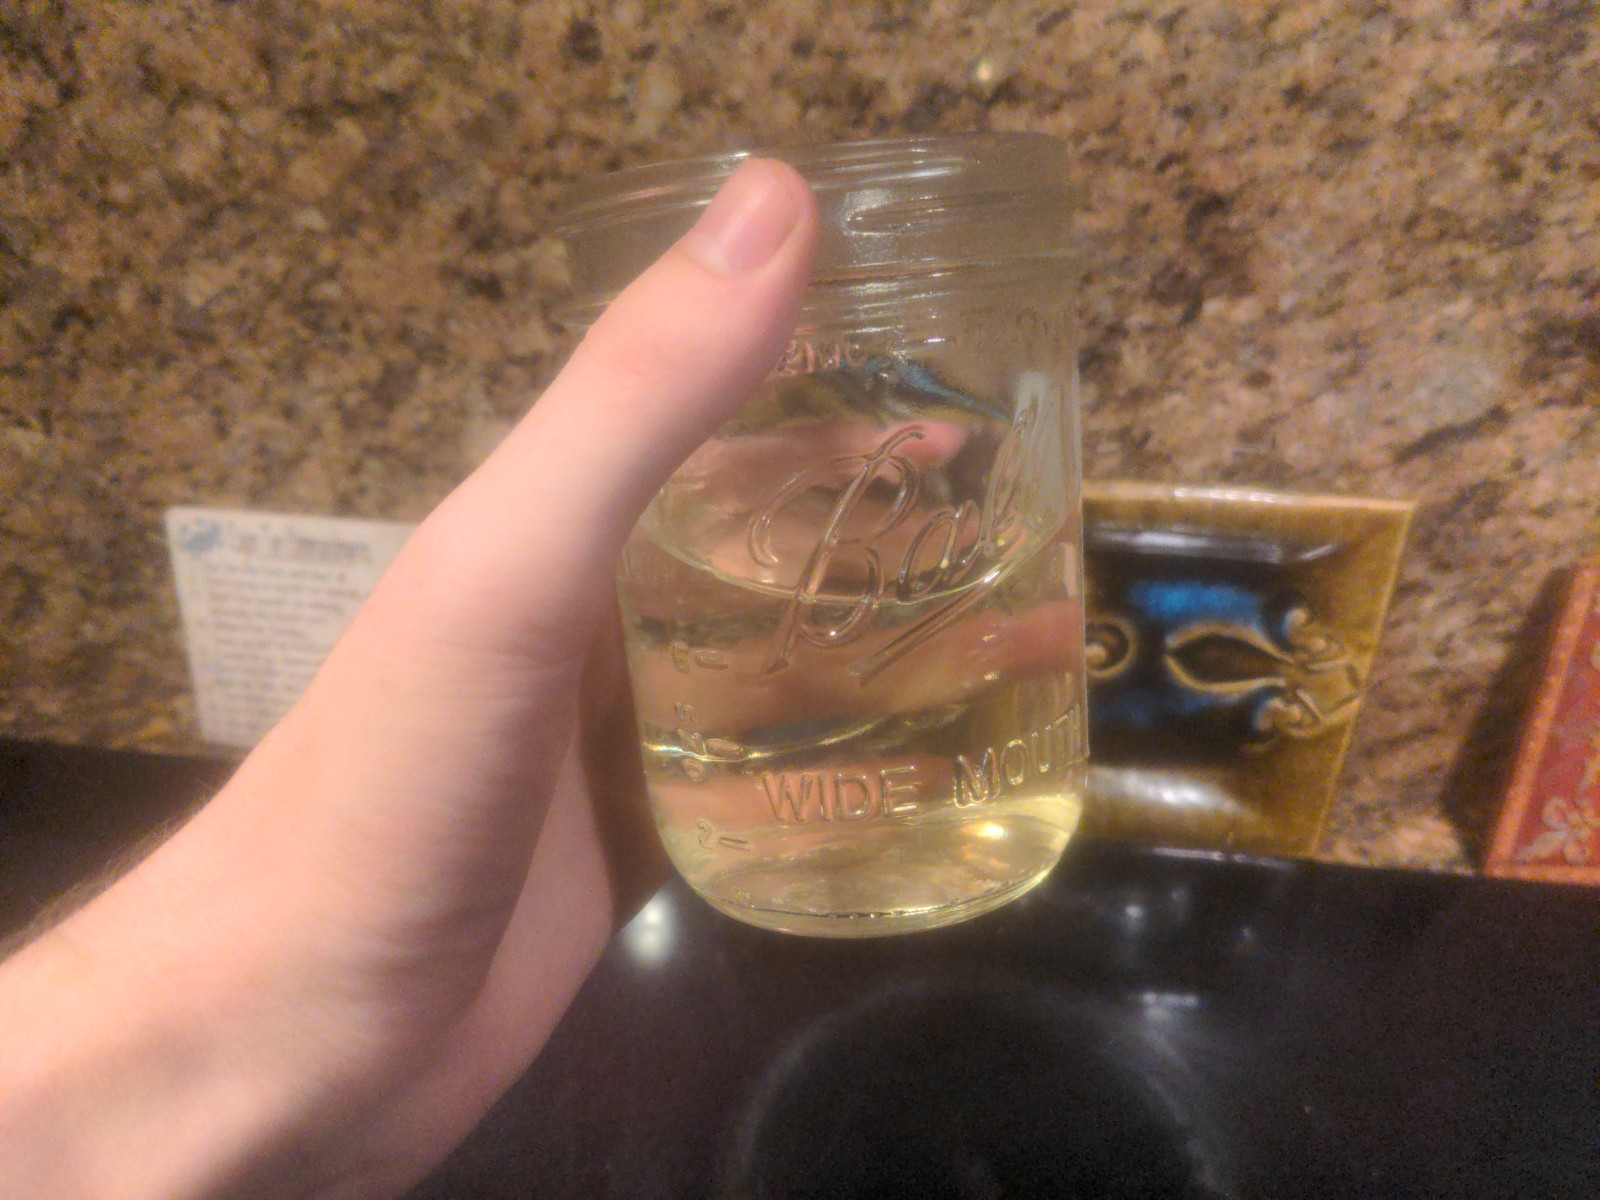
Now I move on to the stock, I decided to use some store-bought chicken stock, mainly because the chicken flavor will be overpowered by the end of the recipe, so I can be lazy and skip the quality a little bit here. Additionally, many traditional recipes want a split stock with meat and seafood. Traditional is oysters but most people who aren't old here seem to neglect it. I used dashi, which no one was able to taste but me, though it was still very present.

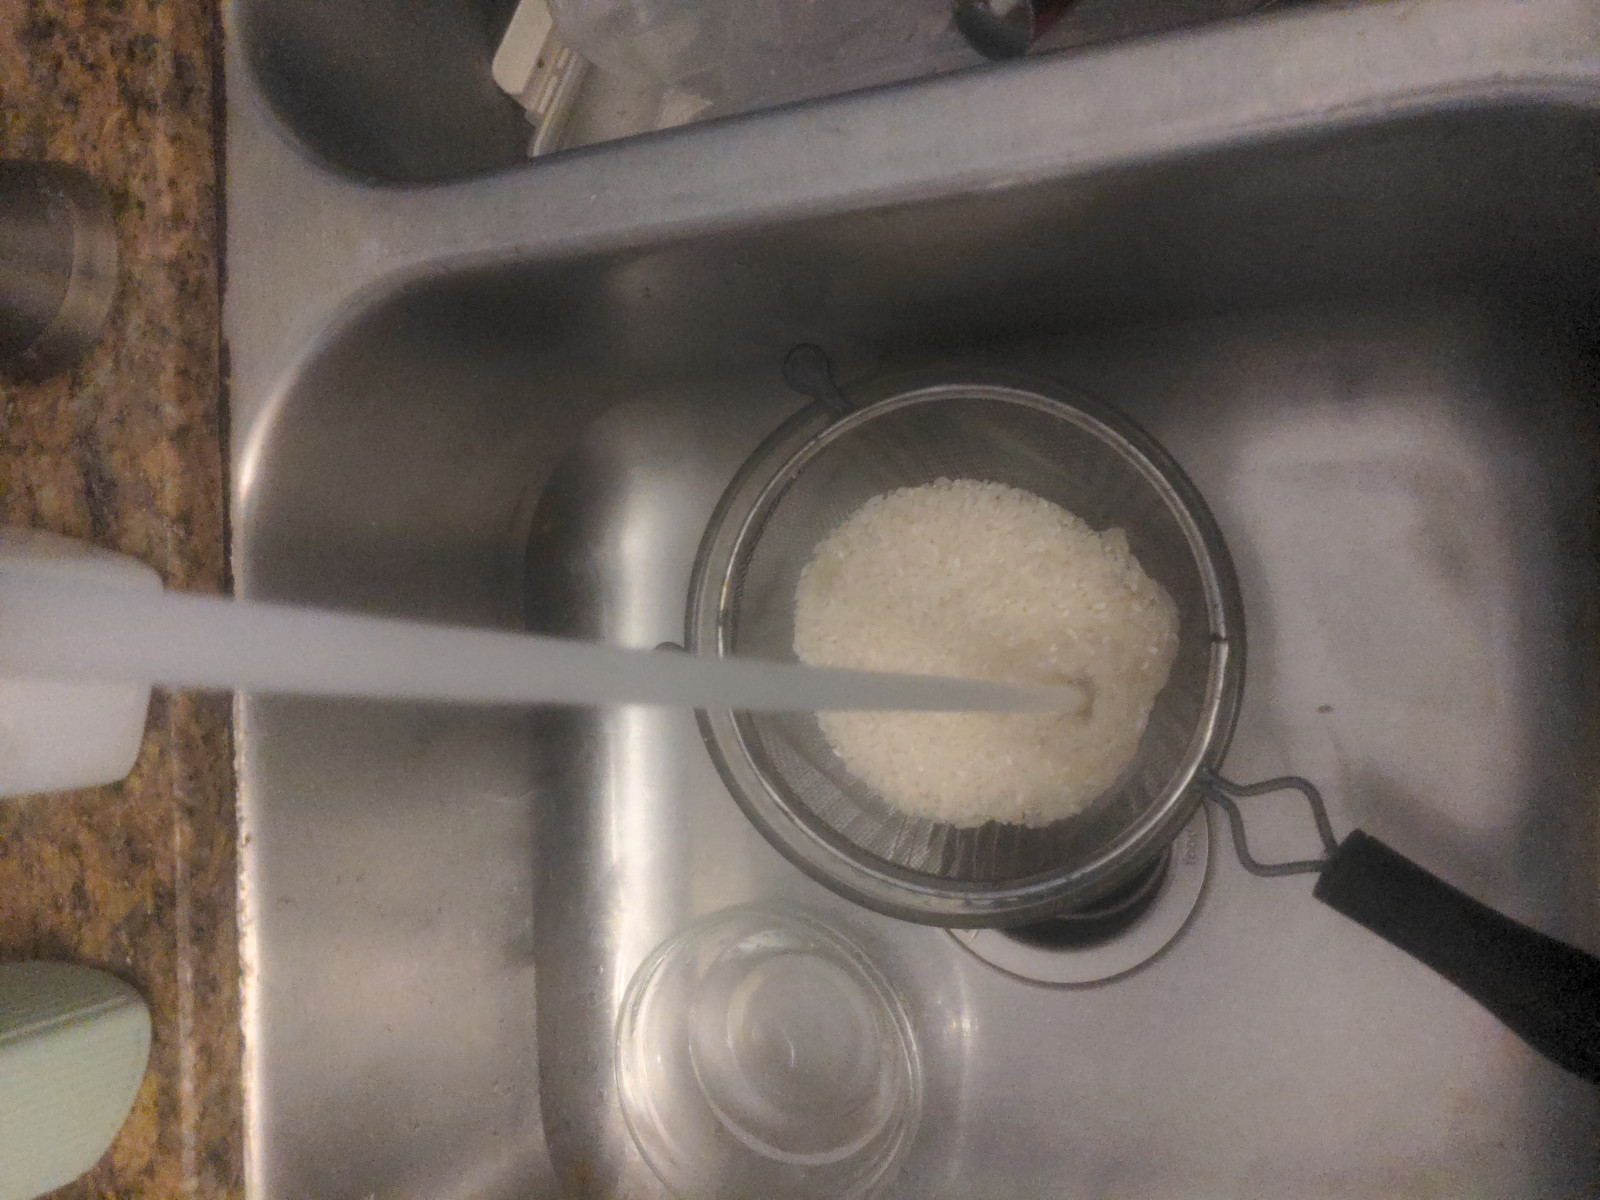
Additionally I wash my rice and put it in my rice cooker.
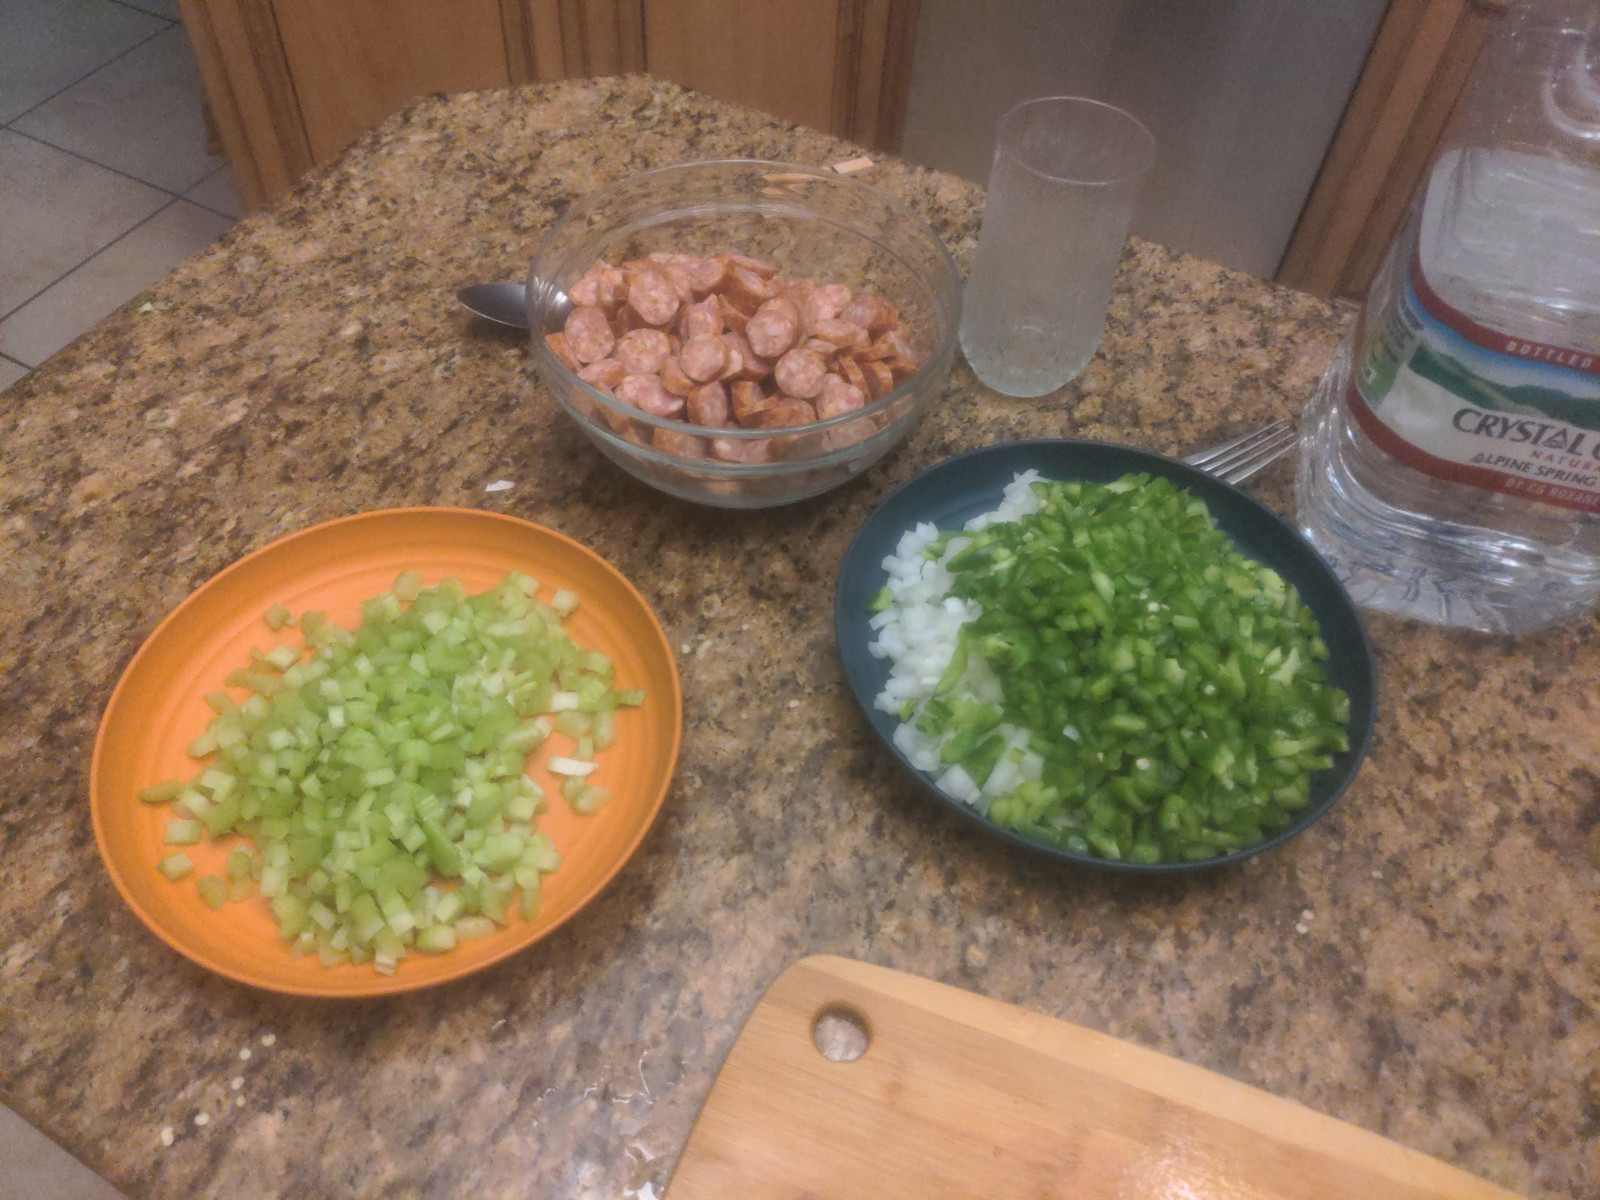
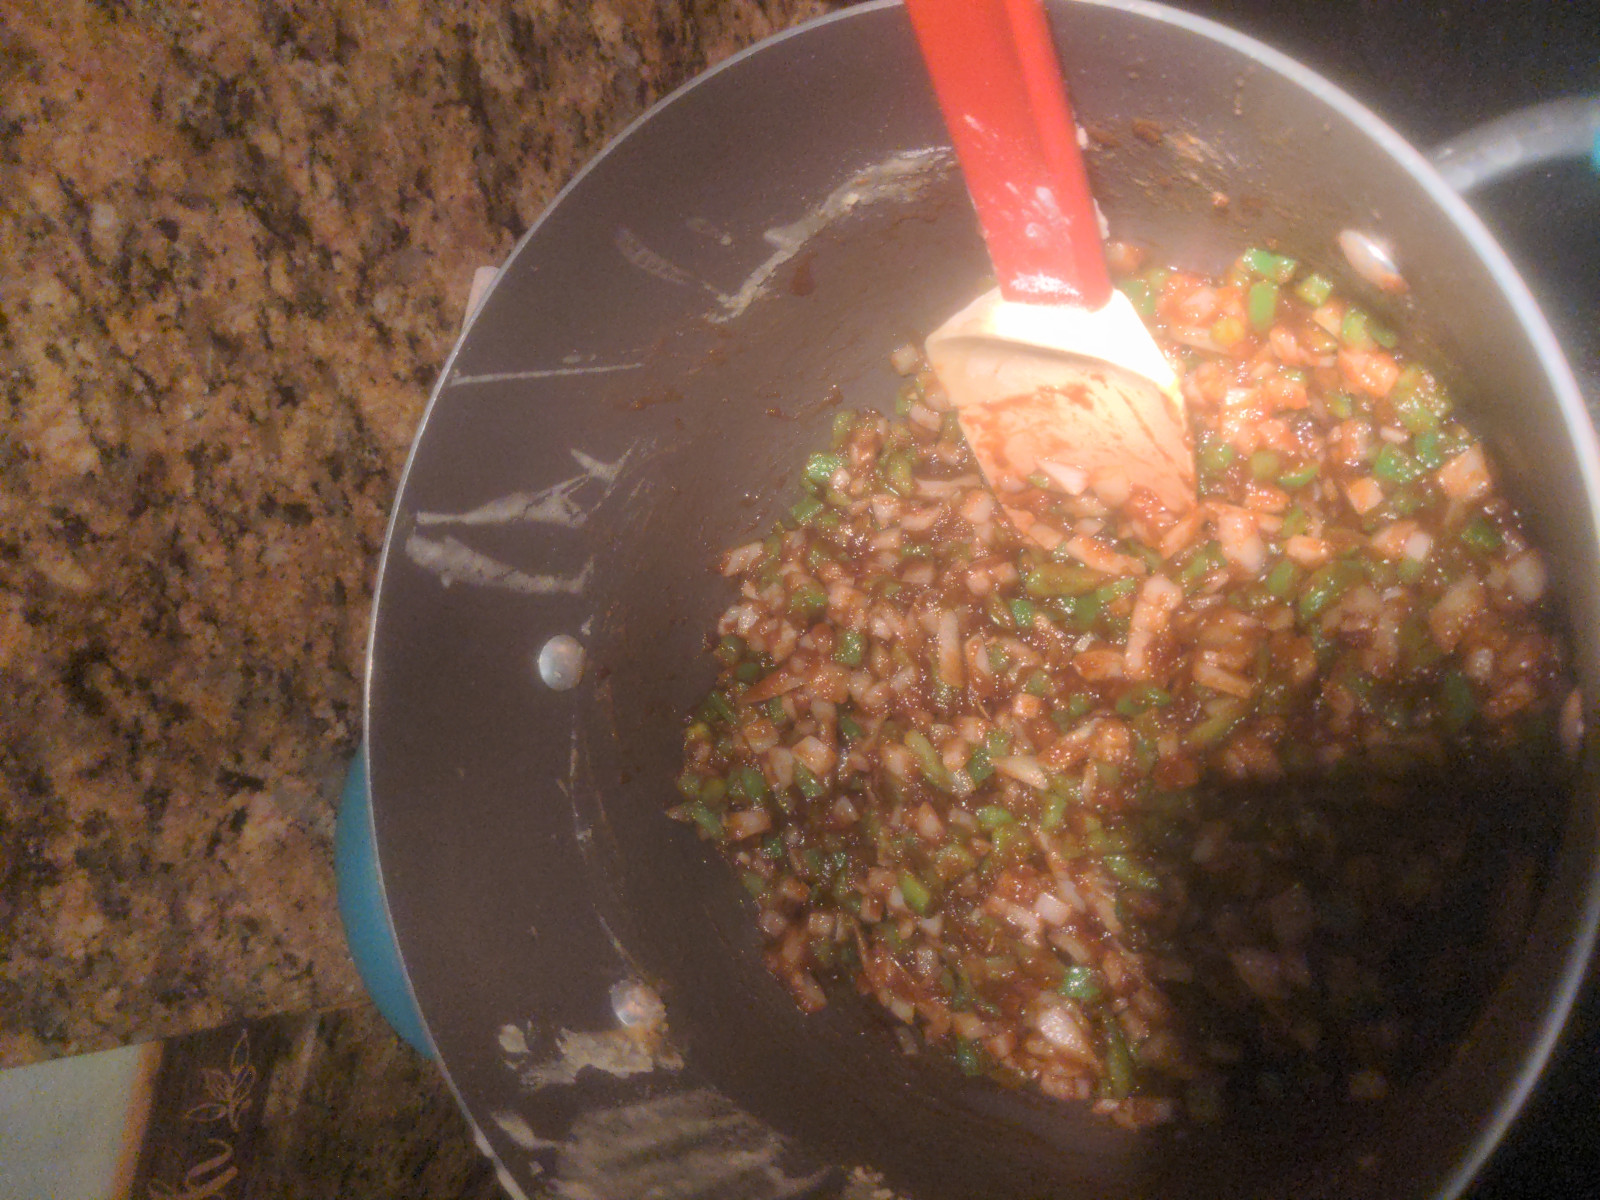
Now I prepare the other ingredients, a traditional style of mirepoix for gumbo uses white onion, bell pepper (paprika), and celery. Additionally, I chop the sausage.
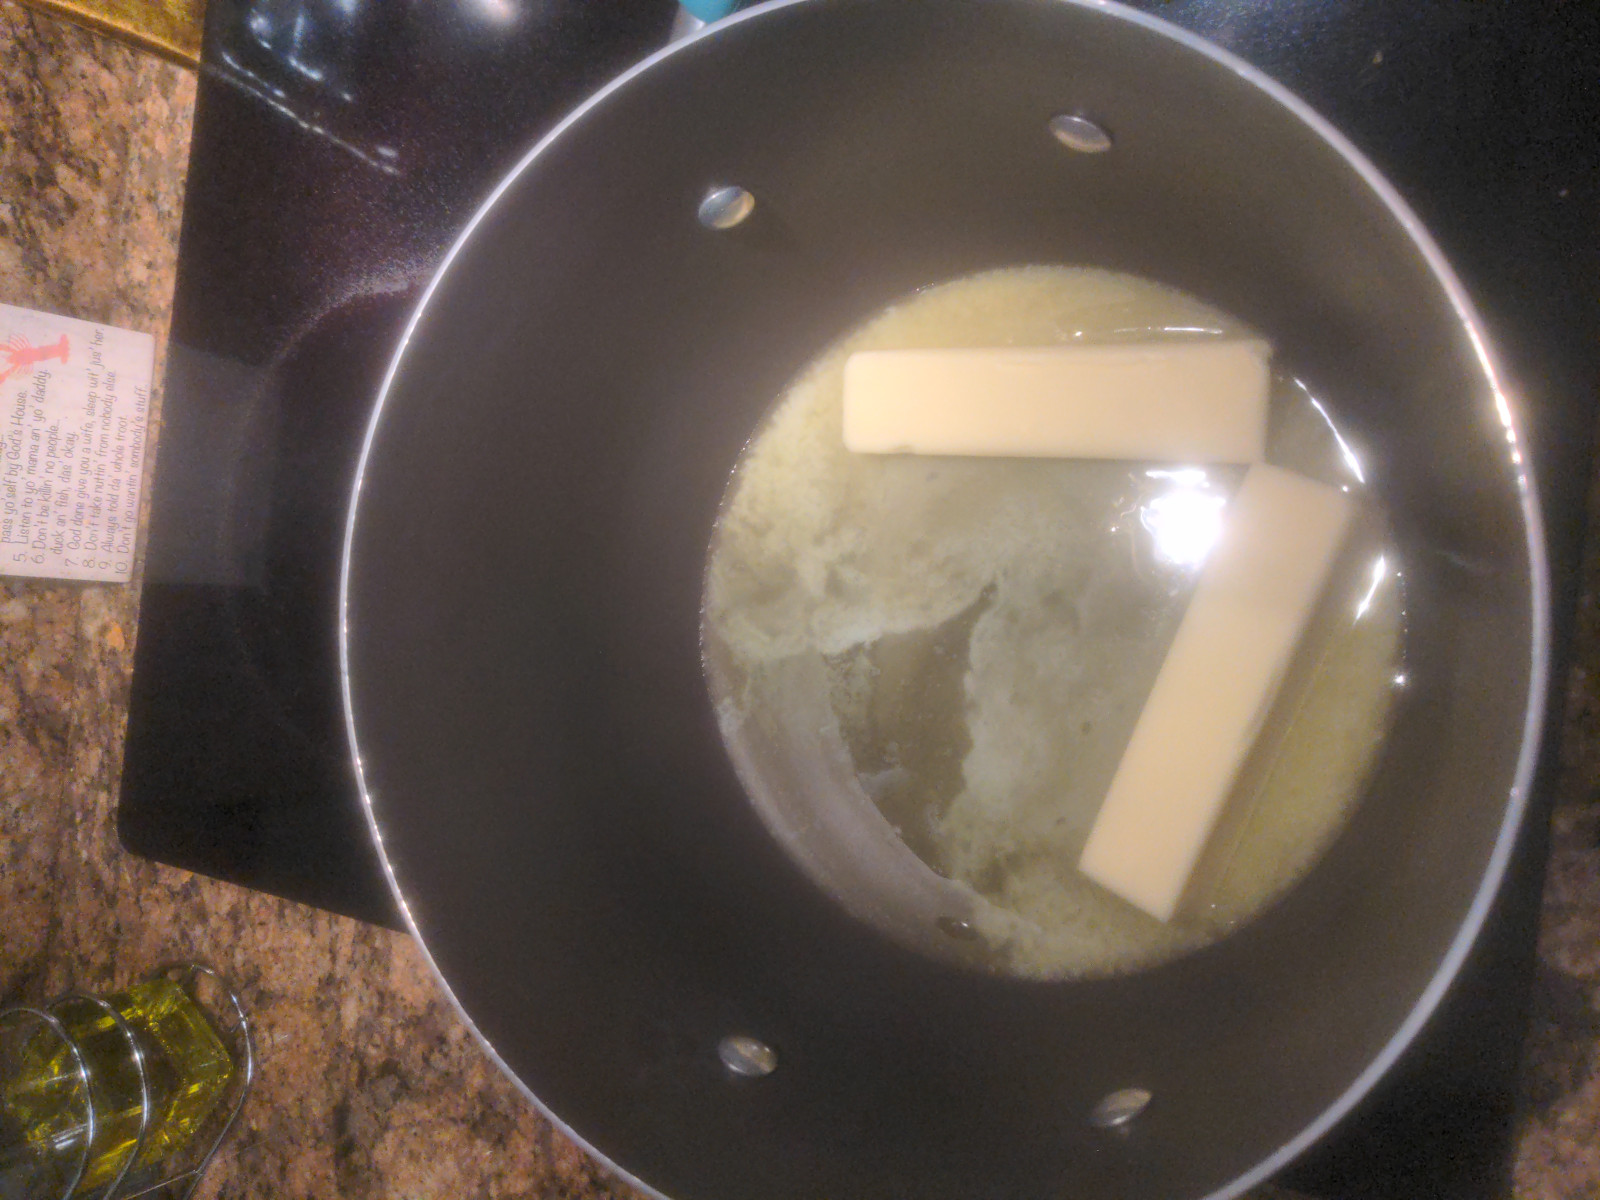
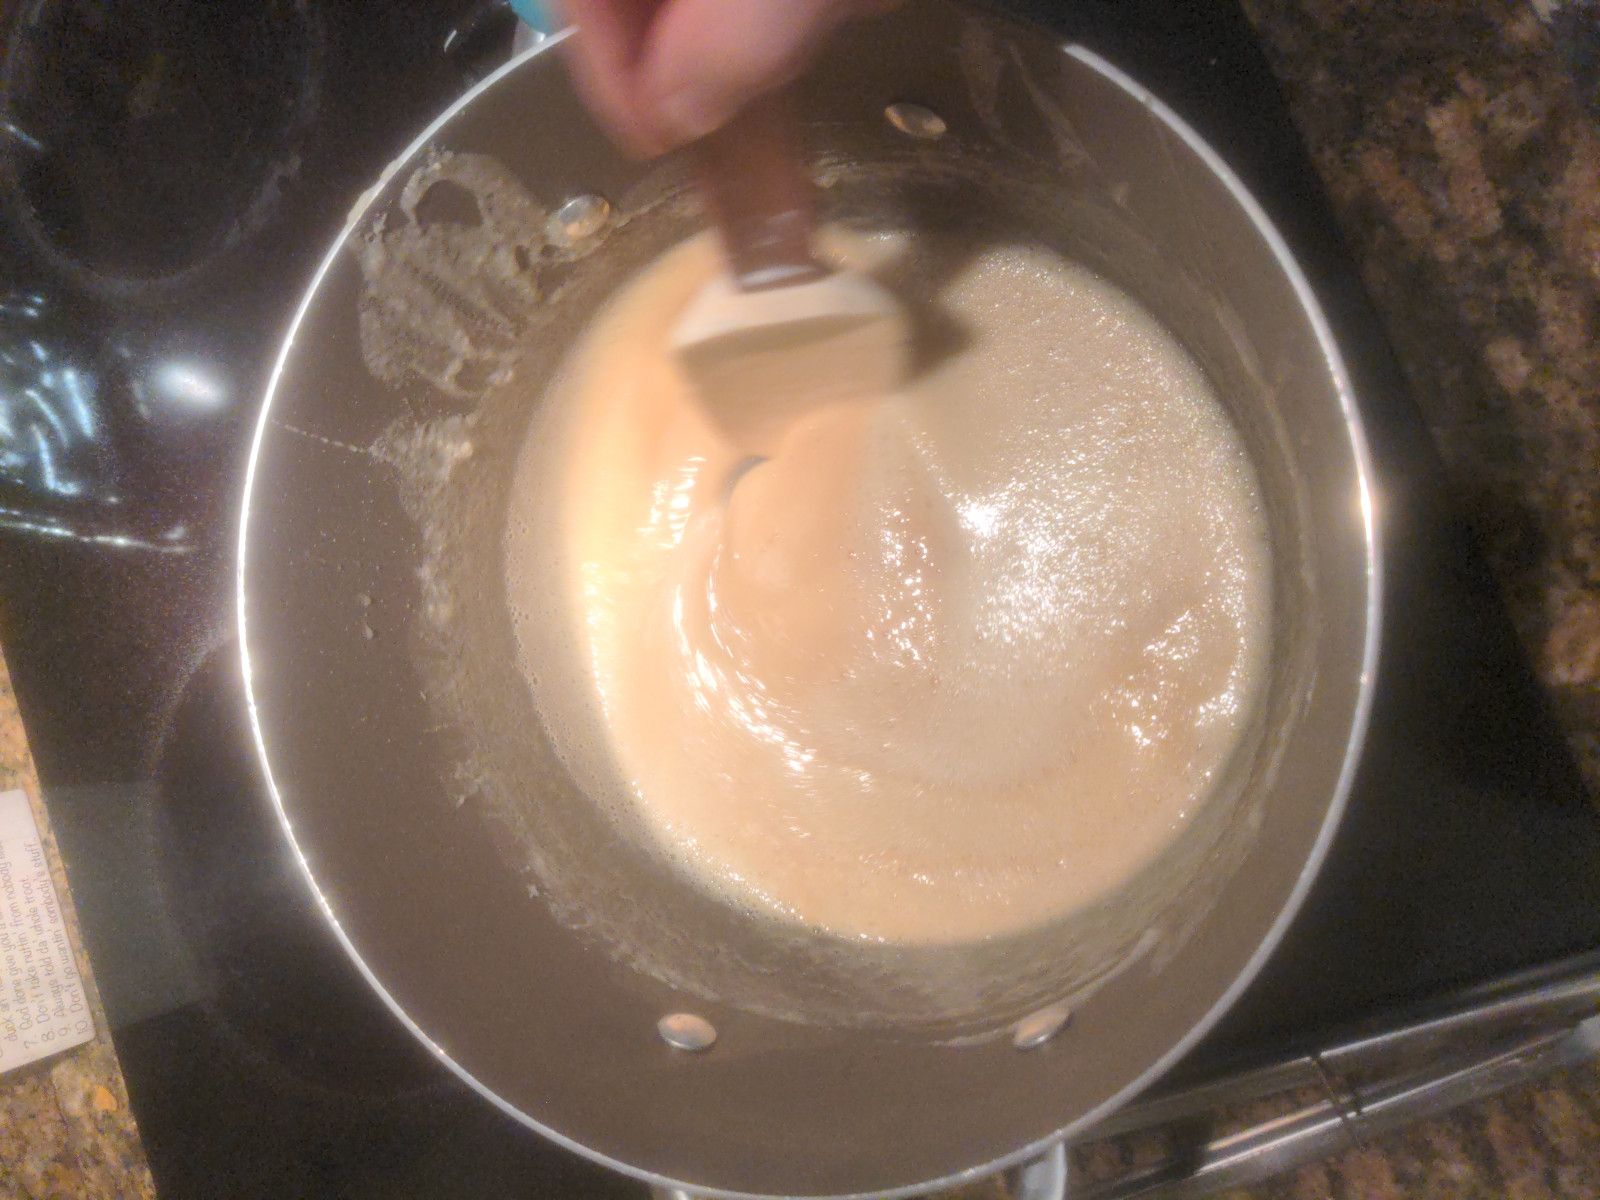
Next I can prepare the roux which has become standard for most Cajun recipes today. The universization of the roux is an example of historical development in the recipes. I use butter and flour in an equal ratio. Clarified butter is easier because you don't have to wait for the water to boil off, but if you keep things at a low enough temperature it is quite possible to brown the flour without burning the milk proteins and producing an off taste. I cooked it until dark brown, darker than gravy. Don't get confused like I did and try to lick it while it's hot or you will suffer extreme pain.

Then the veggies are added and fried in the roux for a little while, before adding stock and meat, then finally boiling the soup. Though some recipes will tell you to simmer or low boil, this is a massive mistake IMO because we want to emulsify the soup.
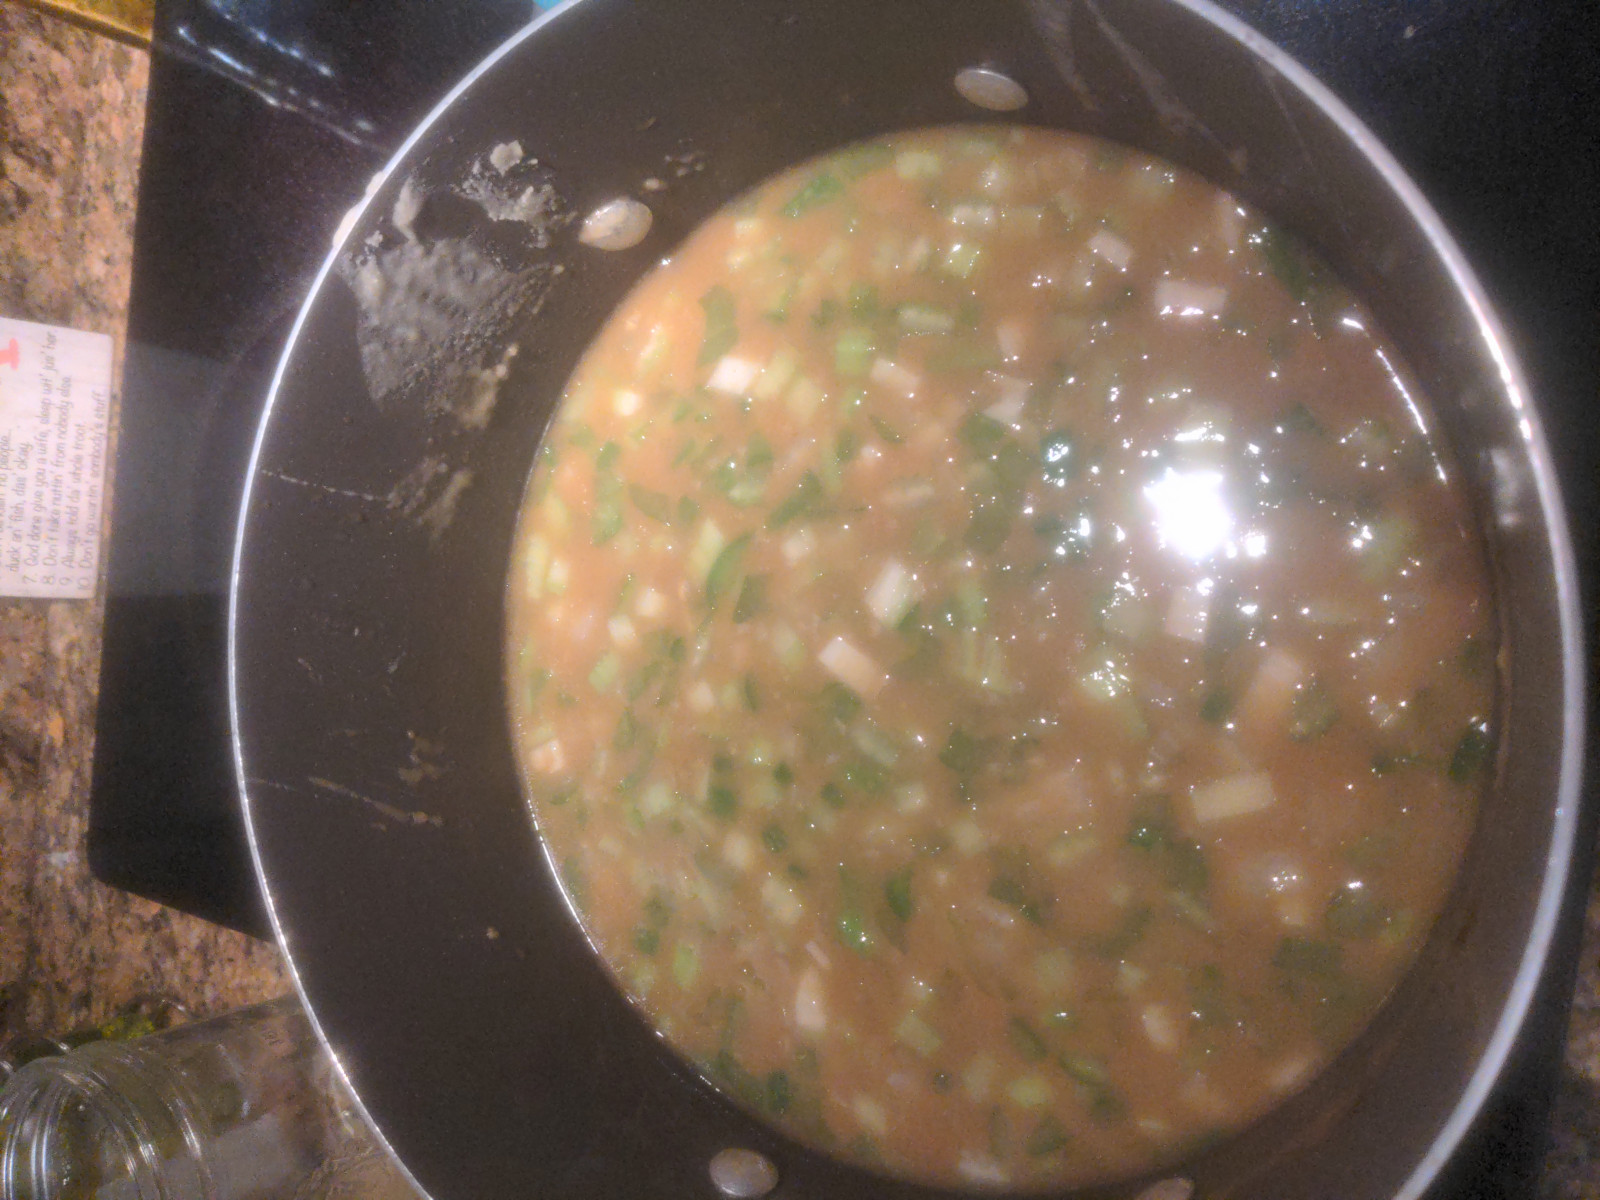
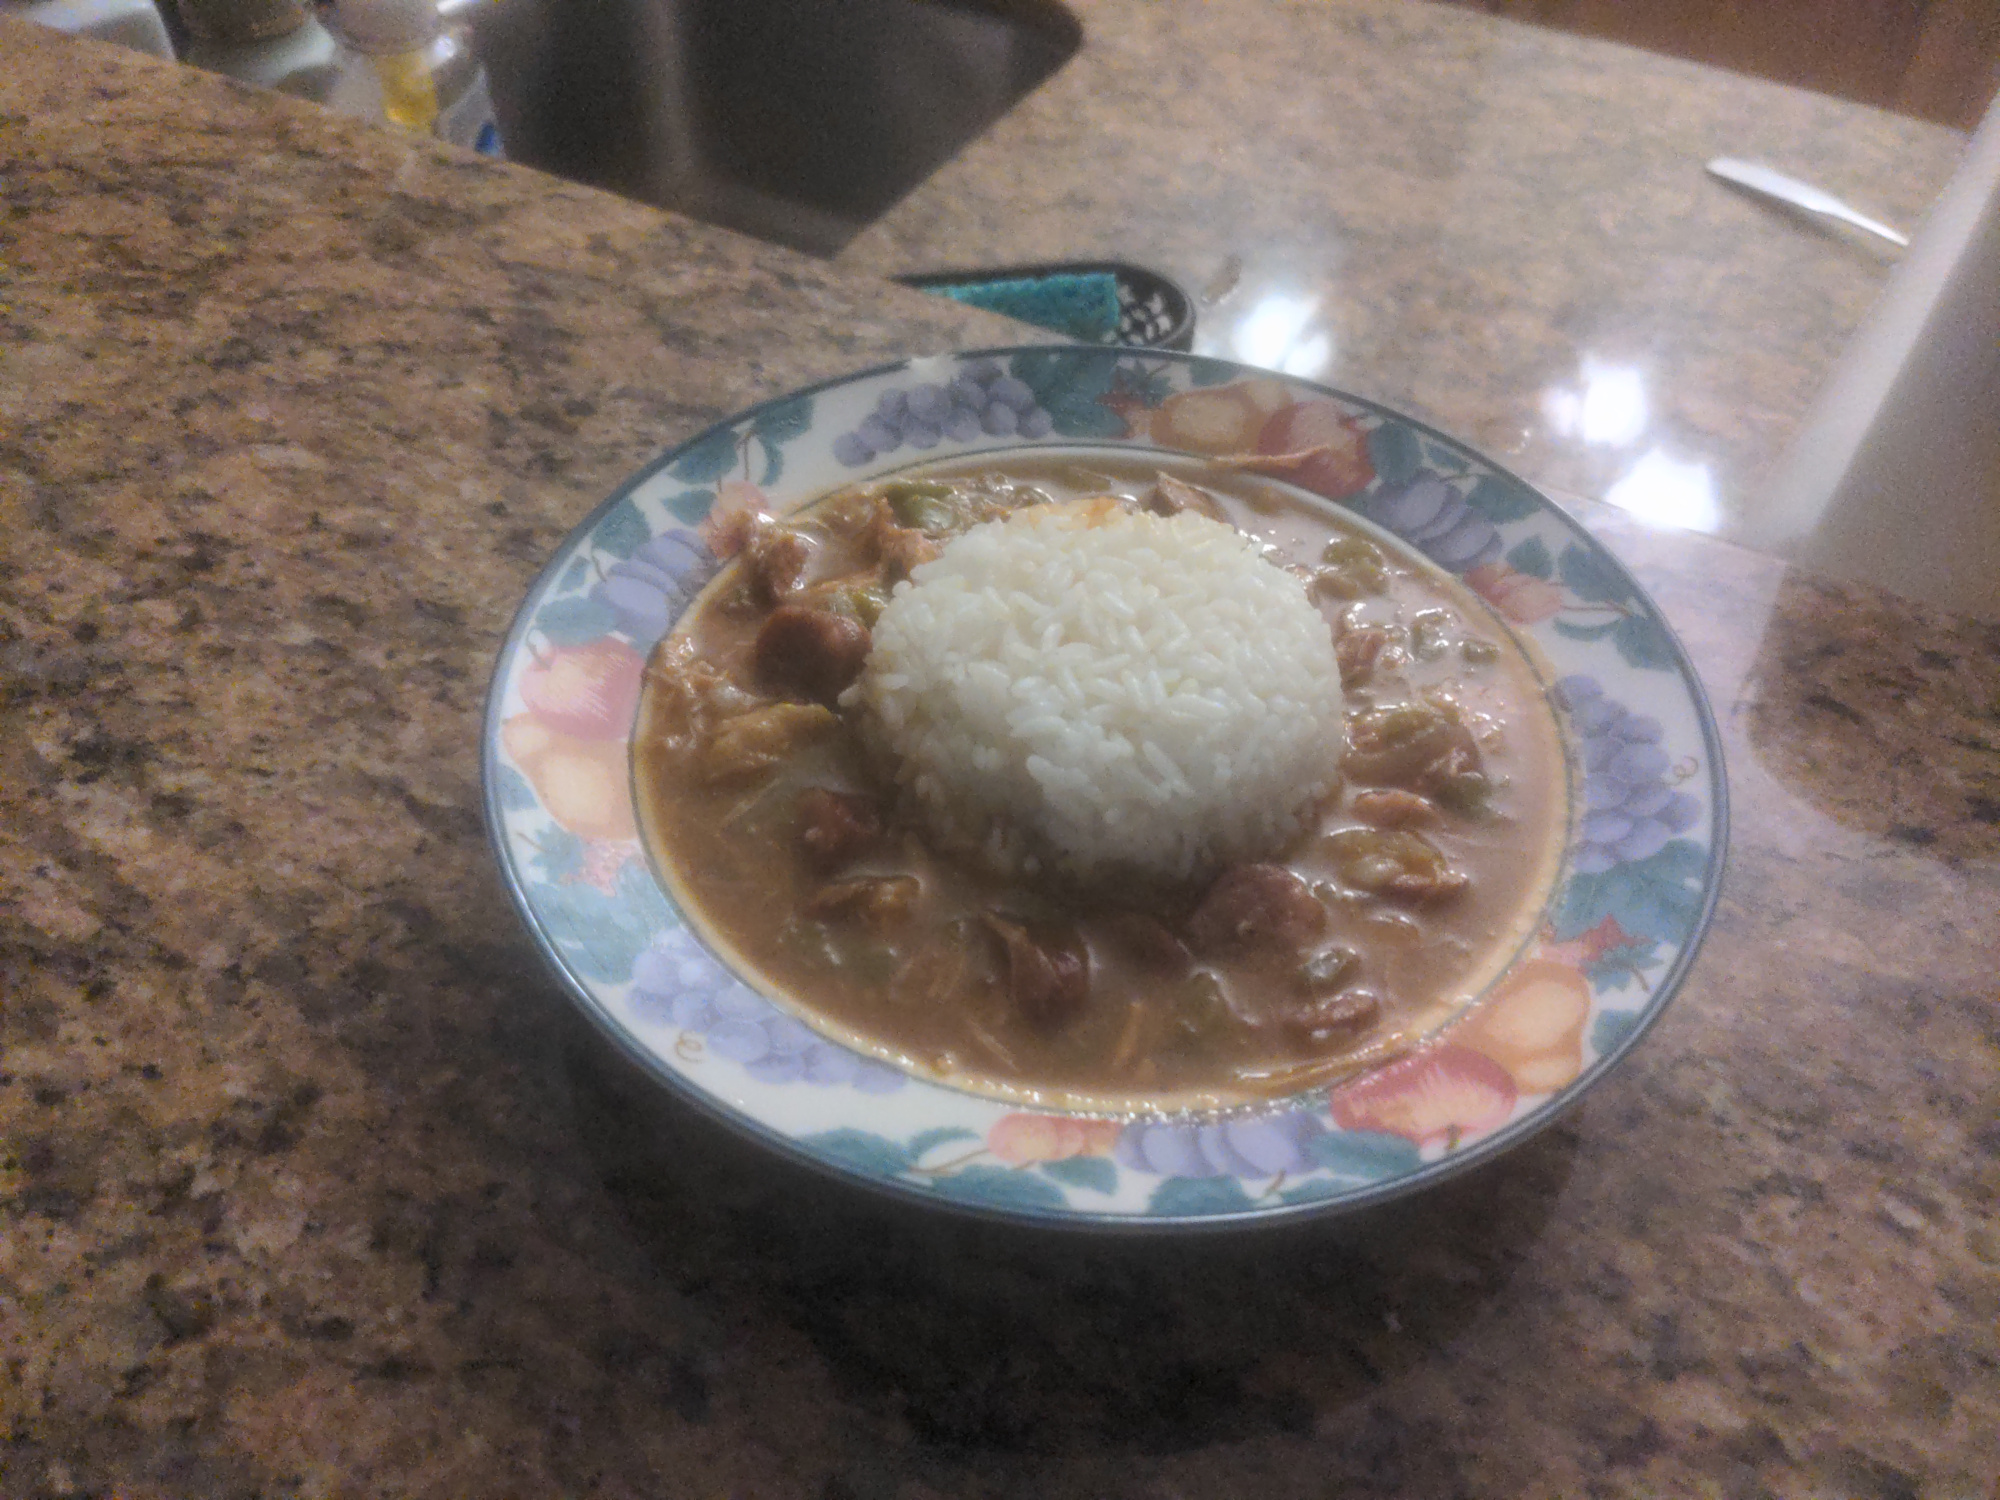
After about an hour of boiling the soup is emulsified and we've reached peak flavour extraction for veggies and pre-cooked meats, so boiling any longer is a waste of time and flavour. At this point thickening agents such as okra or filé (dried leaf of sassafras) may be added. Then I serve the soup with rice.
So for those who don't know it's a Cajun and Creole soup that largely came into existence after the Civil War, it's recently gained much popularity outside of home cooking and LA restaurants because of the efforts of Paul Prudhomme (PBUH). I will be making gumbo with chicken and sausage.
First I begin with chicken, I've seen it done every way possible from frying in a pan to grilling to BBQ. I will do none of them and instead prefer a slow roast cooking chicken thighs for six hours using gochujang, ketchup, vinegar, chili sauce and seasonings (including MSG). I wanted something unique to put my own flair on it.

Now I move on to the stock, I decided to use some store-bought chicken stock, mainly because the chicken flavor will be overpowered by the end of the recipe, so I can be lazy and skip the quality a little bit here. Additionally, many traditional recipes want a split stock with meat and seafood. Traditional is oysters but most people who aren't old here seem to neglect it. I used dashi, which no one was able to taste but me, though it was still very present.


Additionally I wash my rice and put it in my rice cooker.

Now I prepare the other ingredients, a traditional style of mirepoix for gumbo uses white onion, bell pepper (paprika), and celery. Additionally, I chop the sausage.

Next I can prepare the roux which has become standard for most Cajun recipes today. The universization of the roux is an example of historical development in the recipes. I use butter and flour in an equal ratio. Clarified butter is easier because you don't have to wait for the water to boil off, but if you keep things at a low enough temperature it is quite possible to brown the flour without burning the milk proteins and producing an off taste. I cooked it until dark brown, darker than gravy. Don't get confused like I did and try to lick it while it's hot or you will suffer extreme pain.


Then the veggies are added and fried in the roux for a little while, before adding stock and meat, then finally boiling the soup. Though some recipes will tell you to simmer or low boil, this is a massive mistake IMO because we want to emulsify the soup.


After about an hour of boiling the soup is emulsified and we've reached peak flavour extraction for veggies and pre-cooked meats, so boiling any longer is a waste of time and flavour. At this point thickening agents such as okra or filé (dried leaf of sassafras) may be added. Then I serve the soup with rice.

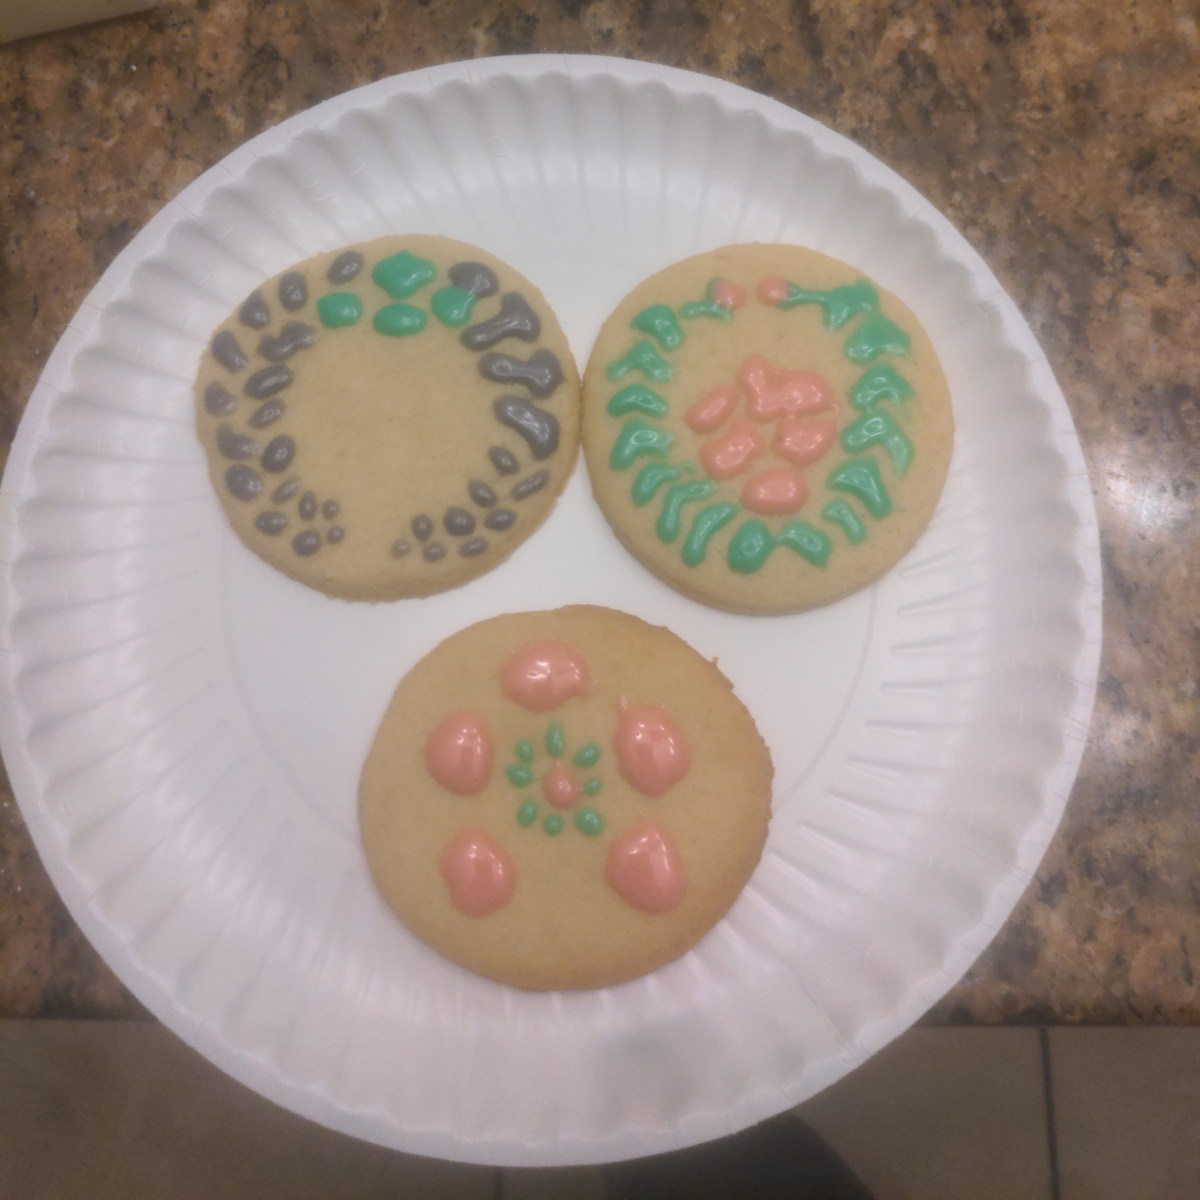
As a bonus I made some sugar cookies and tried to do art using kamon as patterns. I was using a brush instead of a pipe (which felt vastly inferior) but I won't deny my poor cookie art skills.

Ramen Part 1: Toppings
Well I promised a Ramen post and though I'm a few days late the craving has hit again and there is only one way to sate it. Today I will be making chicken ramen. In Japanese it is called tori paitan (for those who can't speak Japanese, the term paitan will be explained in part 2.) Personally, chicken ramen is the most appealing to me because of its rich flavour. It is also easer to make a better stock.
Ramen is famous for being served with toppings so let's make two easy famous ones which require a bit more prep (most others are just drop-ins).
First, let's make ramen eggs (ajitsuke tamago or ajitama). They are essentially soy sauce-brined soft-boiled eggs.
First, I prepare eggs for steaming. Boiling is also acceptable but I've found steaming makes eggs easier to peel, albeit at the sacrifice of consistency in doneness for small batches.
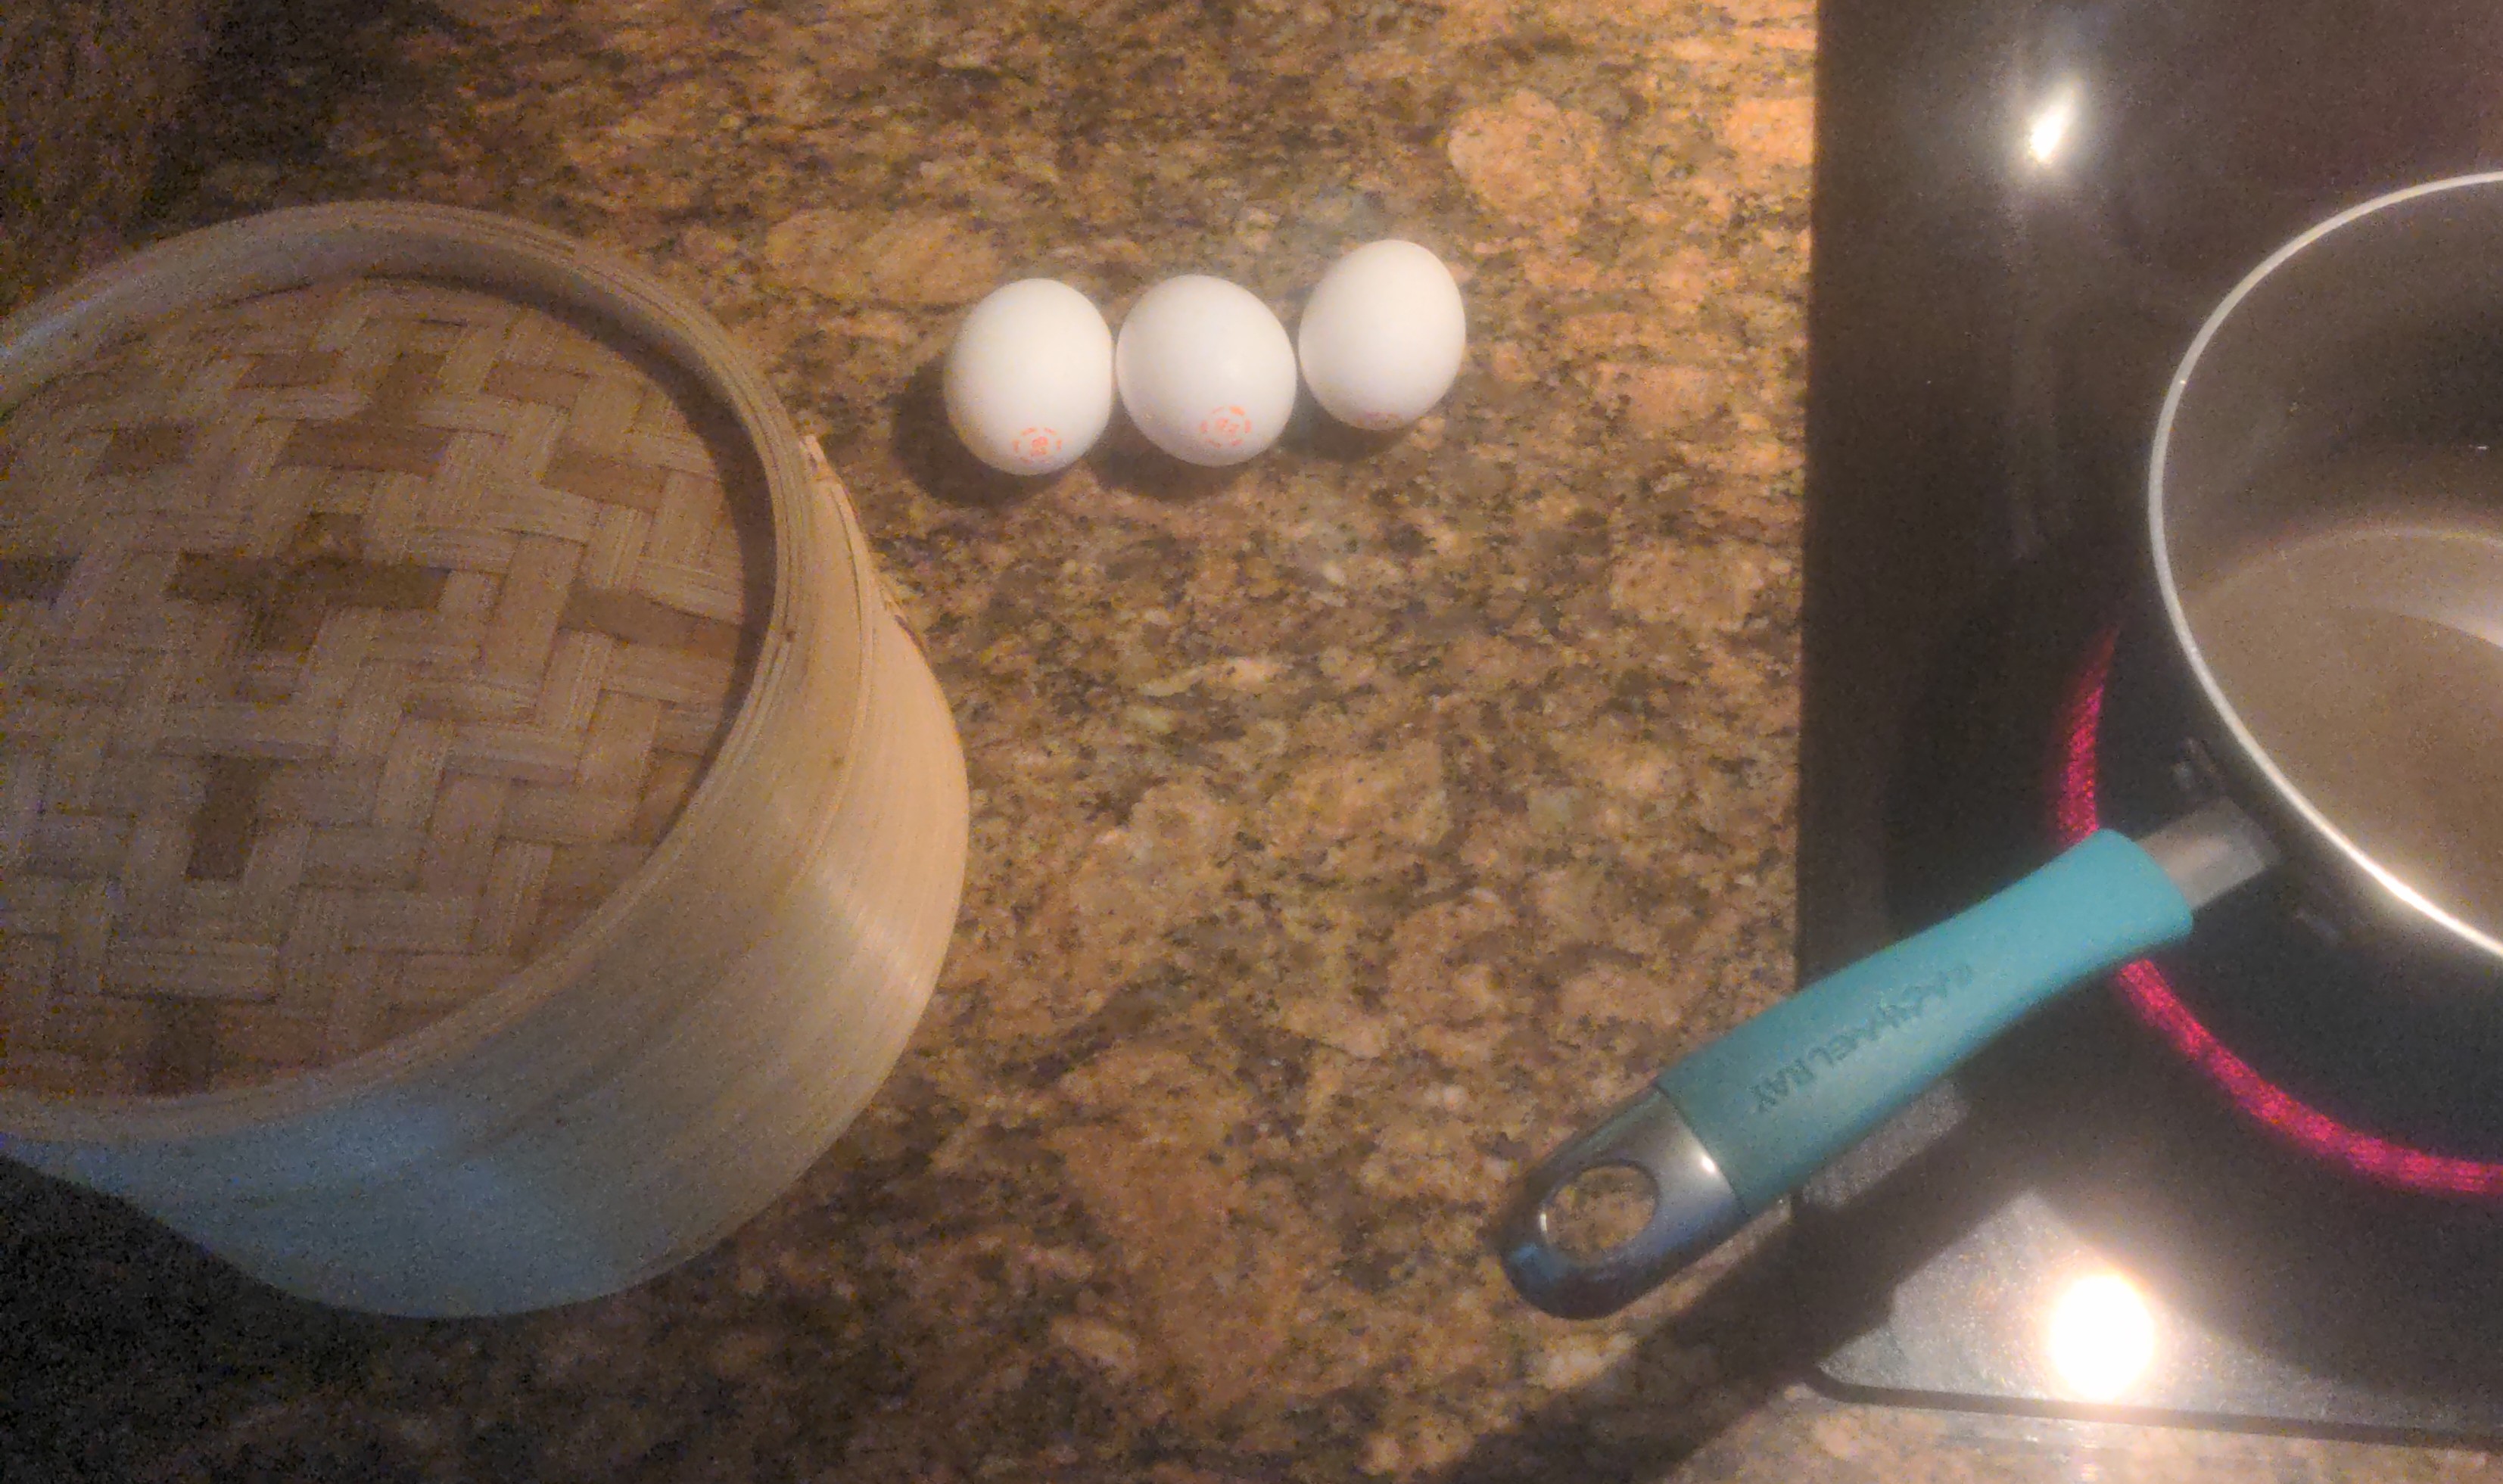
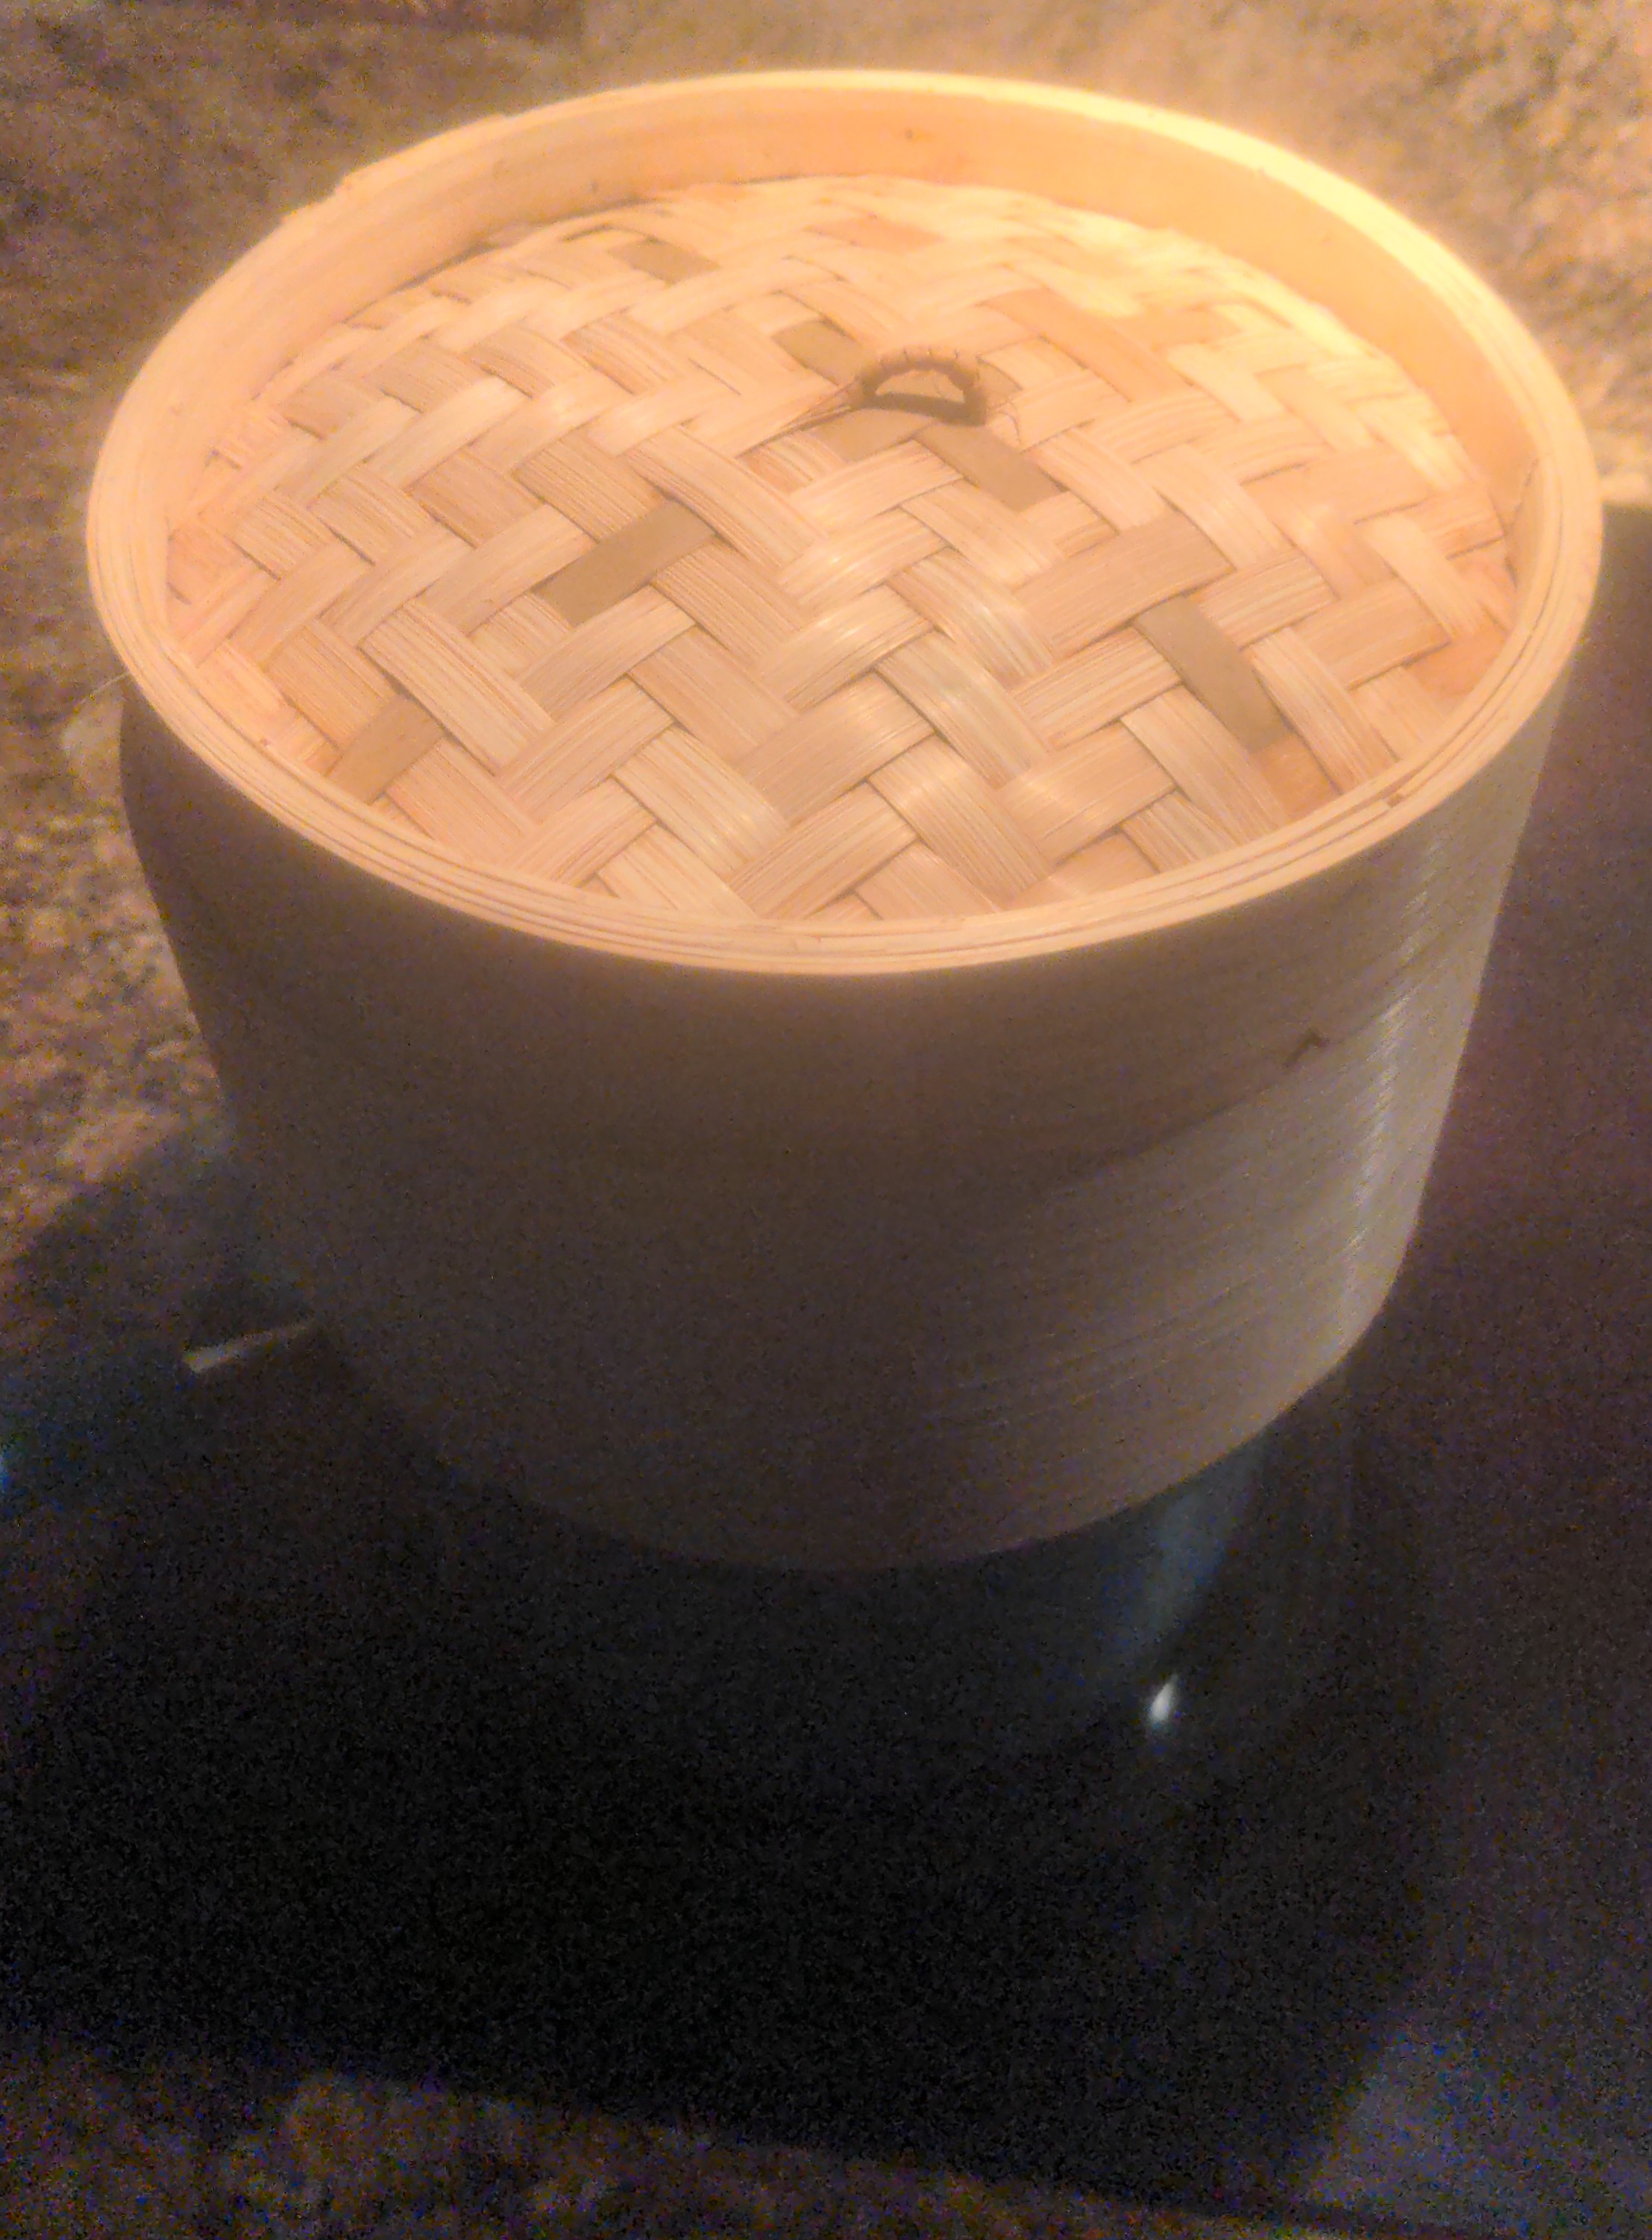
The eggs are placed in the bamboo steamer and steamed 7-8 minutes. 7 gets you runny yolks that spill into the soup, 8-9 will be more set but slimy.
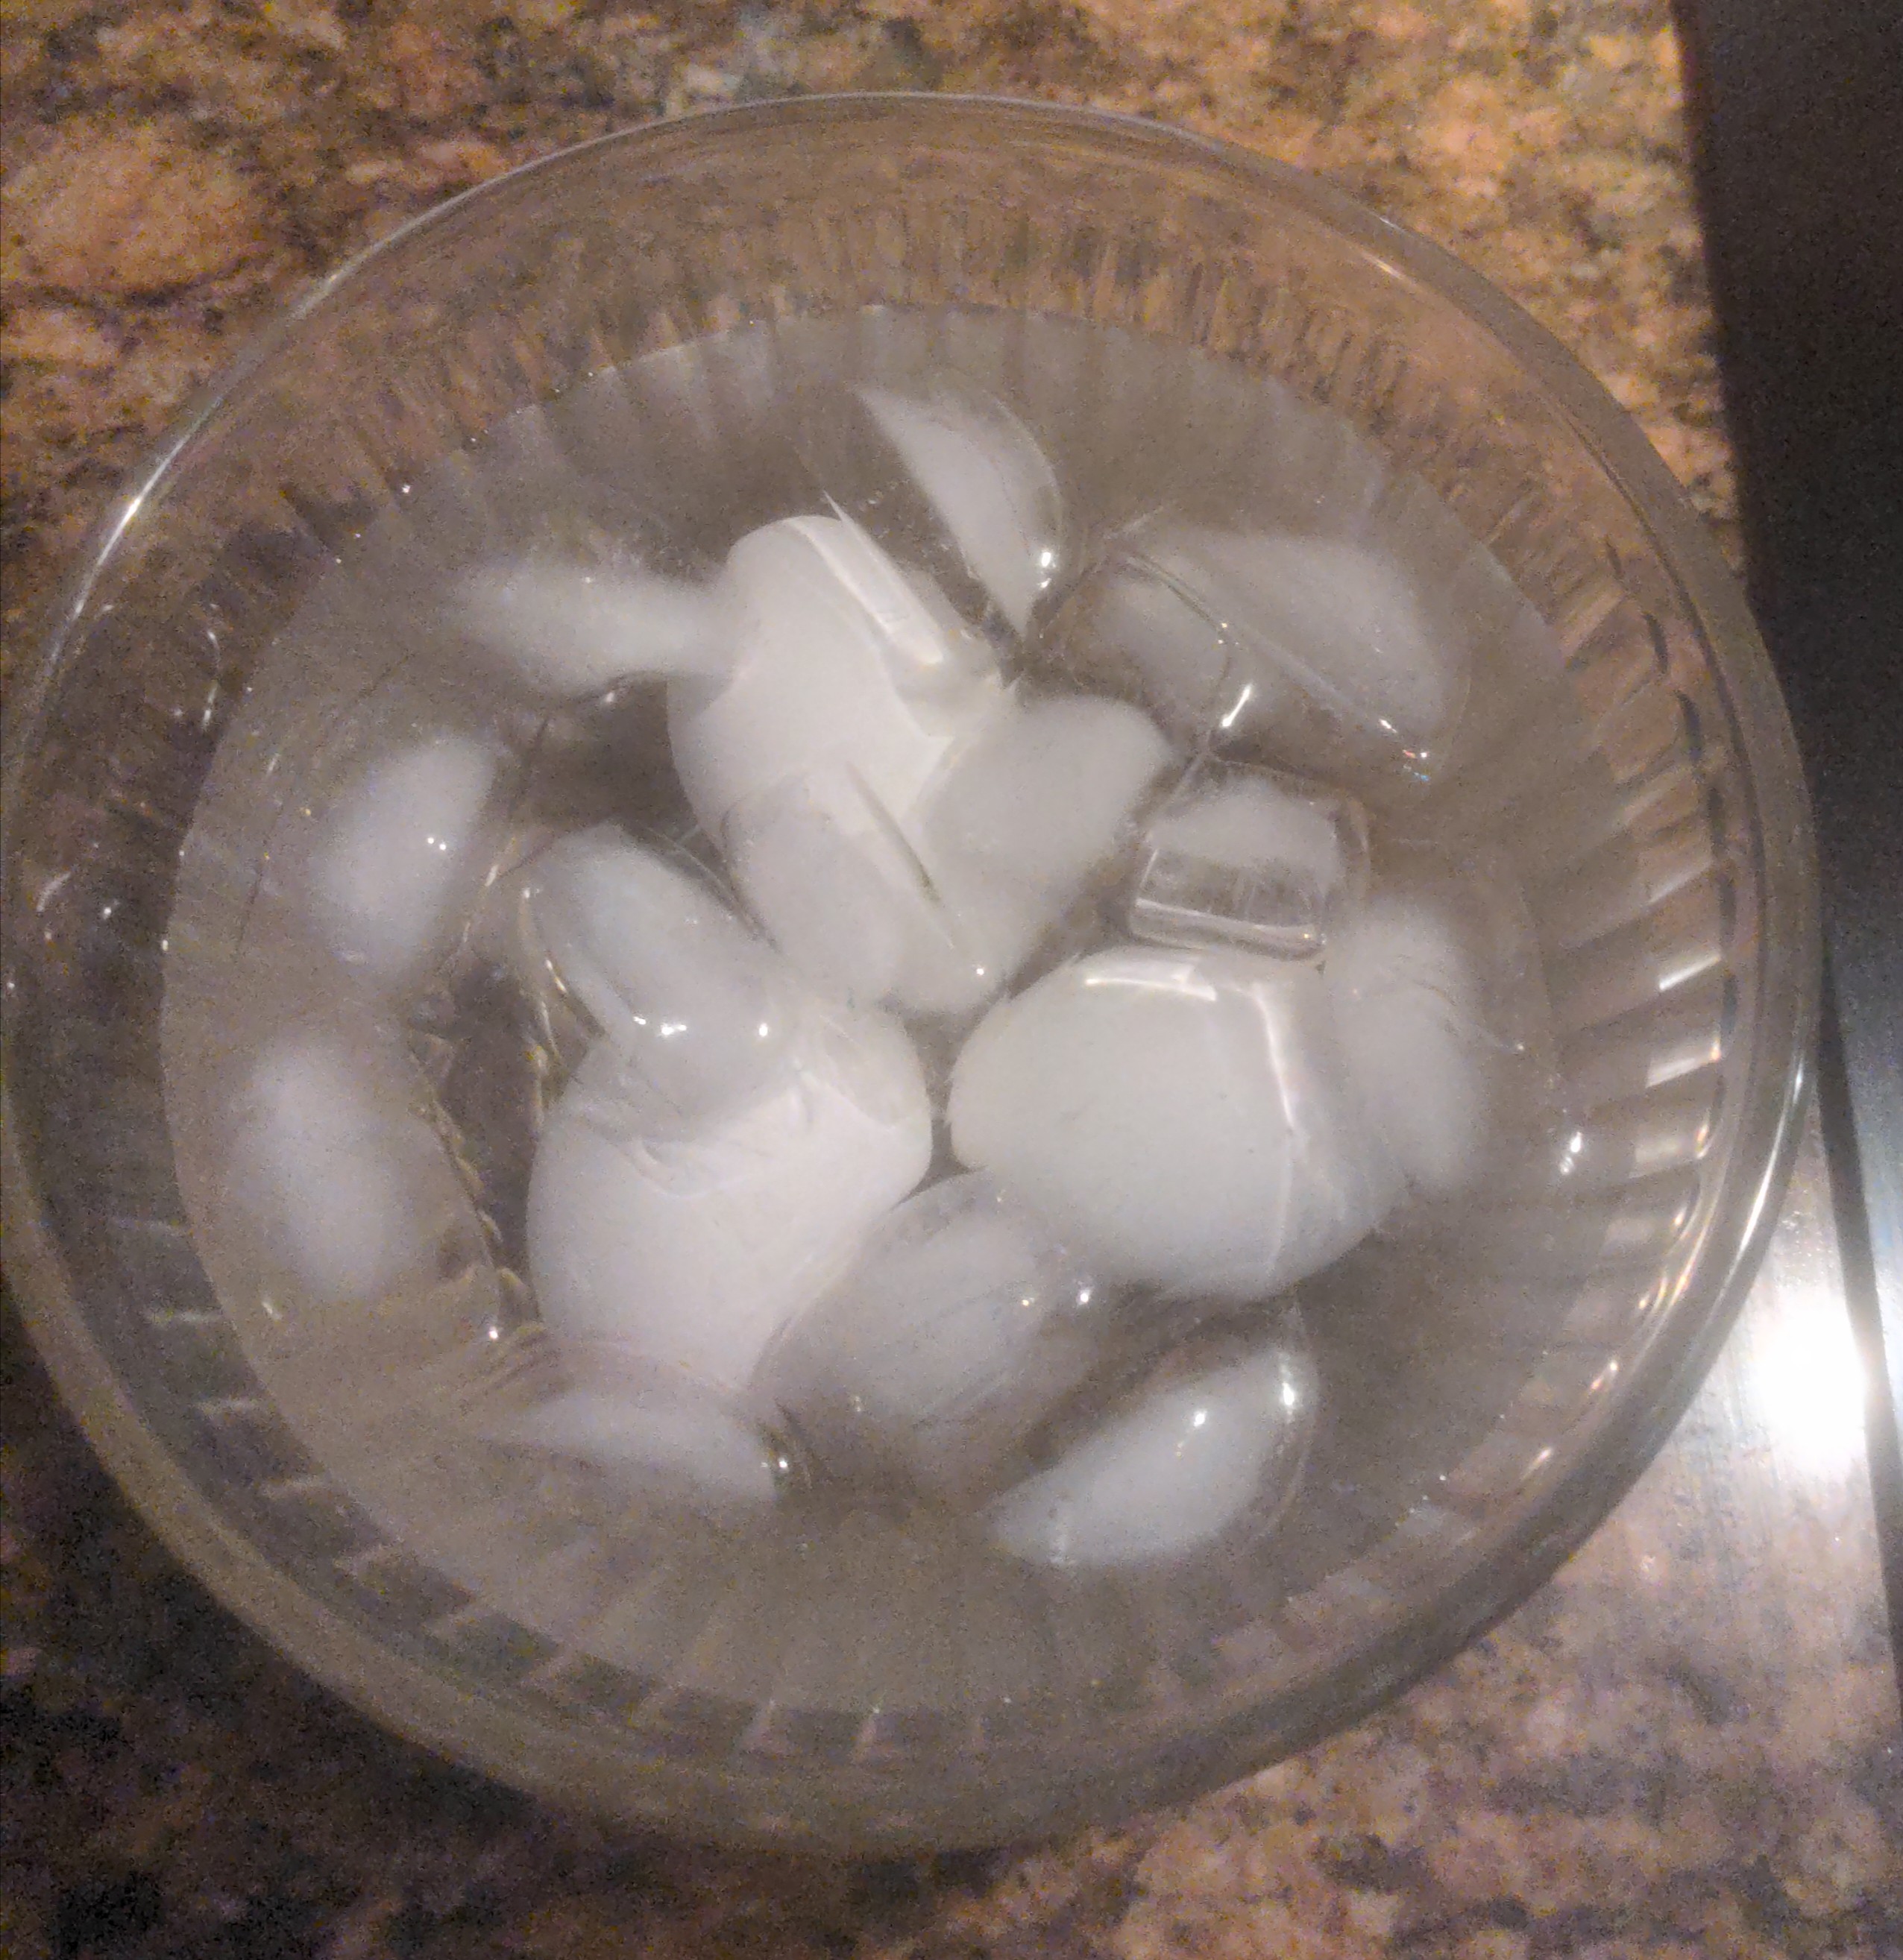
Then of course, we cool them in an ice bath. It is best to get your ice ready ahead of time so the water is cool when you dunk the eggs.
Lastly, the eggs are peeled and then placed in brine. I use soy sauce, water, and mirin in equal parts, though several recipes exist. Now it is best to let your eggs seep in the flavour for 2-3 days. Anything past 5 is chancing it for a rotten egg.
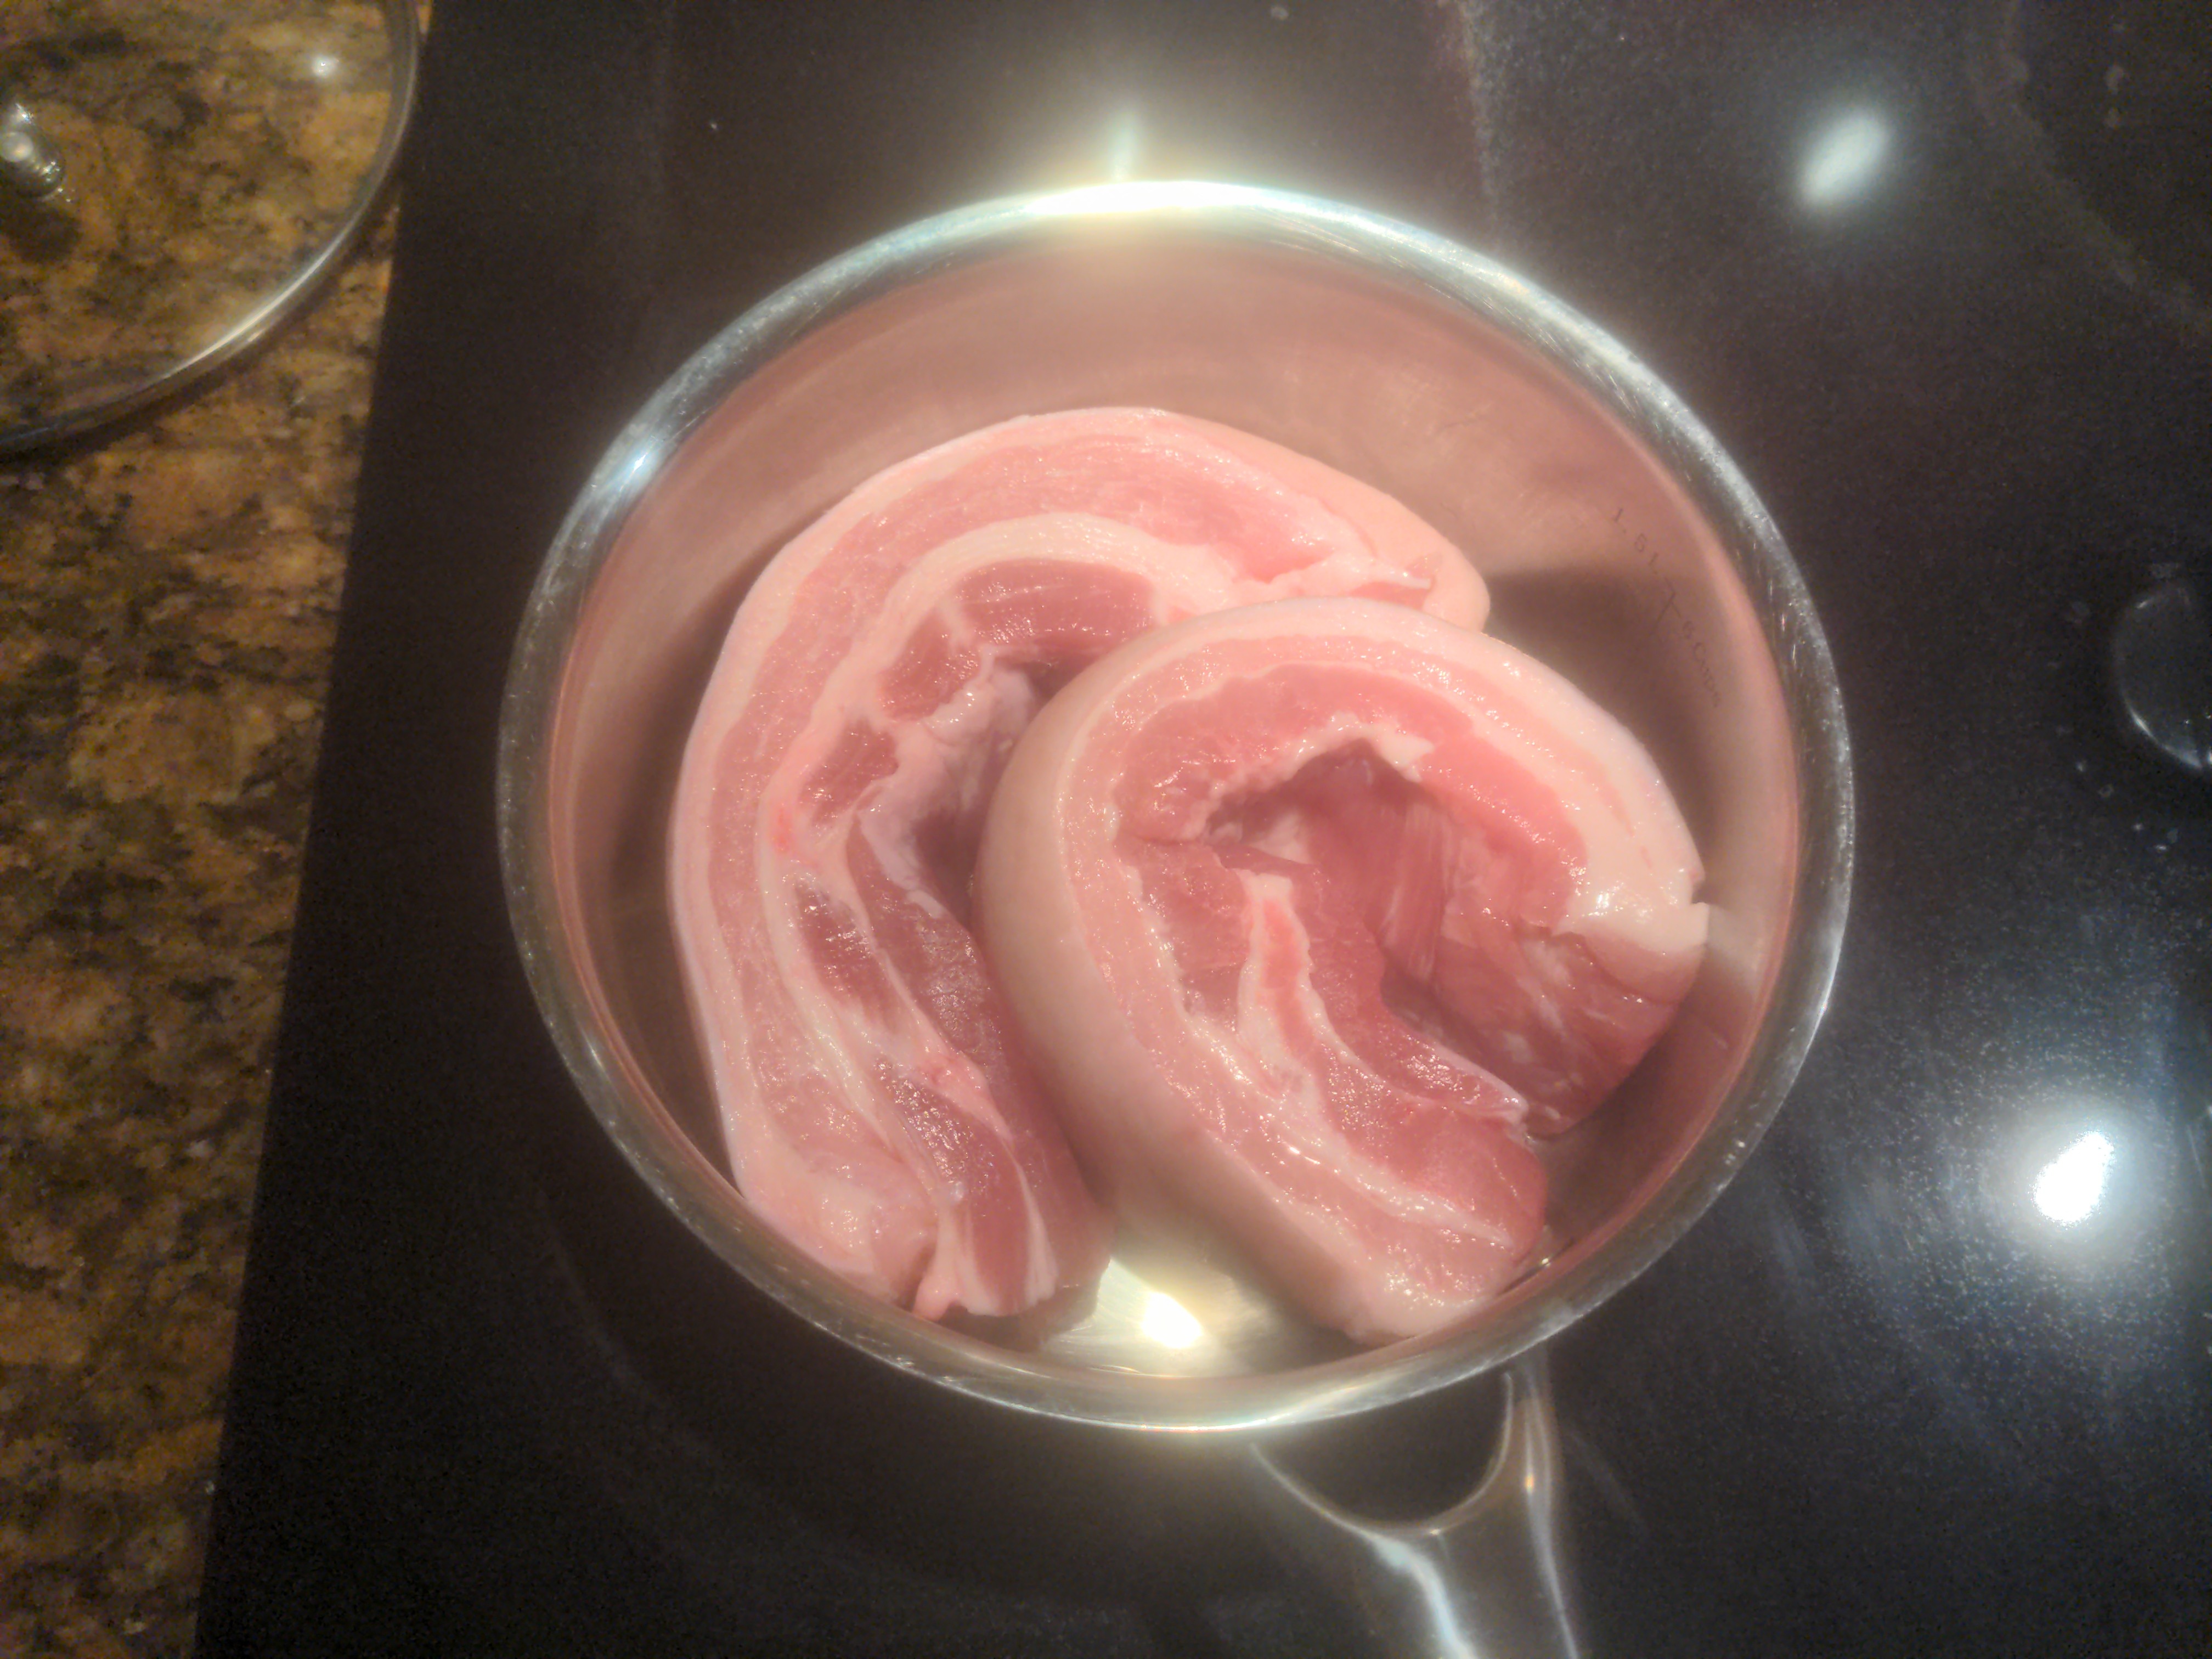
Next, let's prepare the second topping, chashu. Though it is the Japanese approximate of Char Siu, it would be a mistake and waste of time to put that in ramen (or at the least, very unconventional). Chashu is instead made from pork belly braised in soy sauce.
It's also worth noting that there are several ways to do chashu right like many things in the ramen world. Some will be rolled up and tied with twine before cooking, others will be unrolled. Some recipes call for browning on the stove before simmering (personally, I think this works better for kakuni than chashu). I like the square shape of unrolled more, but this is mostly preference and convenience of cooking.
In any case, pork belly is added to a dutch oven or large saucepan once preparations are made.
Then, the braising liquid is prepared by mixing equal parts soy sauce, sake, and mirin, then dissolving half a cup of sugar (I use brown for better flavour) in a small amount of water and pouring the liquid in the pan.
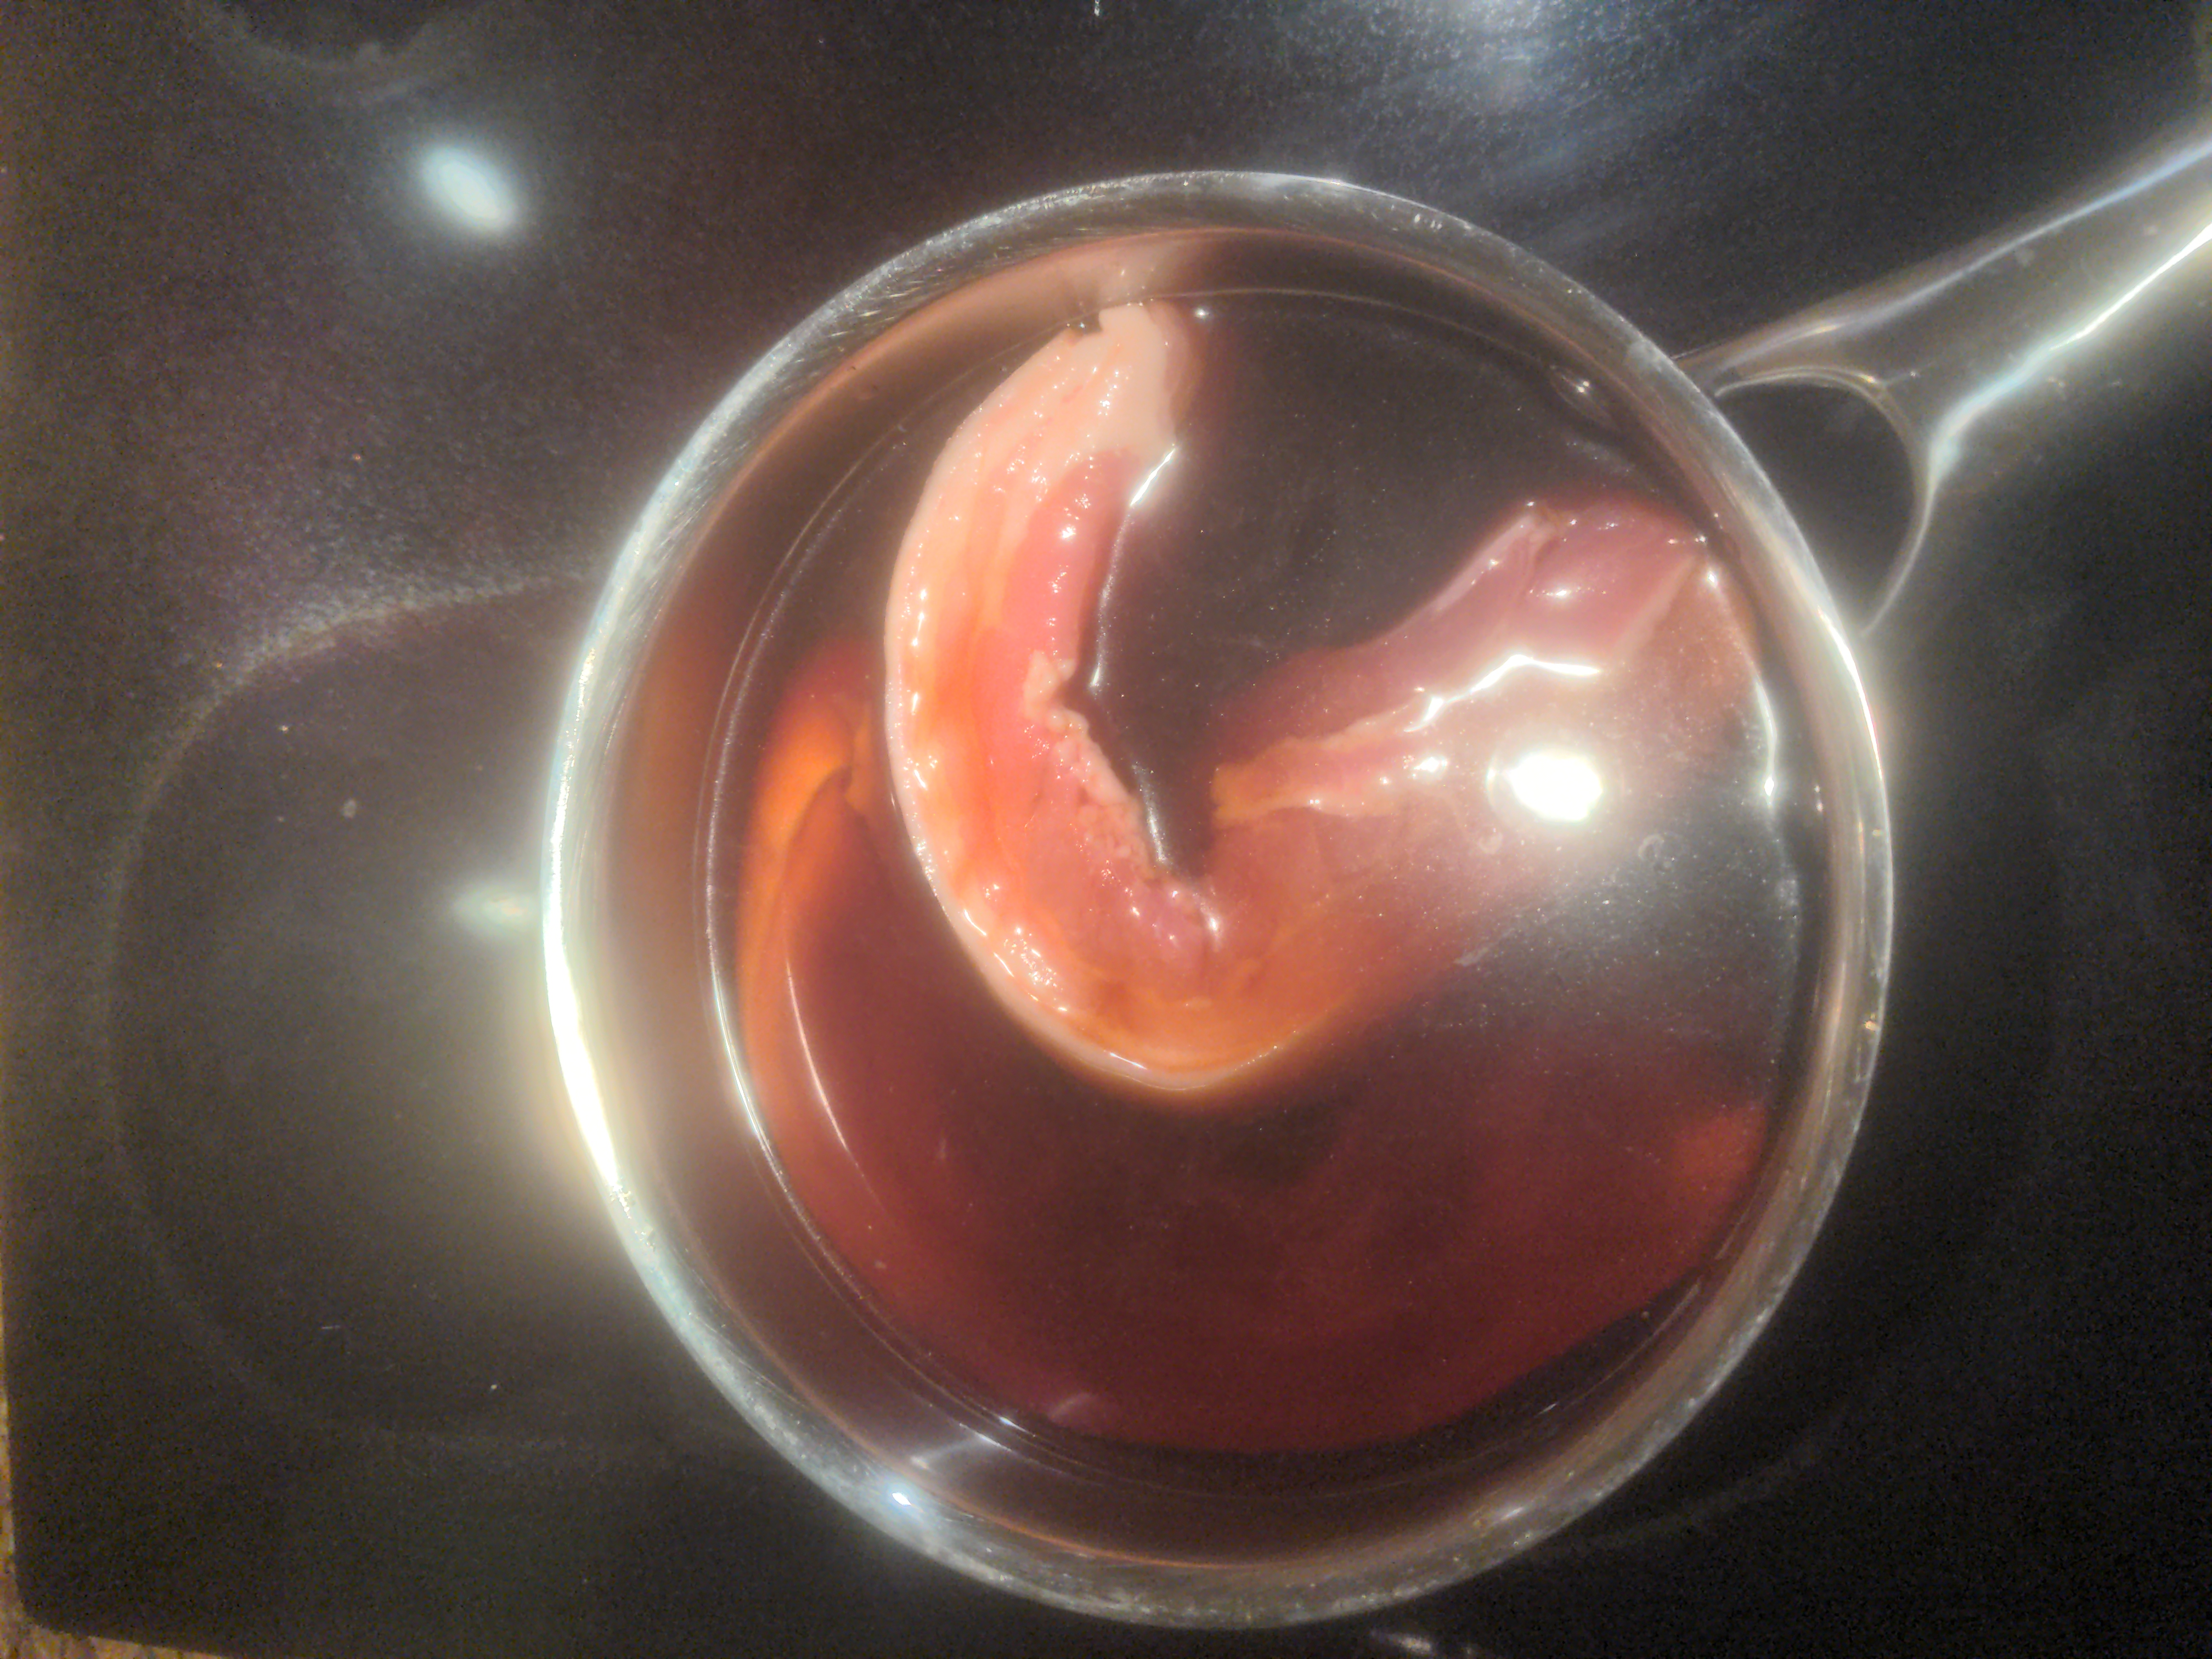
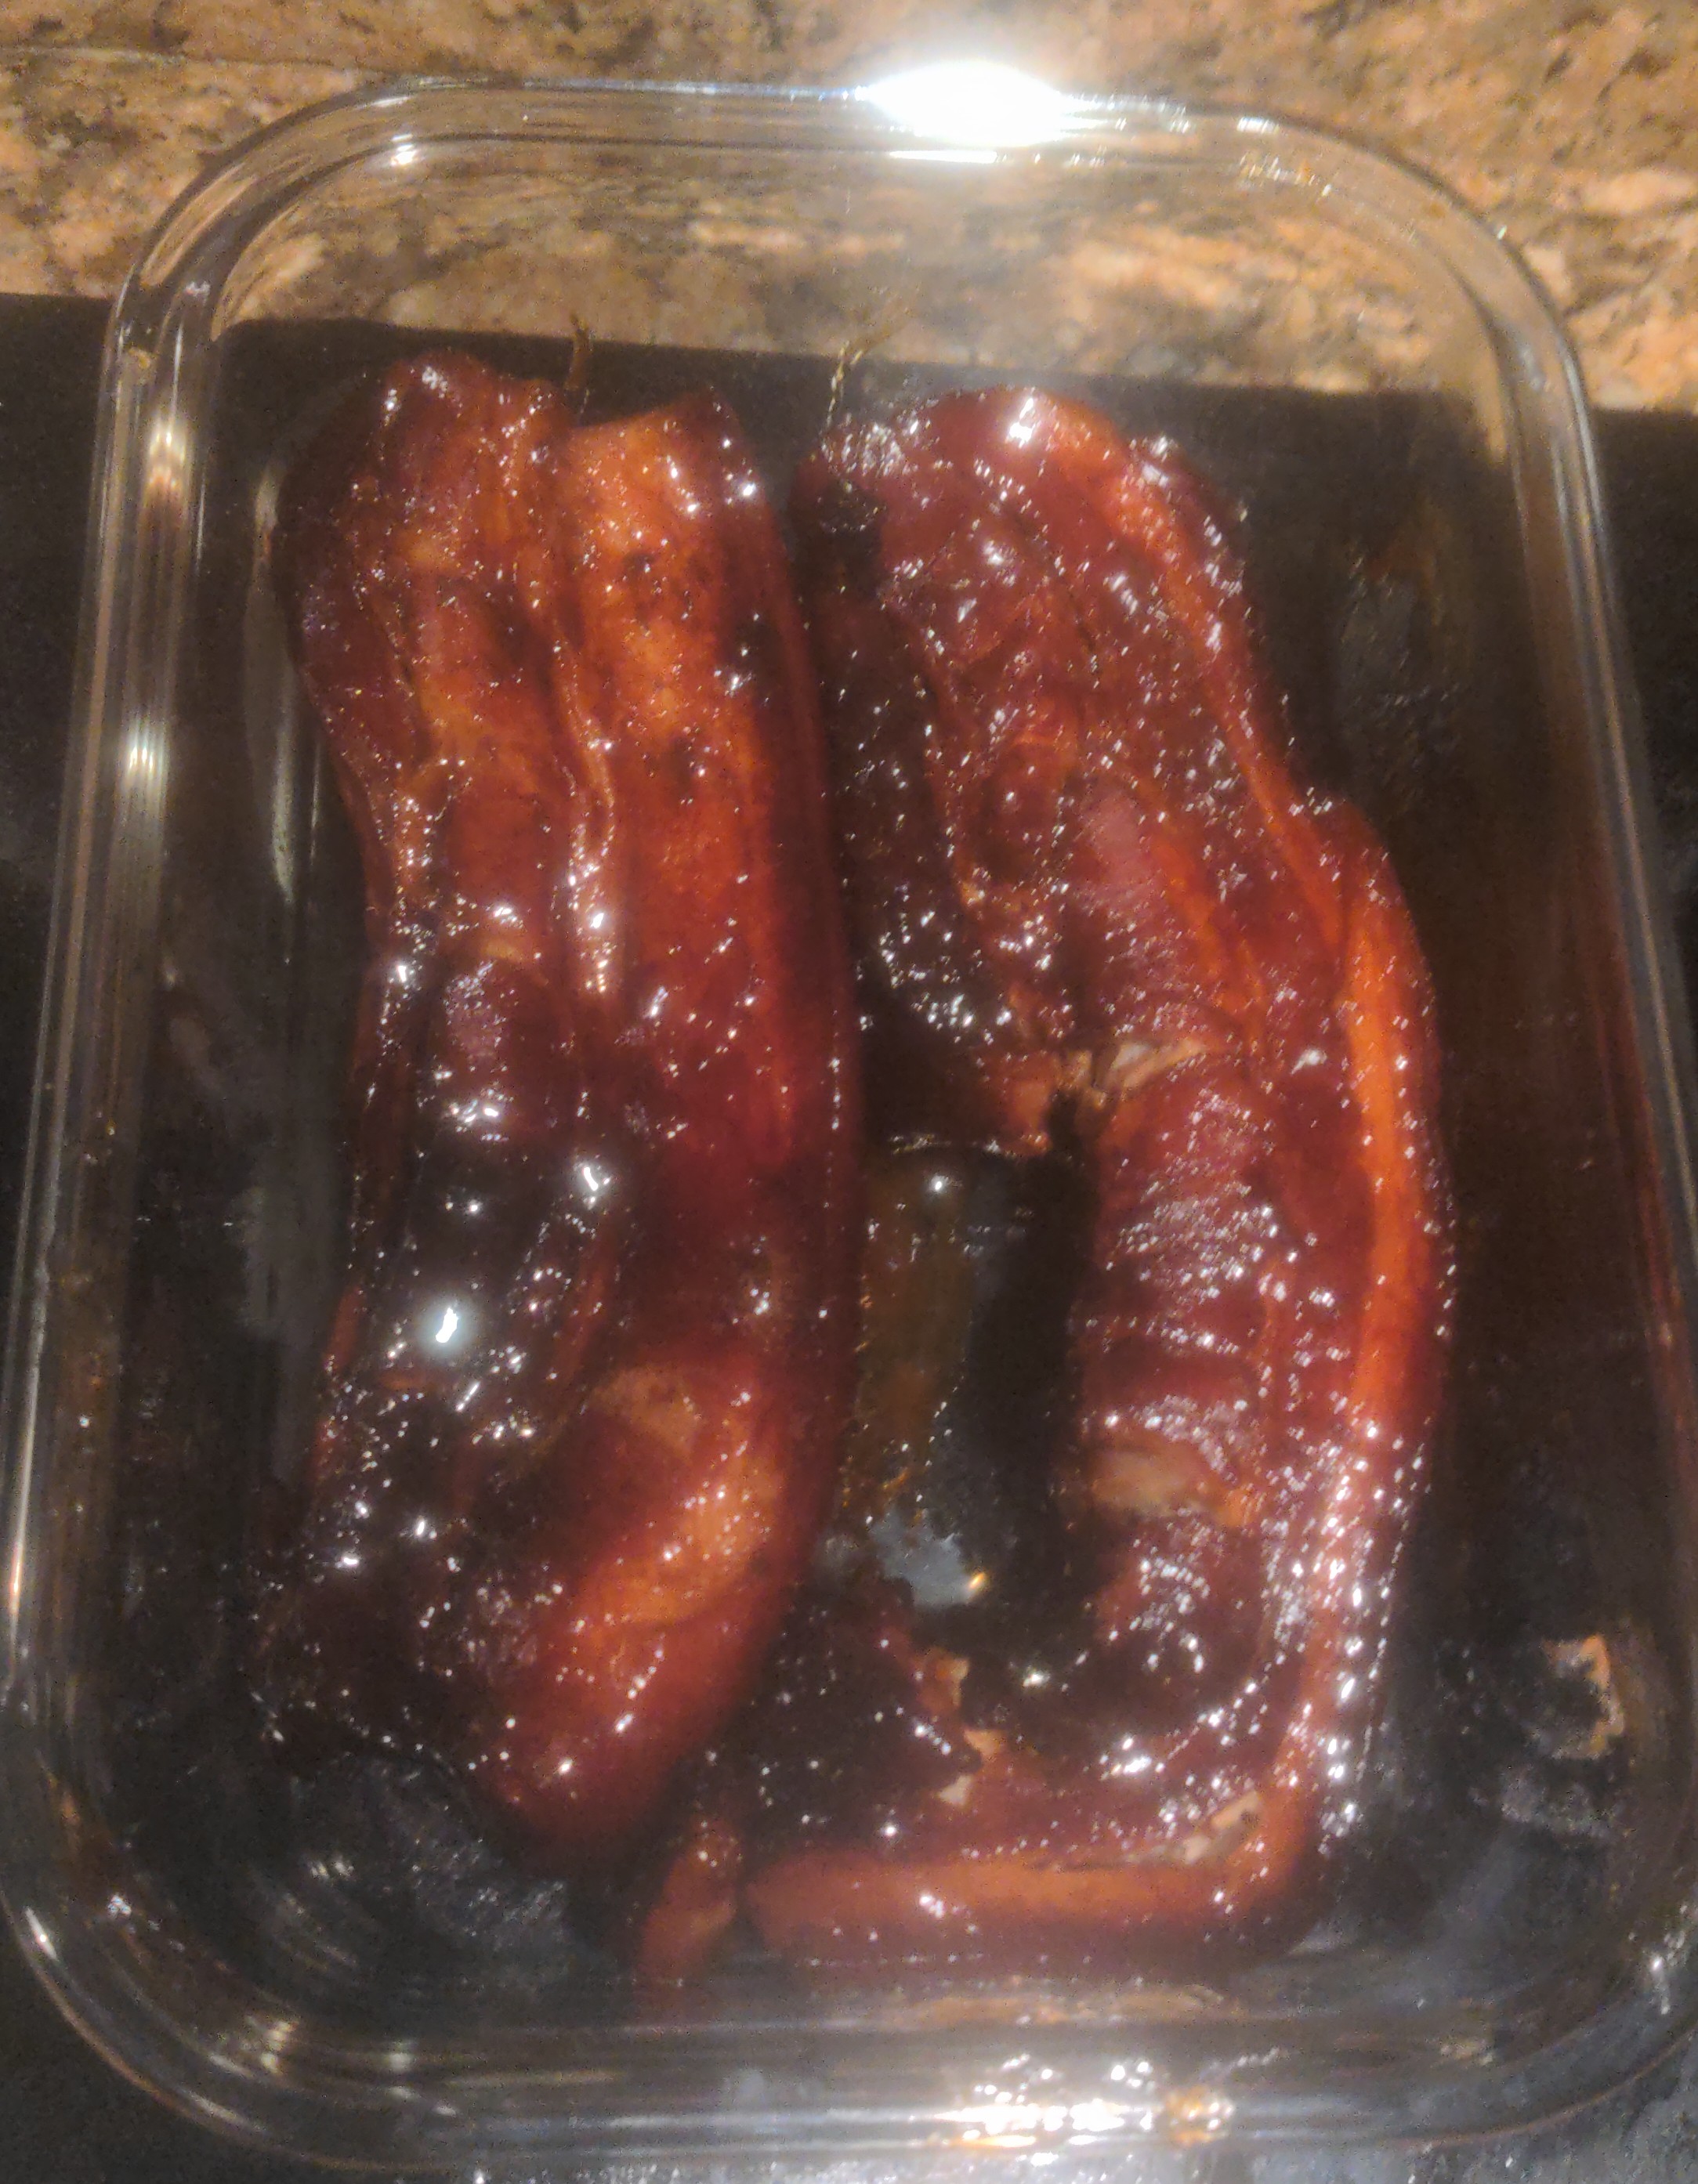
Now, we cook the pork belly low and slow (ideally <180F, or ~160 with sous vide) until it is tender and basically falling apart. 3.5 hours is a good target for time on the stove. Once it is done and the braising liquid has substantially reduced, remove the chashu and place it in a bag to rest in the fridge overnight. Freezing is also a good idea (or at least placing in the freezer to firm up) as it facilitates cutting. On a very soft chashu, freezing may be a necessity to make good cuts.
This completes part 1 of my ramen post. Tune in in a few hours for part 2, where we discuss preparation of the soup (stock, tare, and aromatic oil)
Well I promised a Ramen post and though I'm a few days late the craving has hit again and there is only one way to sate it. Today I will be making chicken ramen. In Japanese it is called tori paitan (for those who can't speak Japanese, the term paitan will be explained in part 2.) Personally, chicken ramen is the most appealing to me because of its rich flavour. It is also easer to make a better stock.
Ramen is famous for being served with toppings so let's make two easy famous ones which require a bit more prep (most others are just drop-ins).
First, let's make ramen eggs (ajitsuke tamago or ajitama). They are essentially soy sauce-brined soft-boiled eggs.
First, I prepare eggs for steaming. Boiling is also acceptable but I've found steaming makes eggs easier to peel, albeit at the sacrifice of consistency in doneness for small batches.

The eggs are placed in the bamboo steamer and steamed 7-8 minutes. 7 gets you runny yolks that spill into the soup, 8-9 will be more set but slimy.

Then of course, we cool them in an ice bath. It is best to get your ice ready ahead of time so the water is cool when you dunk the eggs.

Lastly, the eggs are peeled and then placed in brine. I use soy sauce, water, and mirin in equal parts, though several recipes exist. Now it is best to let your eggs seep in the flavour for 2-3 days. Anything past 5 is chancing it for a rotten egg.

Next, let's prepare the second topping, chashu. Though it is the Japanese approximate of Char Siu, it would be a mistake and waste of time to put that in ramen (or at the least, very unconventional). Chashu is instead made from pork belly braised in soy sauce.
It's also worth noting that there are several ways to do chashu right like many things in the ramen world. Some will be rolled up and tied with twine before cooking, others will be unrolled. Some recipes call for browning on the stove before simmering (personally, I think this works better for kakuni than chashu). I like the square shape of unrolled more, but this is mostly preference and convenience of cooking.
In any case, pork belly is added to a dutch oven or large saucepan once preparations are made.

Then, the braising liquid is prepared by mixing equal parts soy sauce, sake, and mirin, then dissolving half a cup of sugar (I use brown for better flavour) in a small amount of water and pouring the liquid in the pan.

Now, we cook the pork belly low and slow (ideally <180F, or ~160 with sous vide) until it is tender and basically falling apart. 3.5 hours is a good target for time on the stove. Once it is done and the braising liquid has substantially reduced, remove the chashu and place it in a bag to rest in the fridge overnight. Freezing is also a good idea (or at least placing in the freezer to firm up) as it facilitates cutting. On a very soft chashu, freezing may be a necessity to make good cuts.

This completes part 1 of my ramen post. Tune in in a few hours for part 2, where we discuss preparation of the soup (stock, tare, and aromatic oil)
Ramen Part 2: Soup
Now it is time to make our ramen soup. Ramen stock is generally divided into two categories, based on the style of preparation: chintan, which is characterized by clear golden appearance like a french stock, or paitan, which is white, cloudy and creamy. Chintan means clear (or pure) soup, whereas paitan means white soup. In this case I'll make paitan.
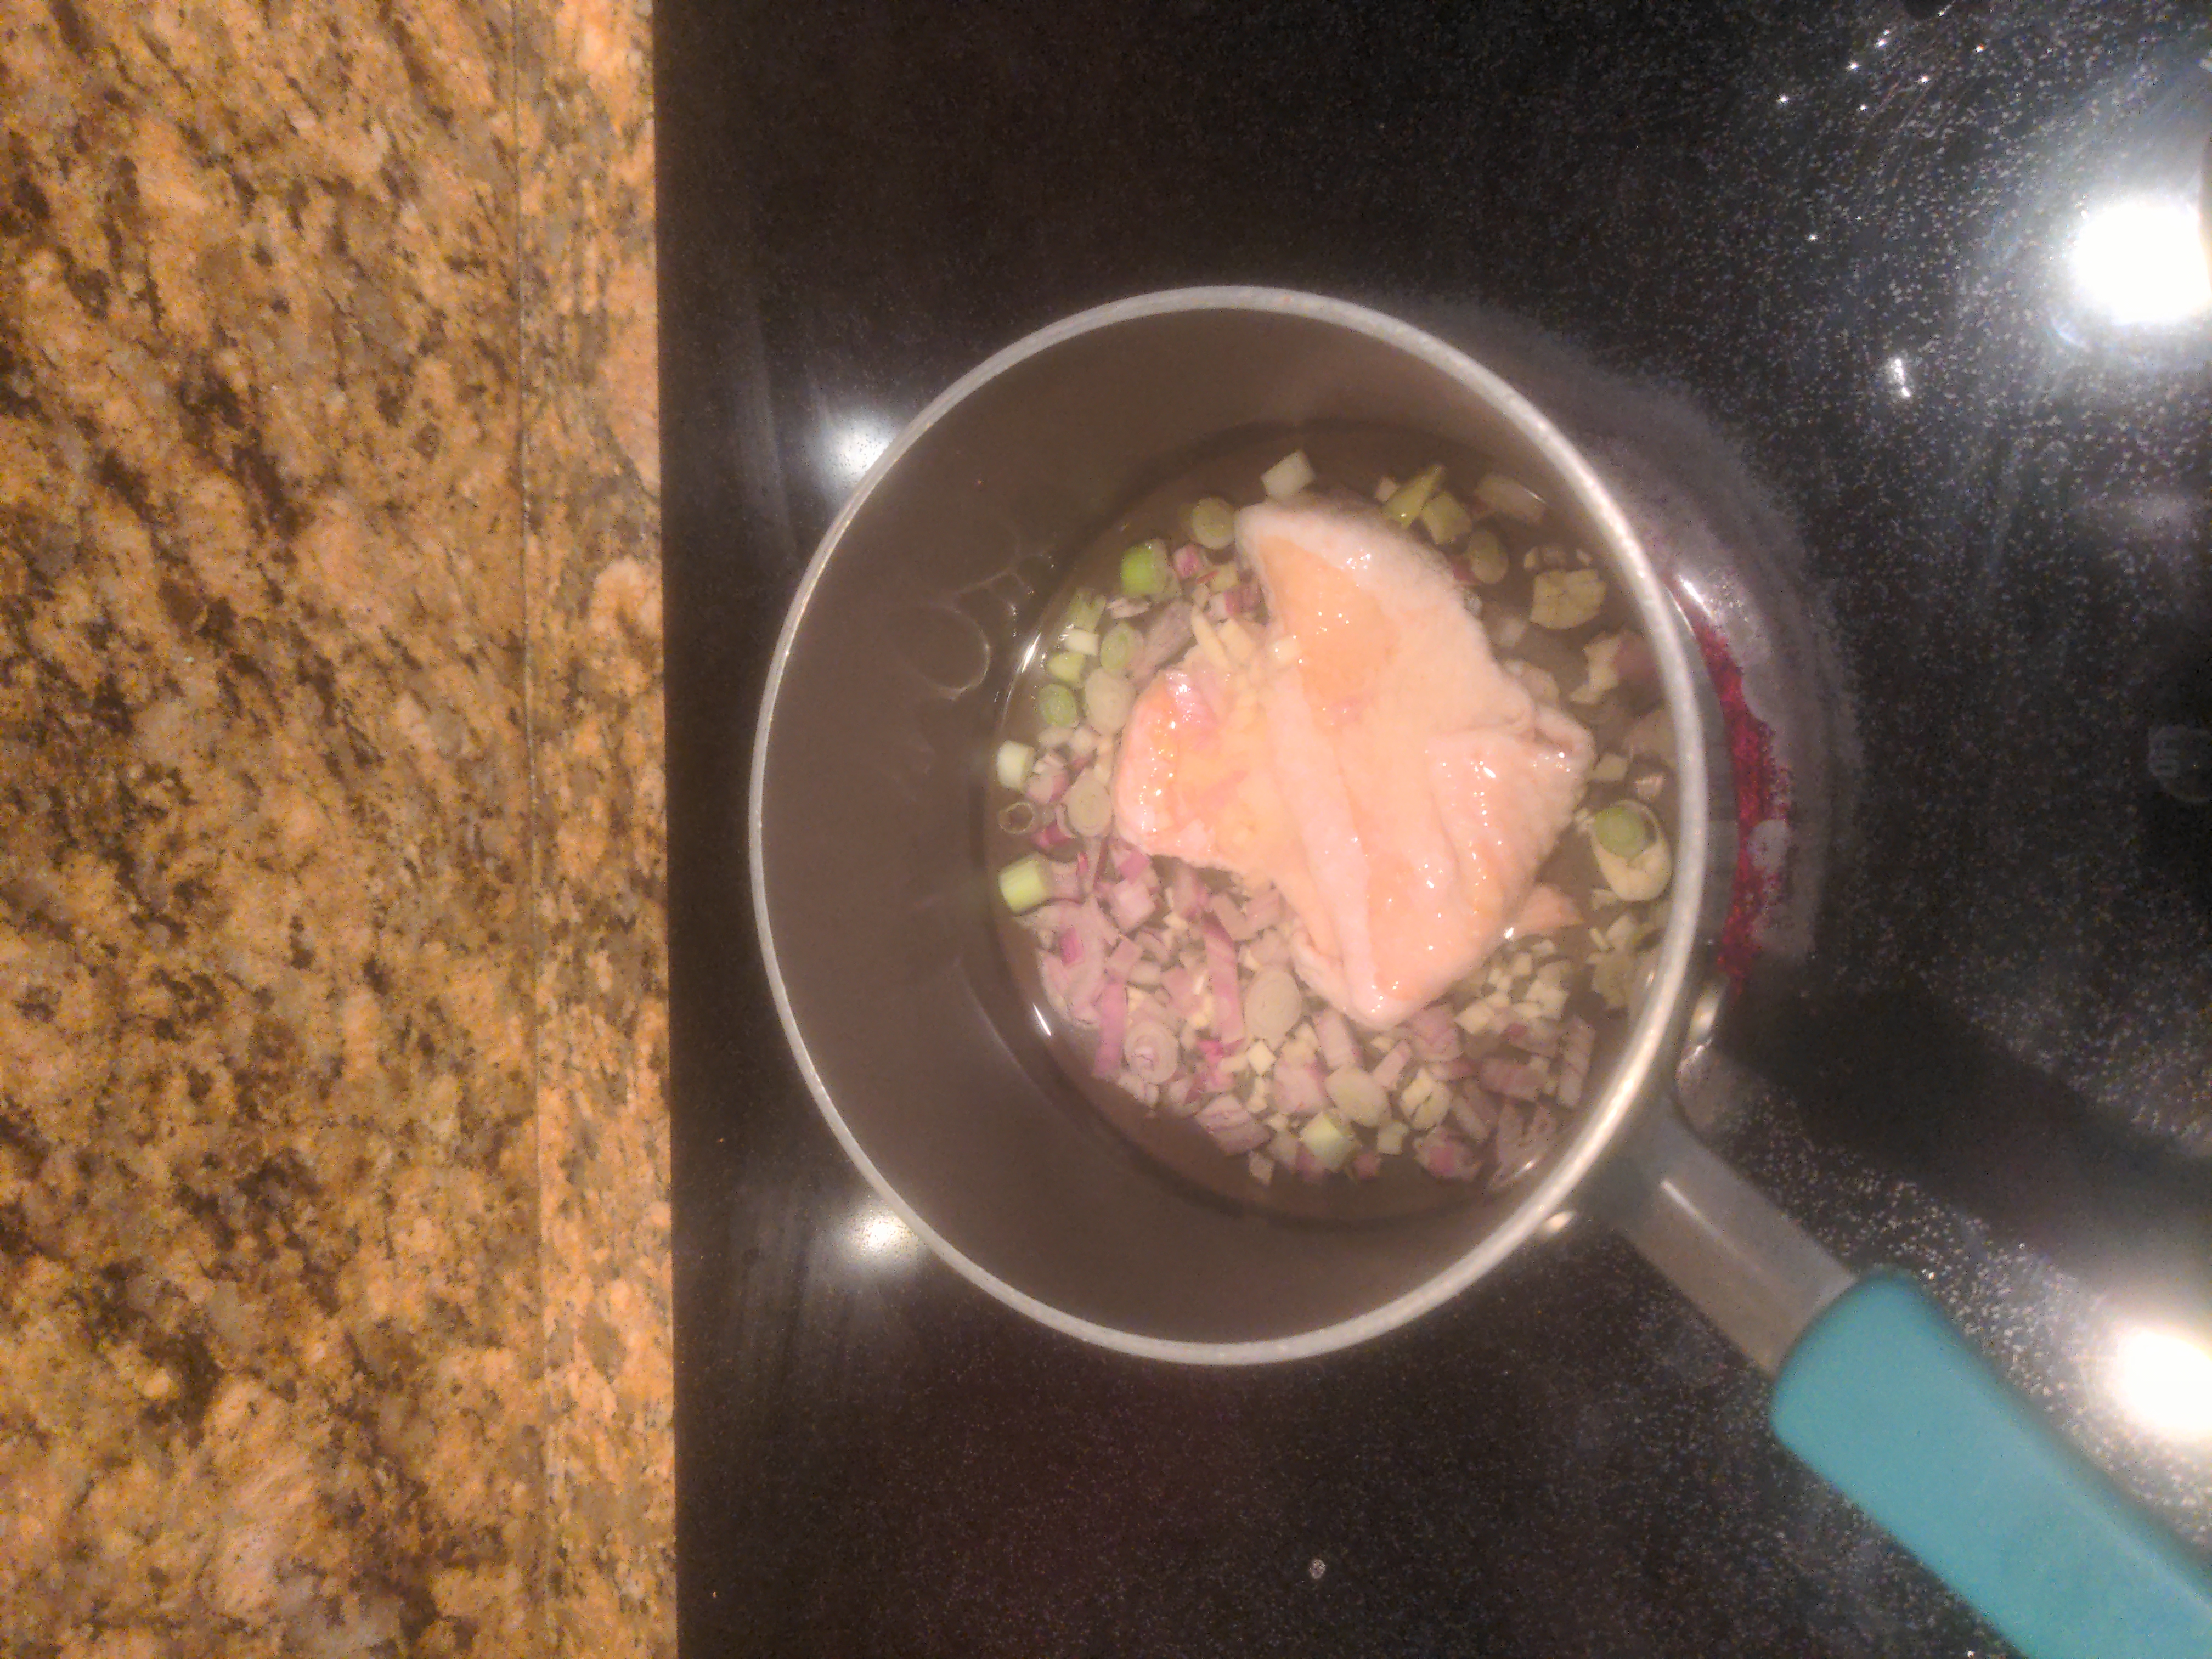
First, I begin with a whole chicken. This one is a rooster; in fact I recommend either roosters or stewing hens, rather than ordinary whole chickens, as these have more flavour when making soup while costing much less. I won't show how to part out the chicken, since this is well known and you can learn how to do it on youtube.
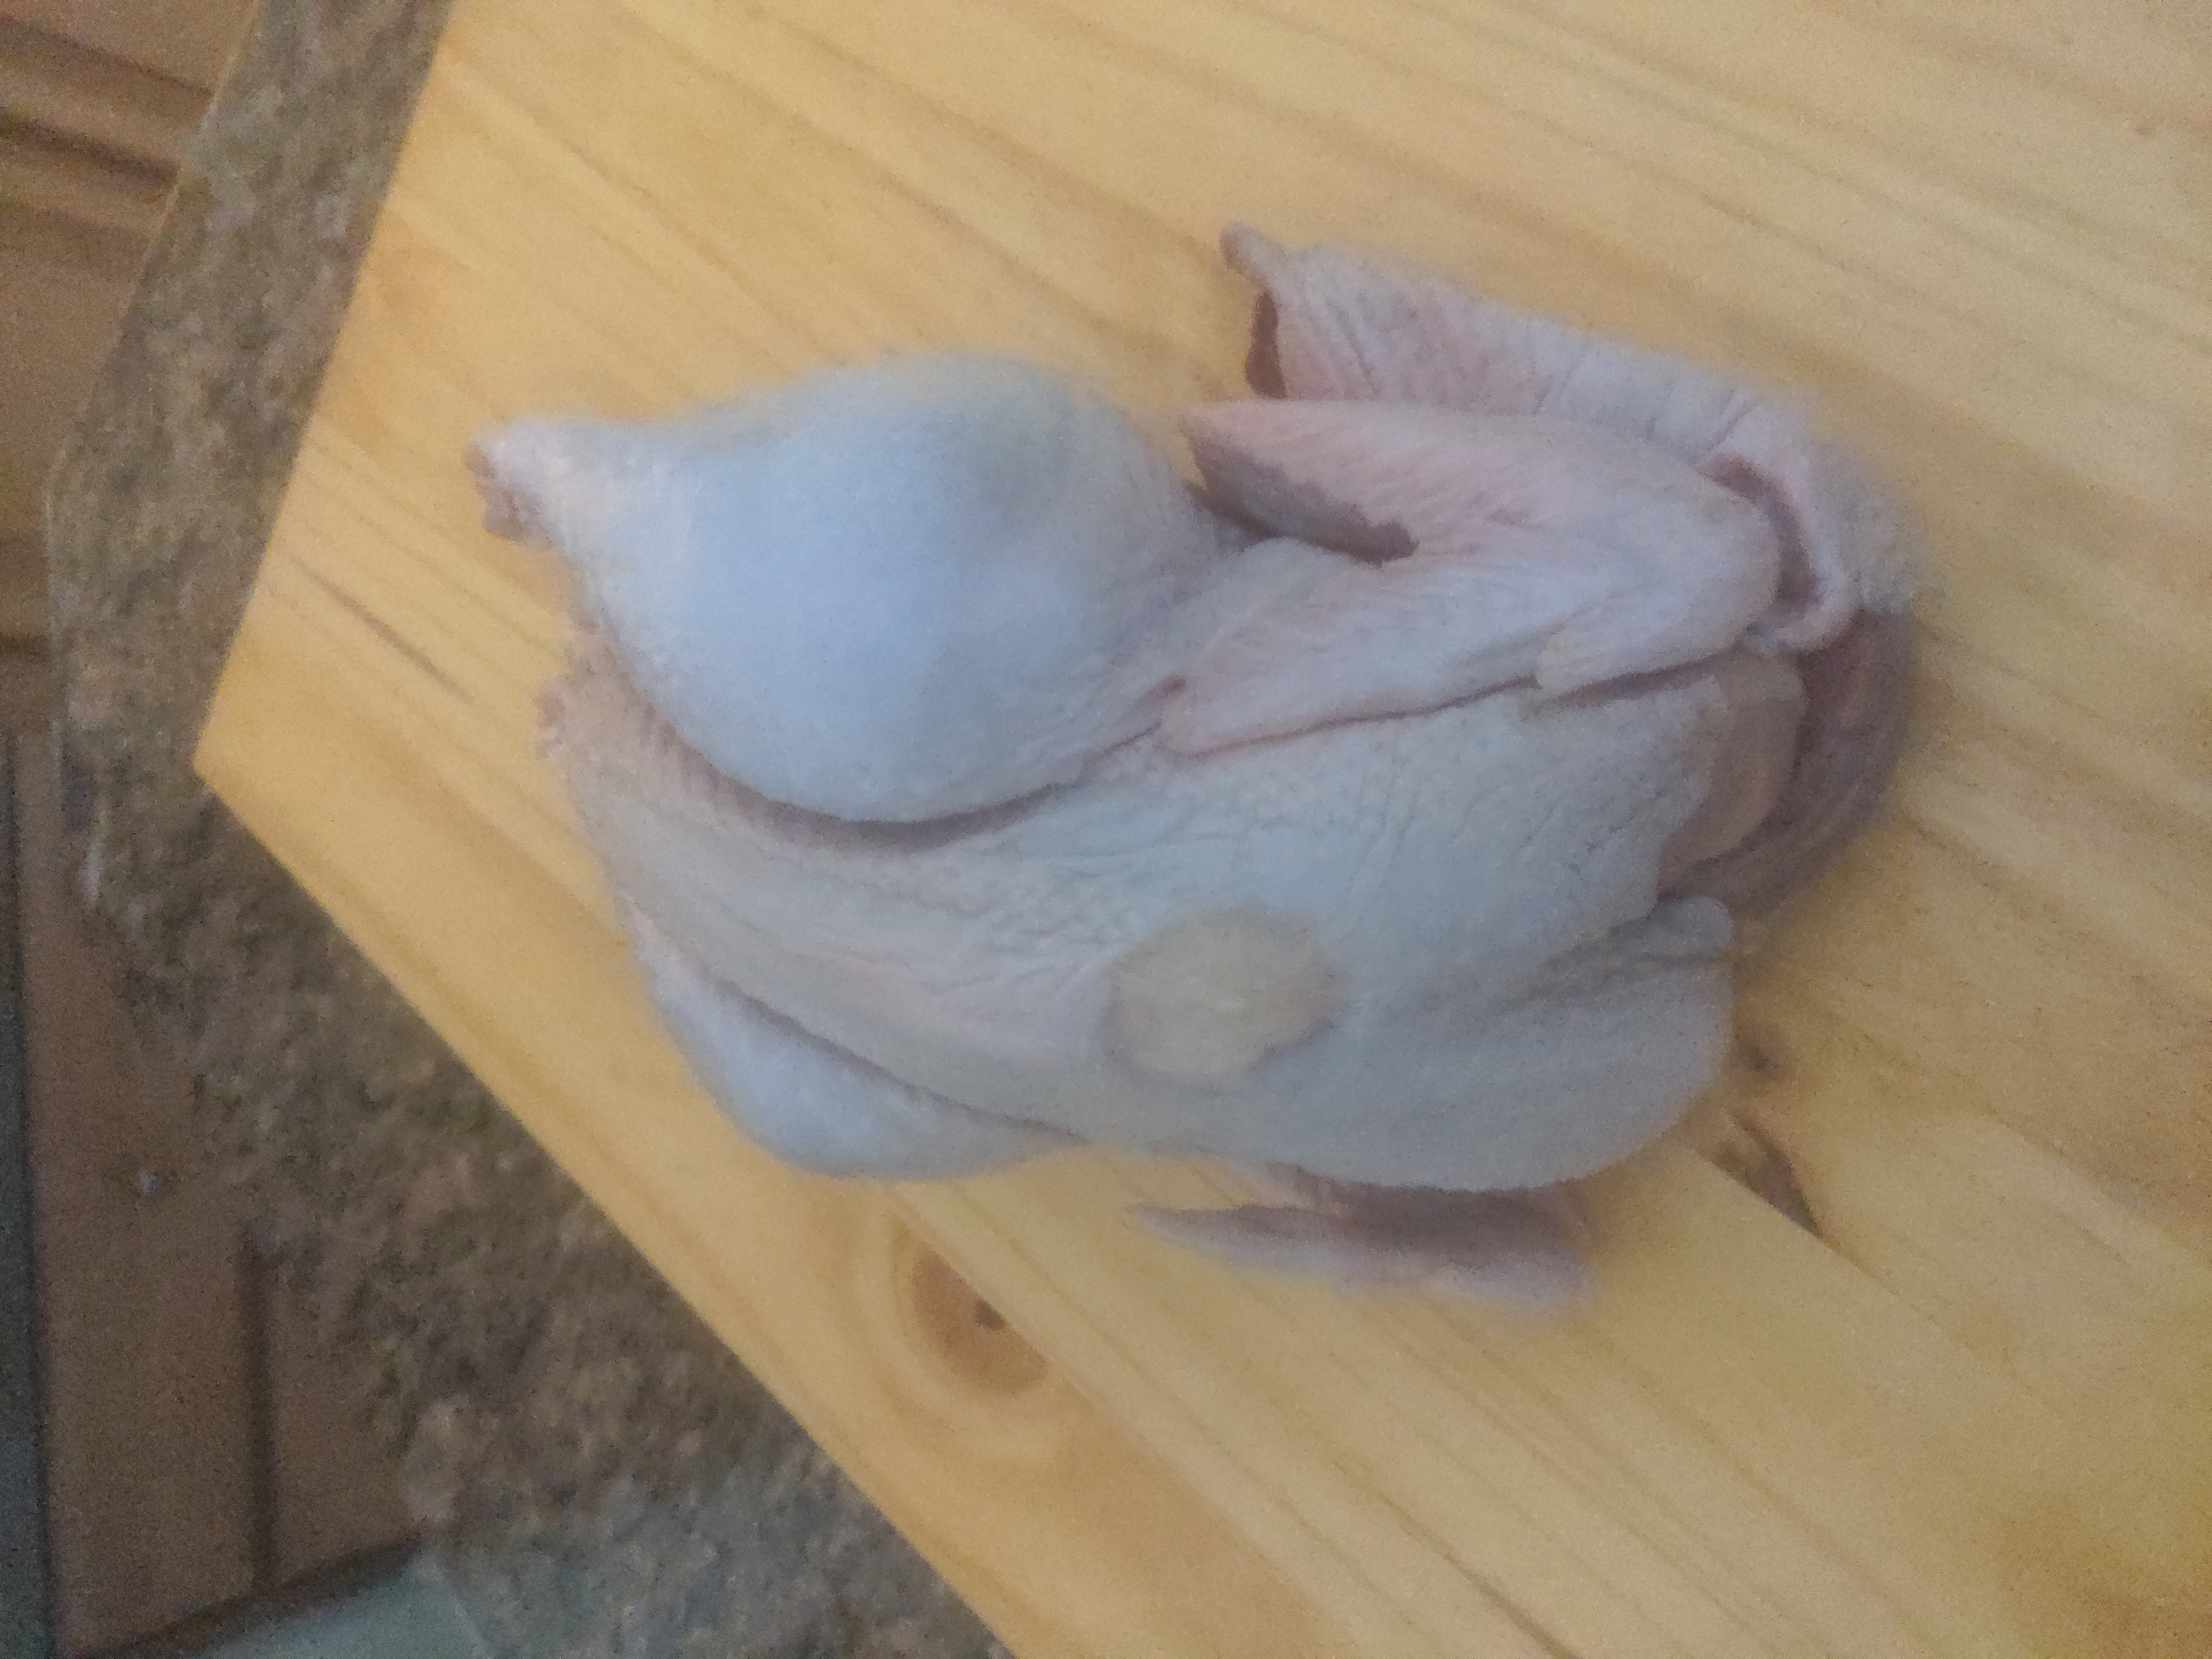
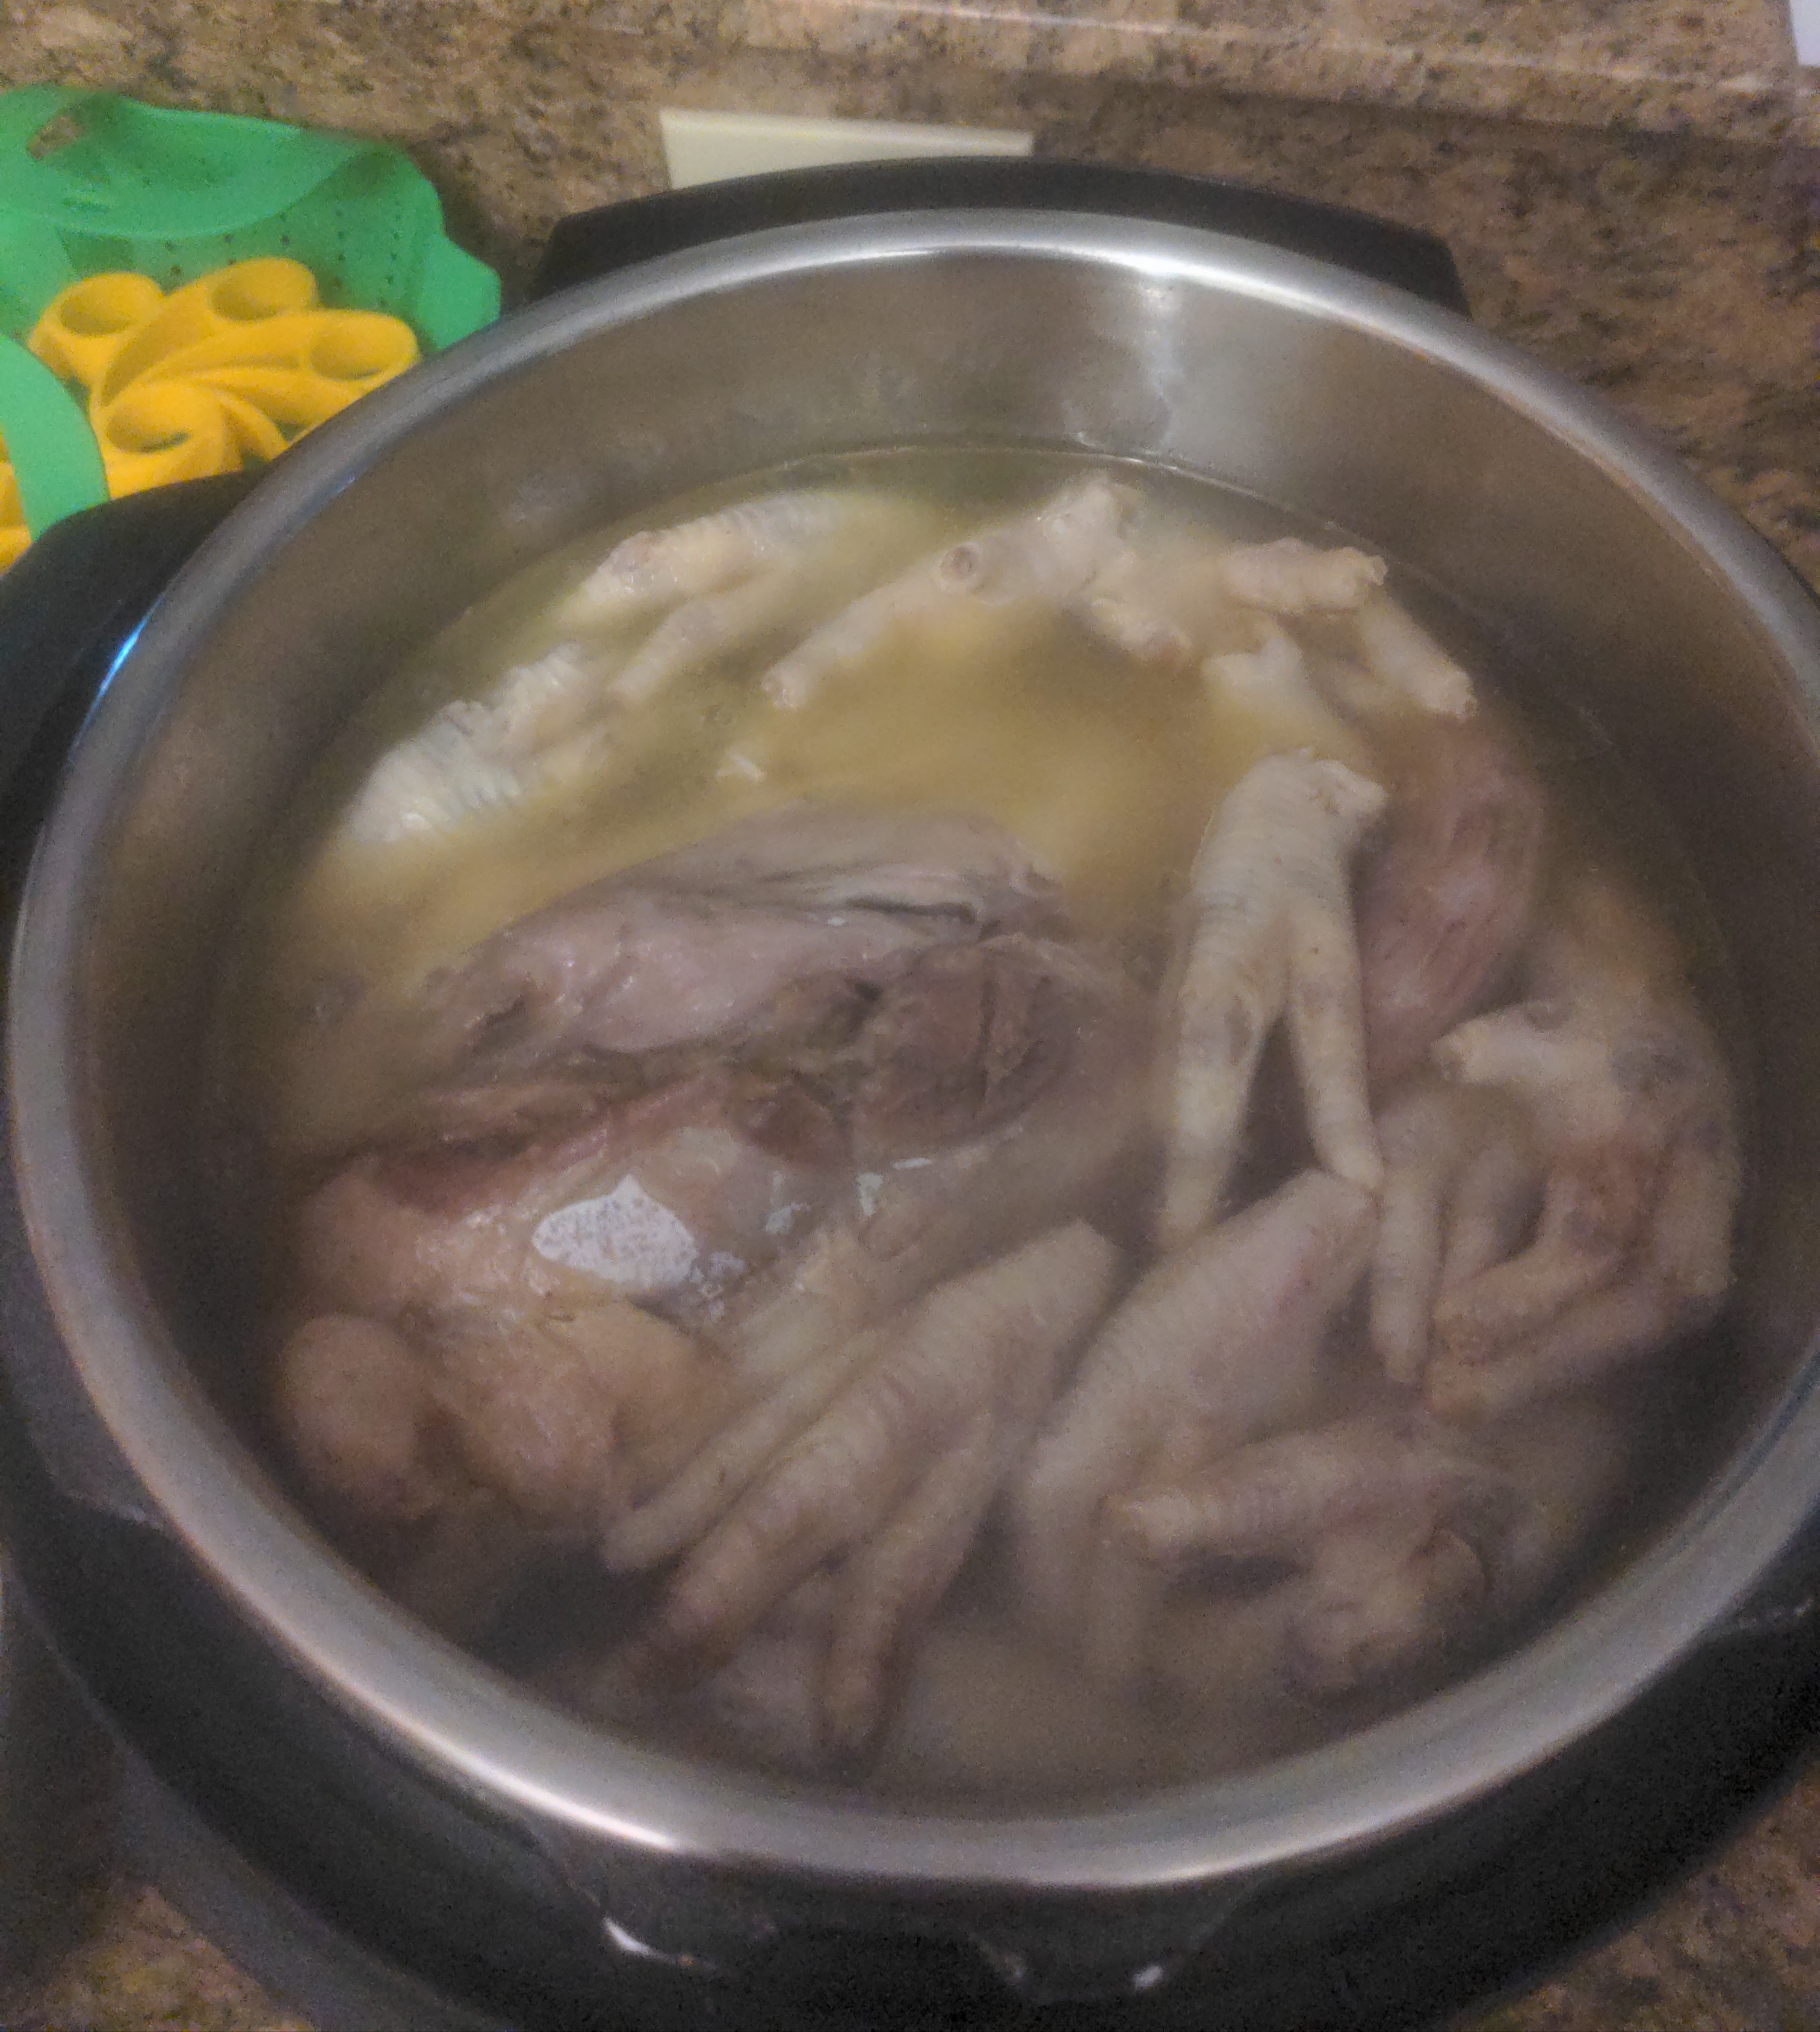
The chicken carcass, as well as about 25% of its weight in chicken feet, are added to a stock pot. Our goal is to pre-boil the bones for 10-15 minutes to prepare for cooking proper.
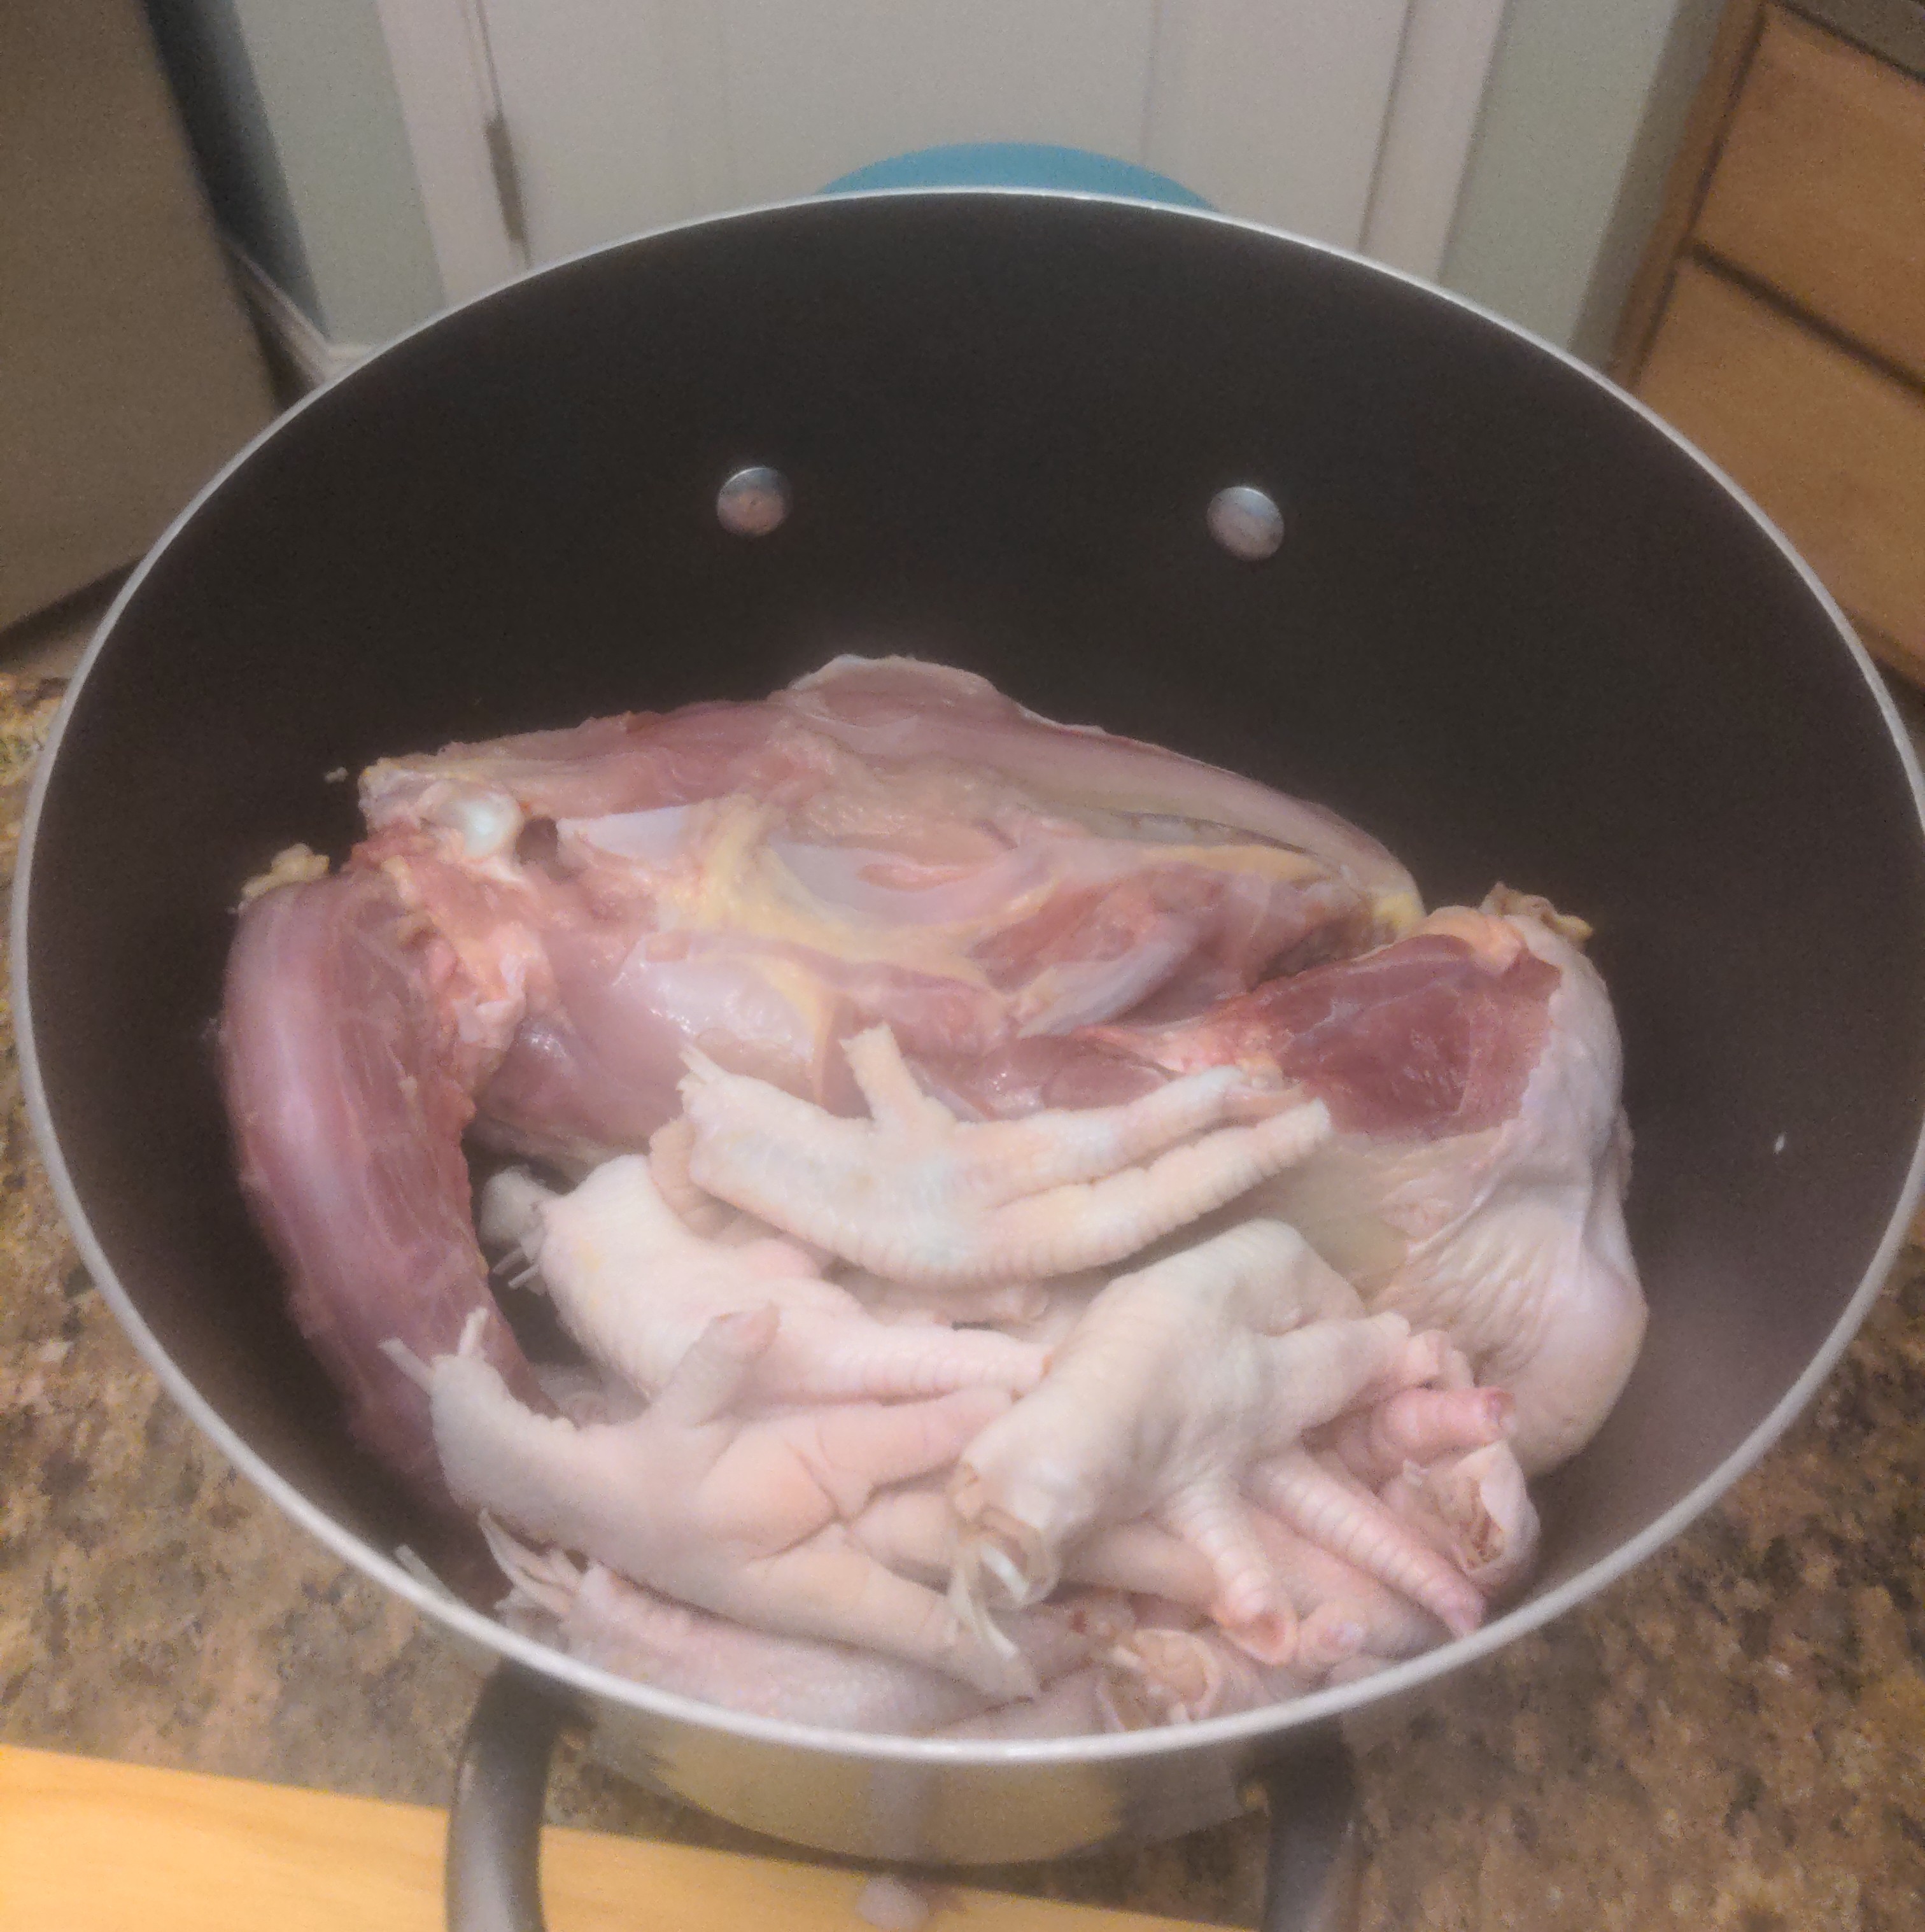
The purpose of the pre-boiling process is to remove impurities which darken the stock and impart bitter flavour. Most pernicious is myoglobin, which, when coming into contact with fat at high temperatures, forms a disgusting compound of scum. Scum ruins the flavour of the stock and looks gross. It is a grey-red foam which looks almost like sea foam. Using a spoon or fine mesh strainer, skim off the scum. Then agitate the meat to release more and continue until none remains.
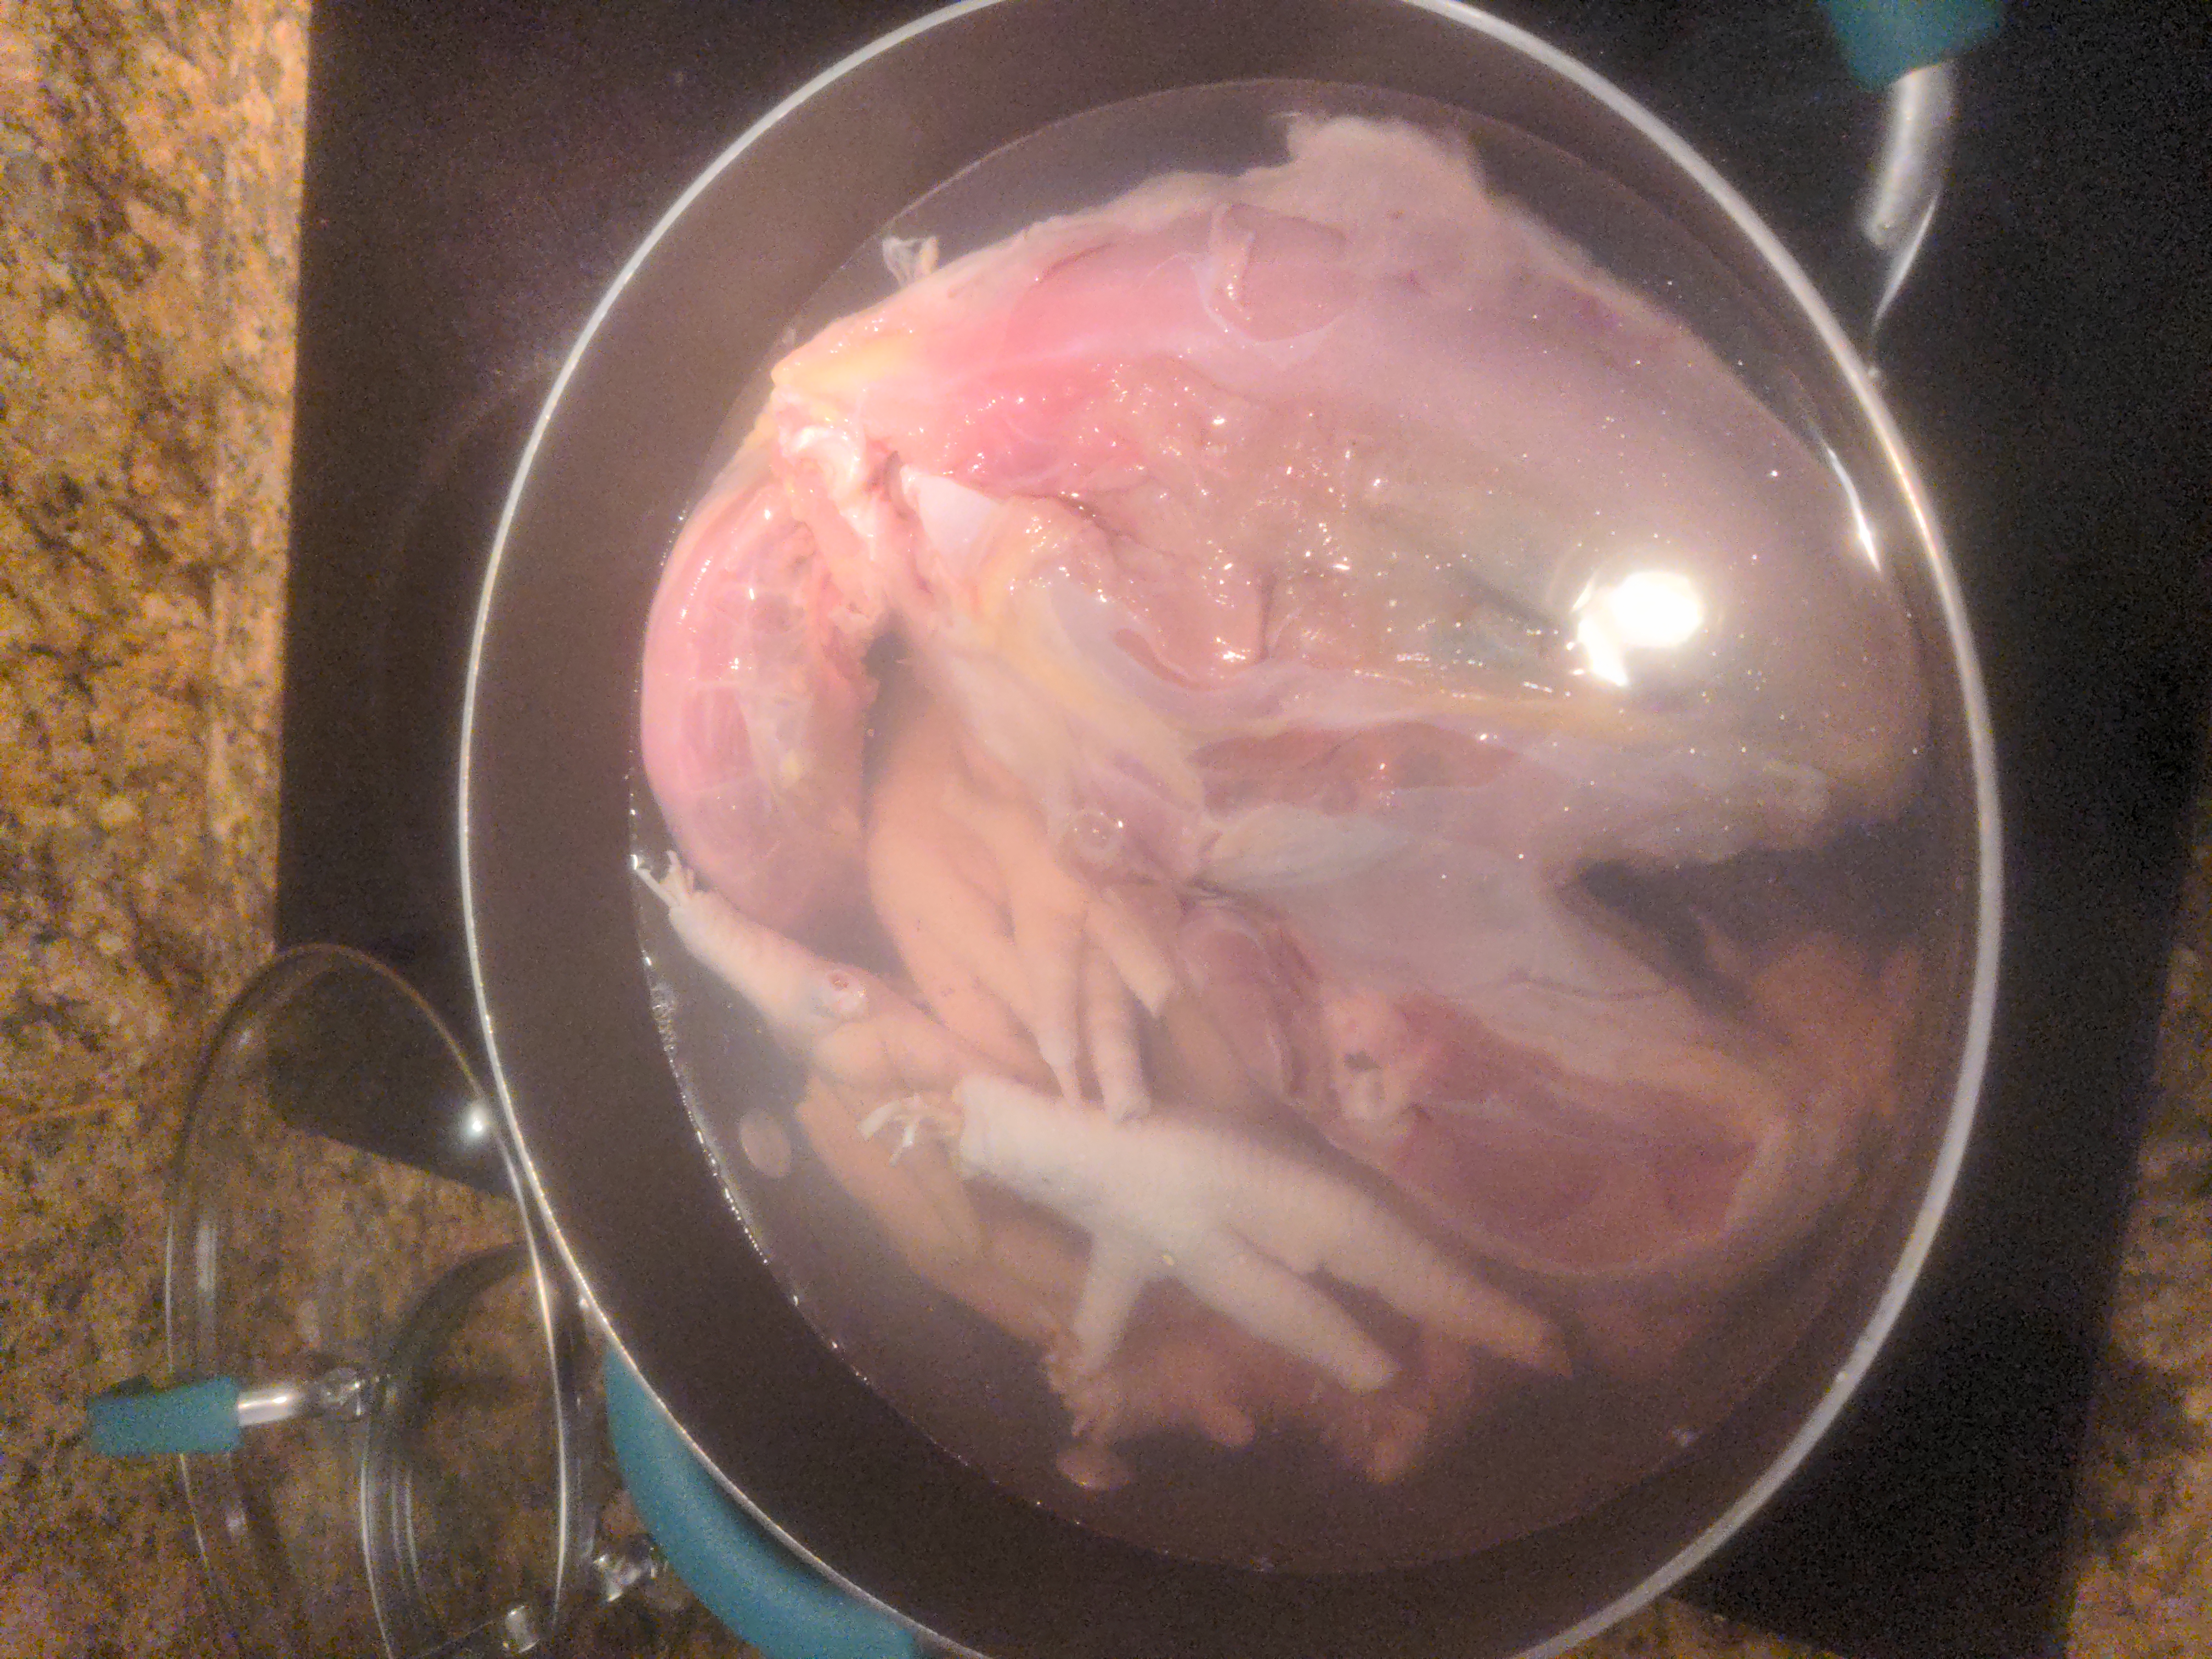
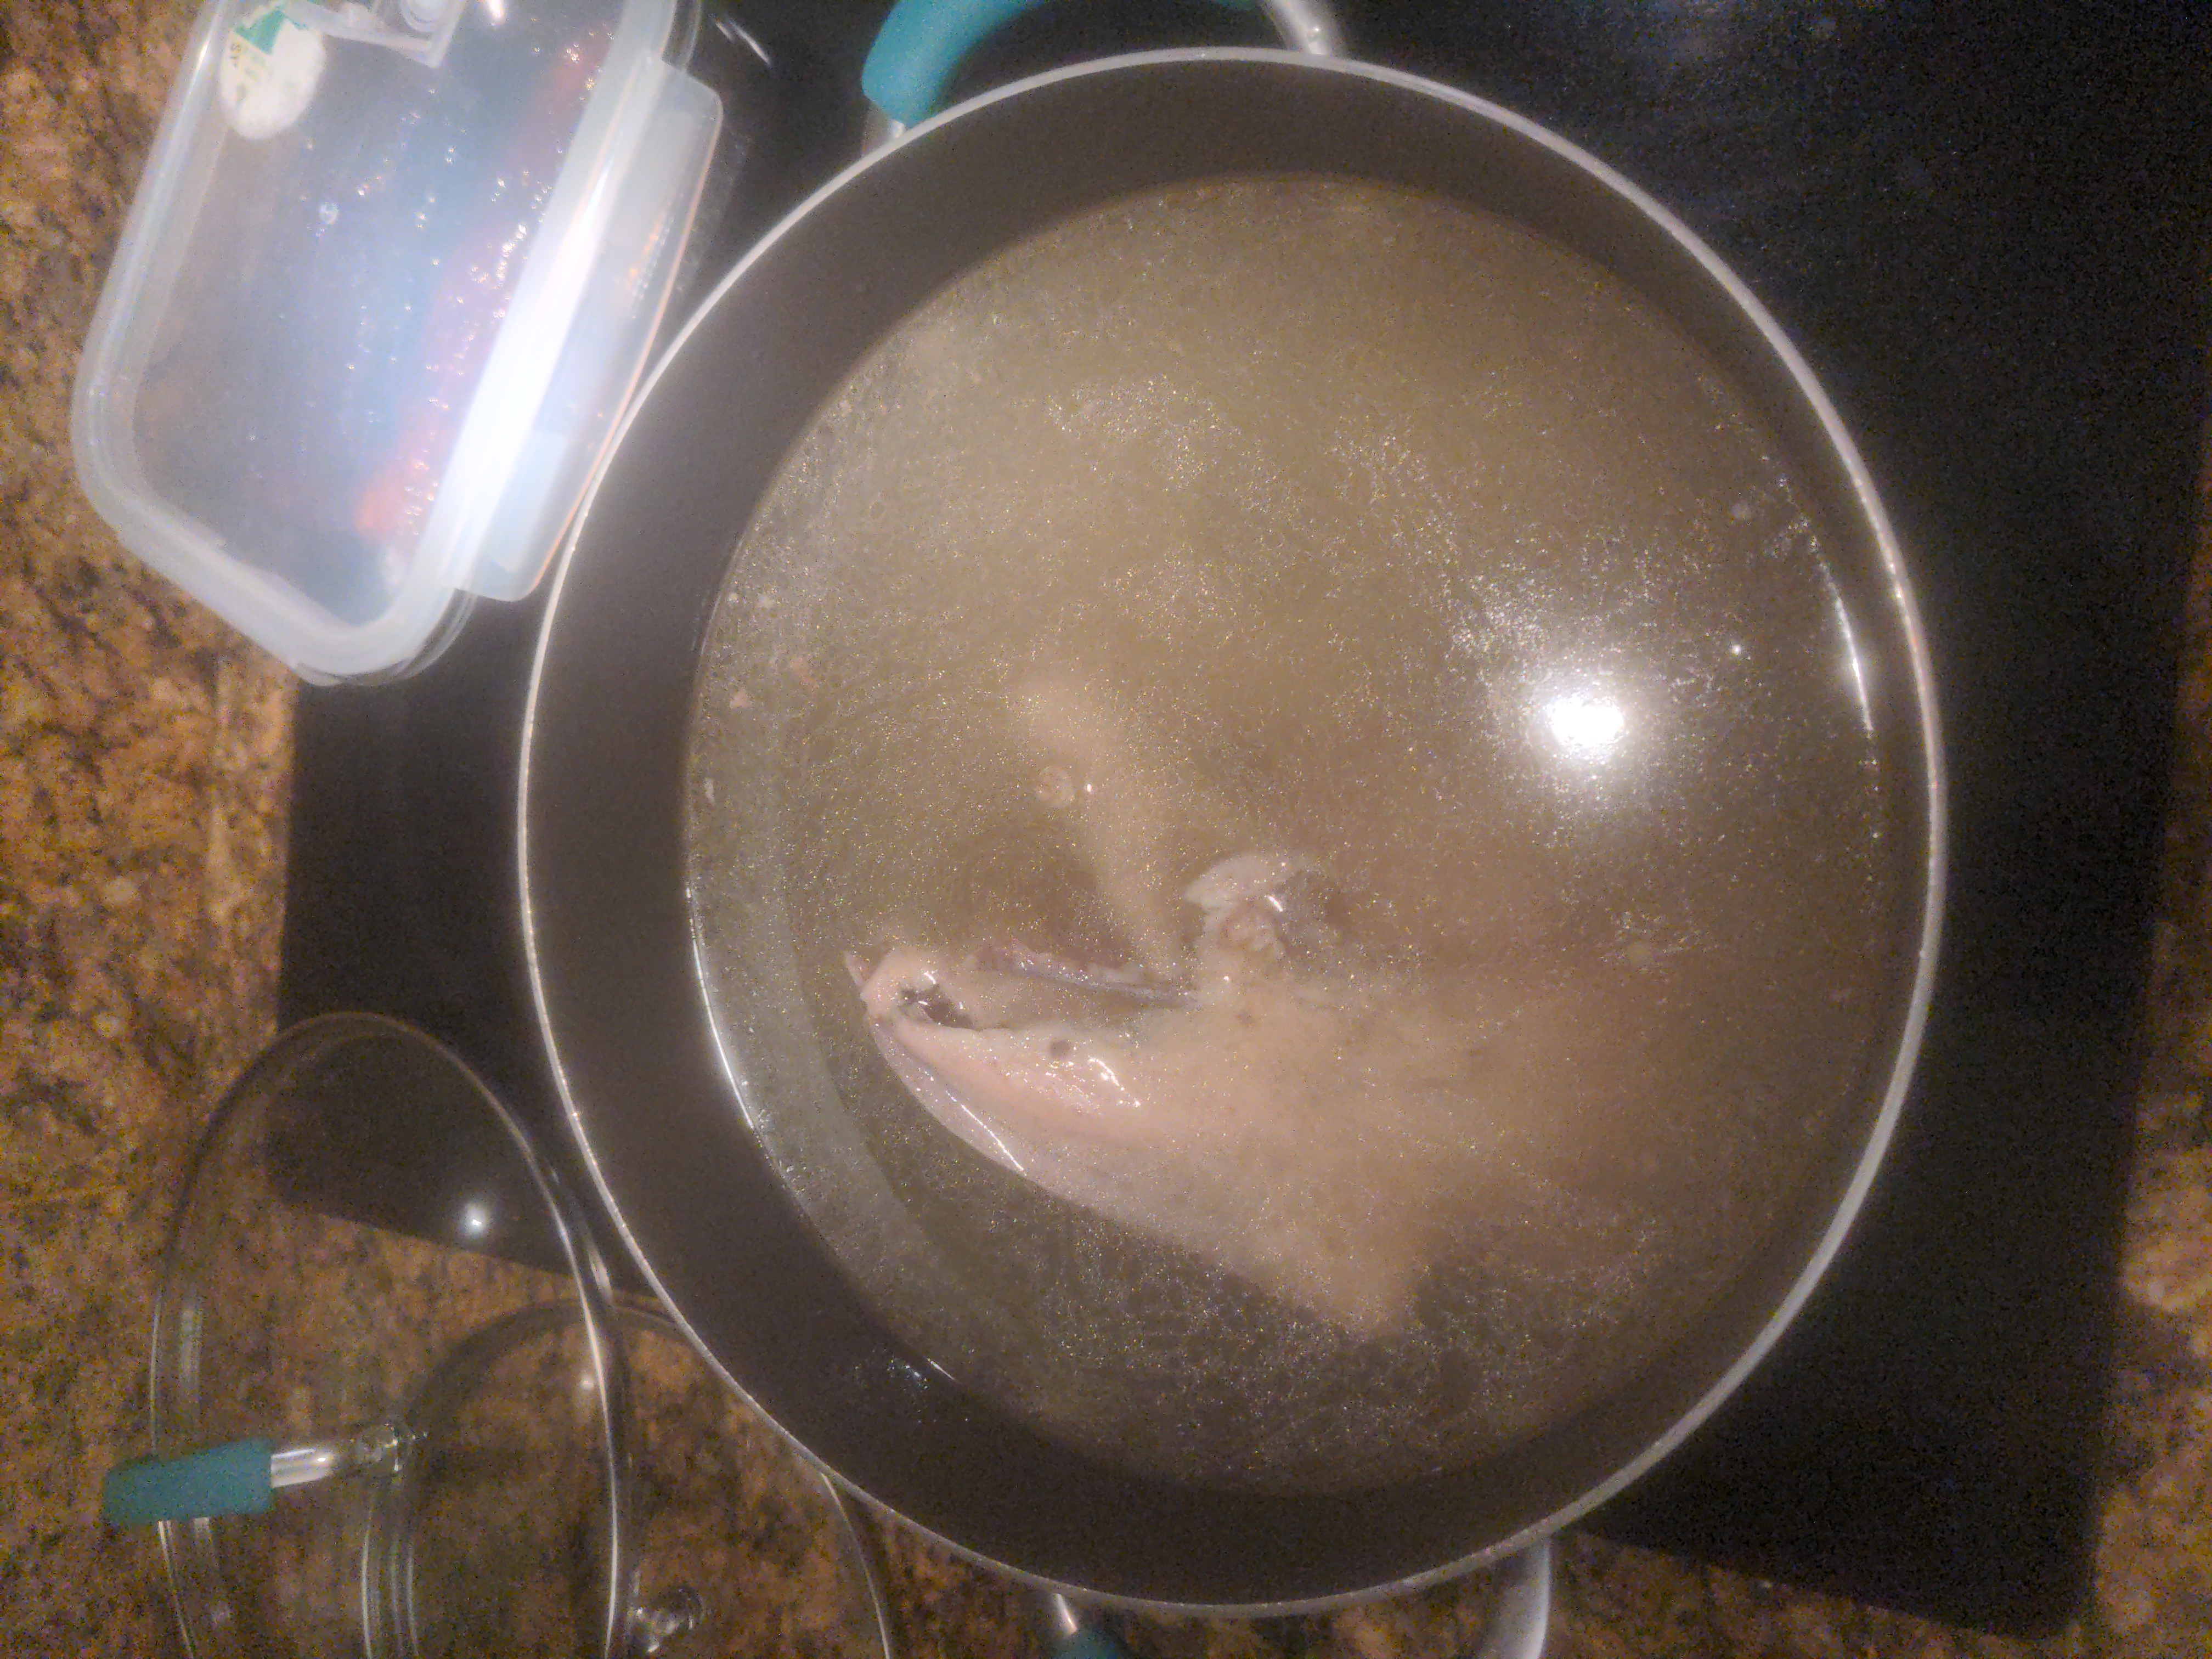
Once the scum is skimmed, wash the bones under water and then transfer to a pressure cooker, cooking at least 2 (for chicken, or 3 for pork) hours under pressure.
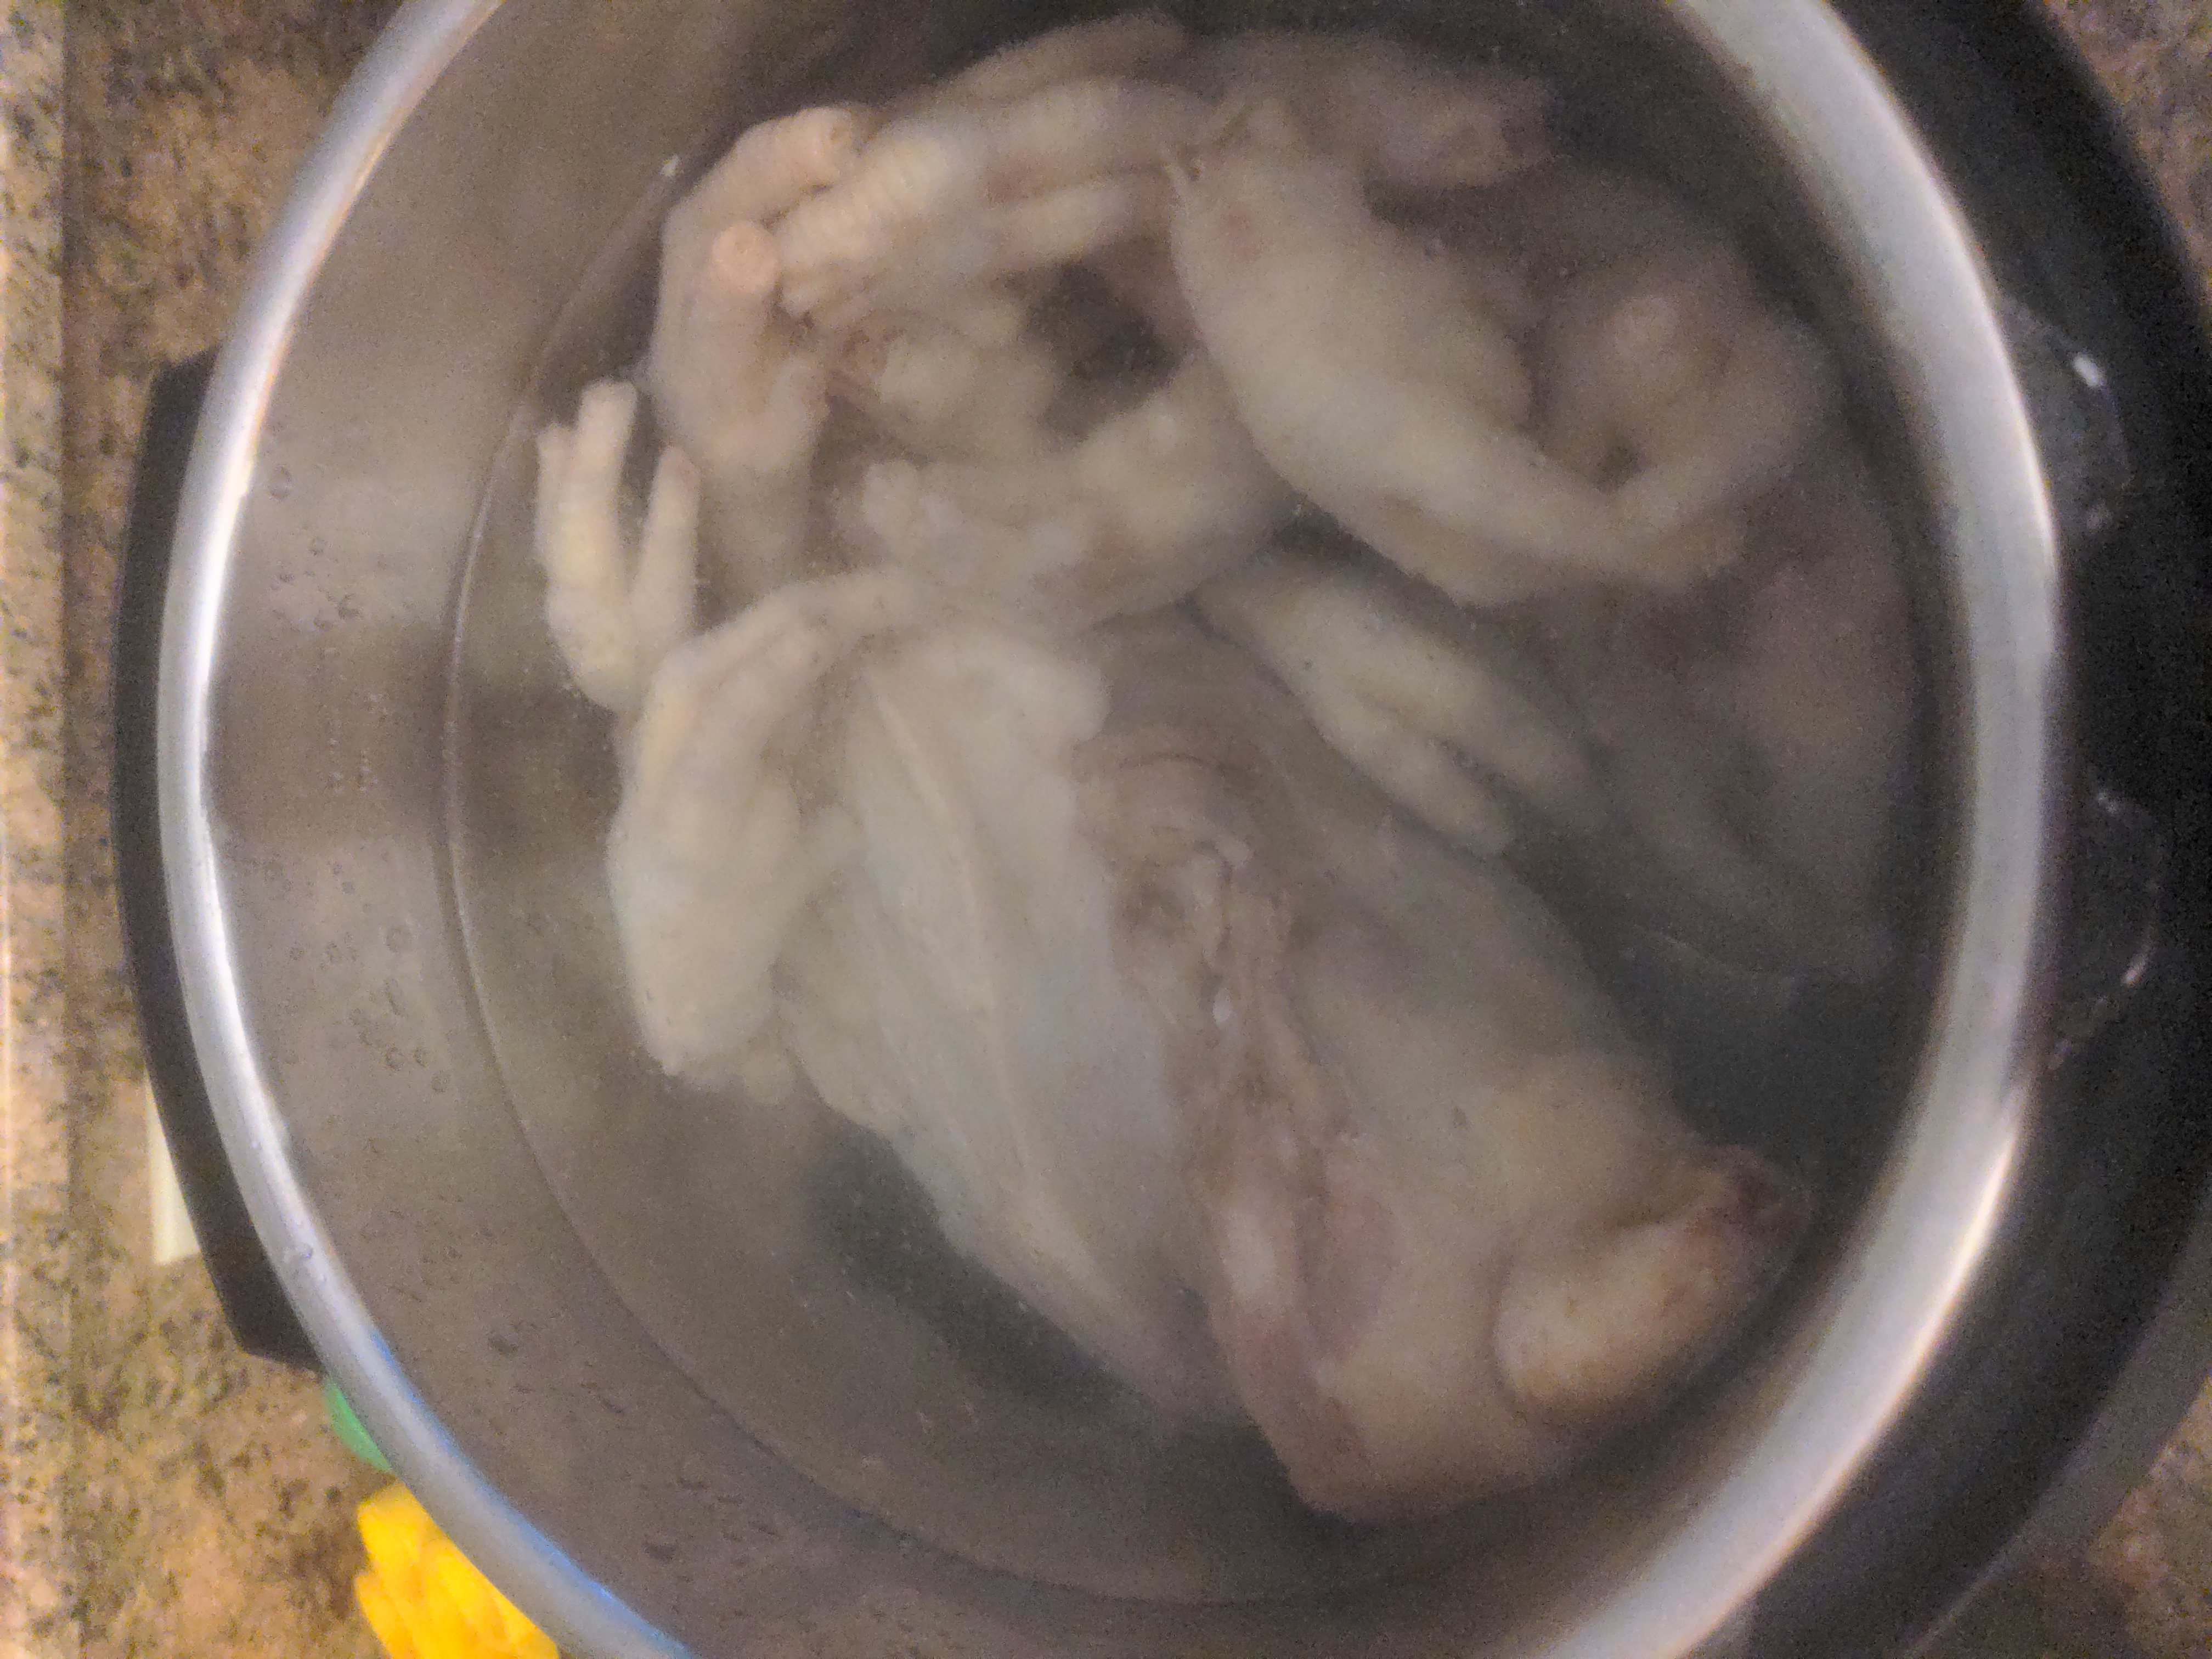

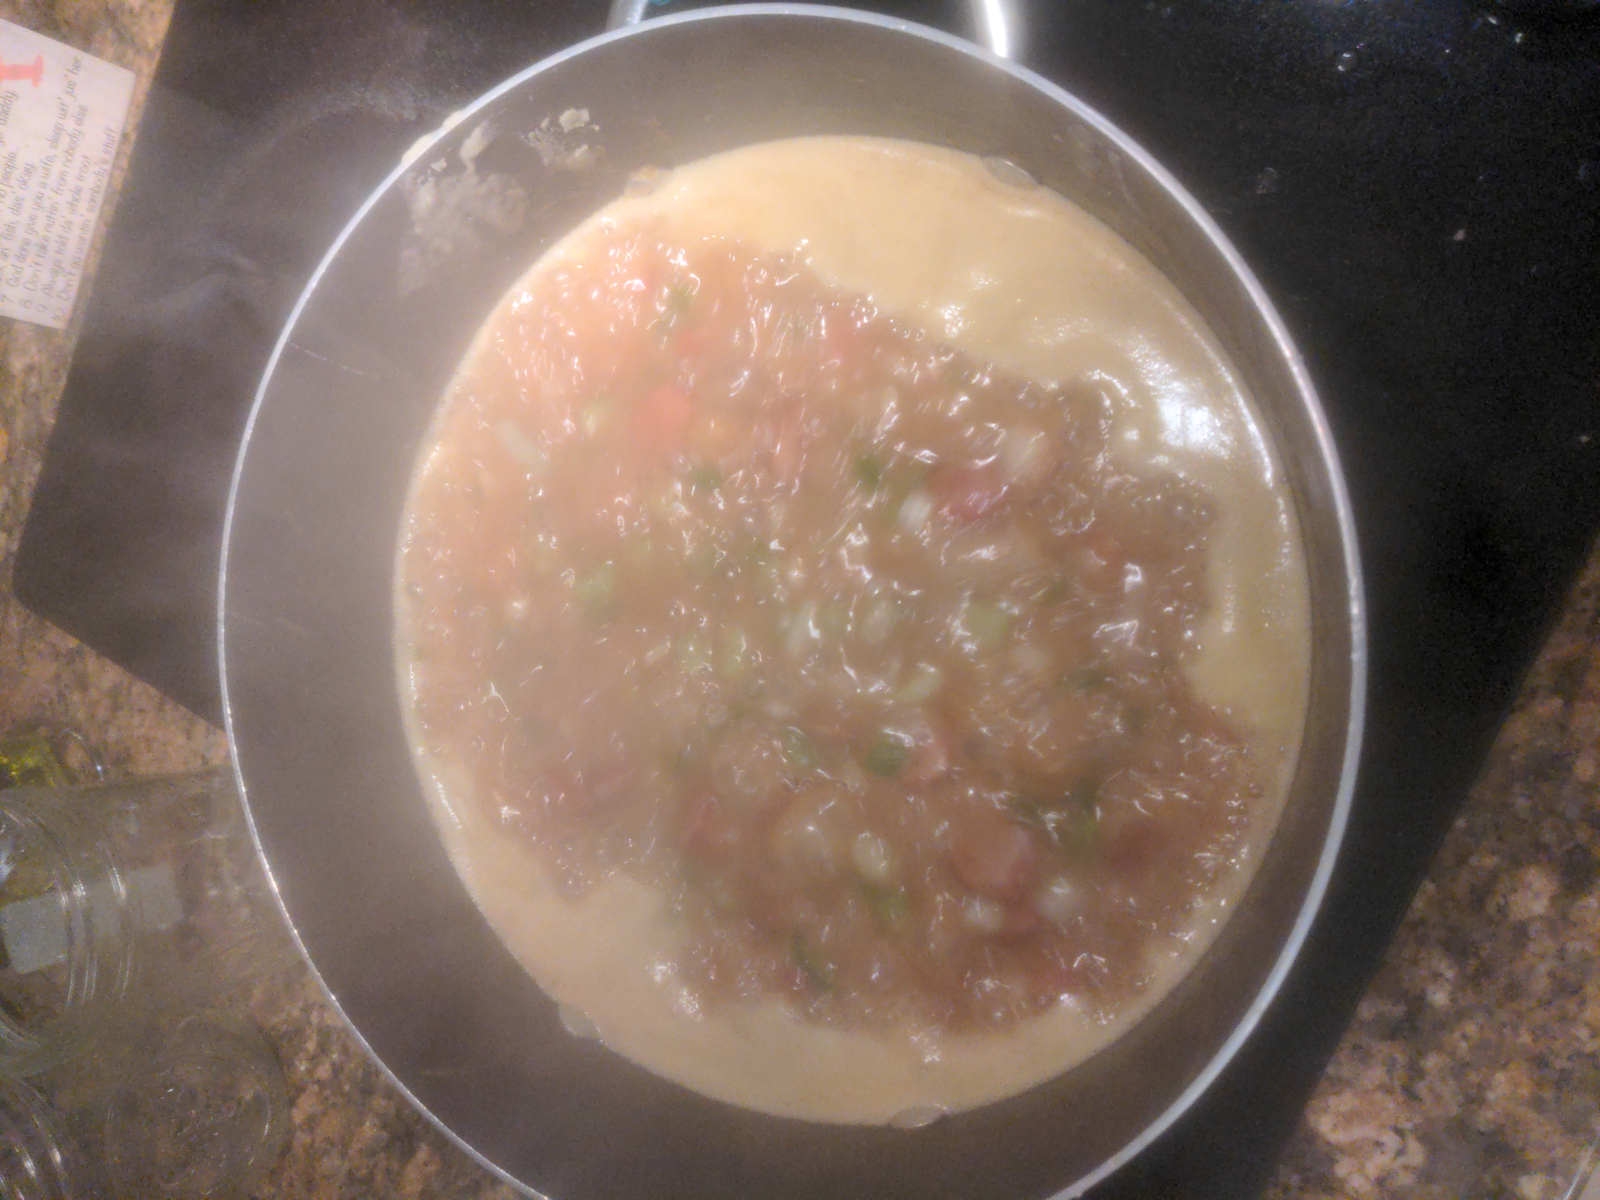
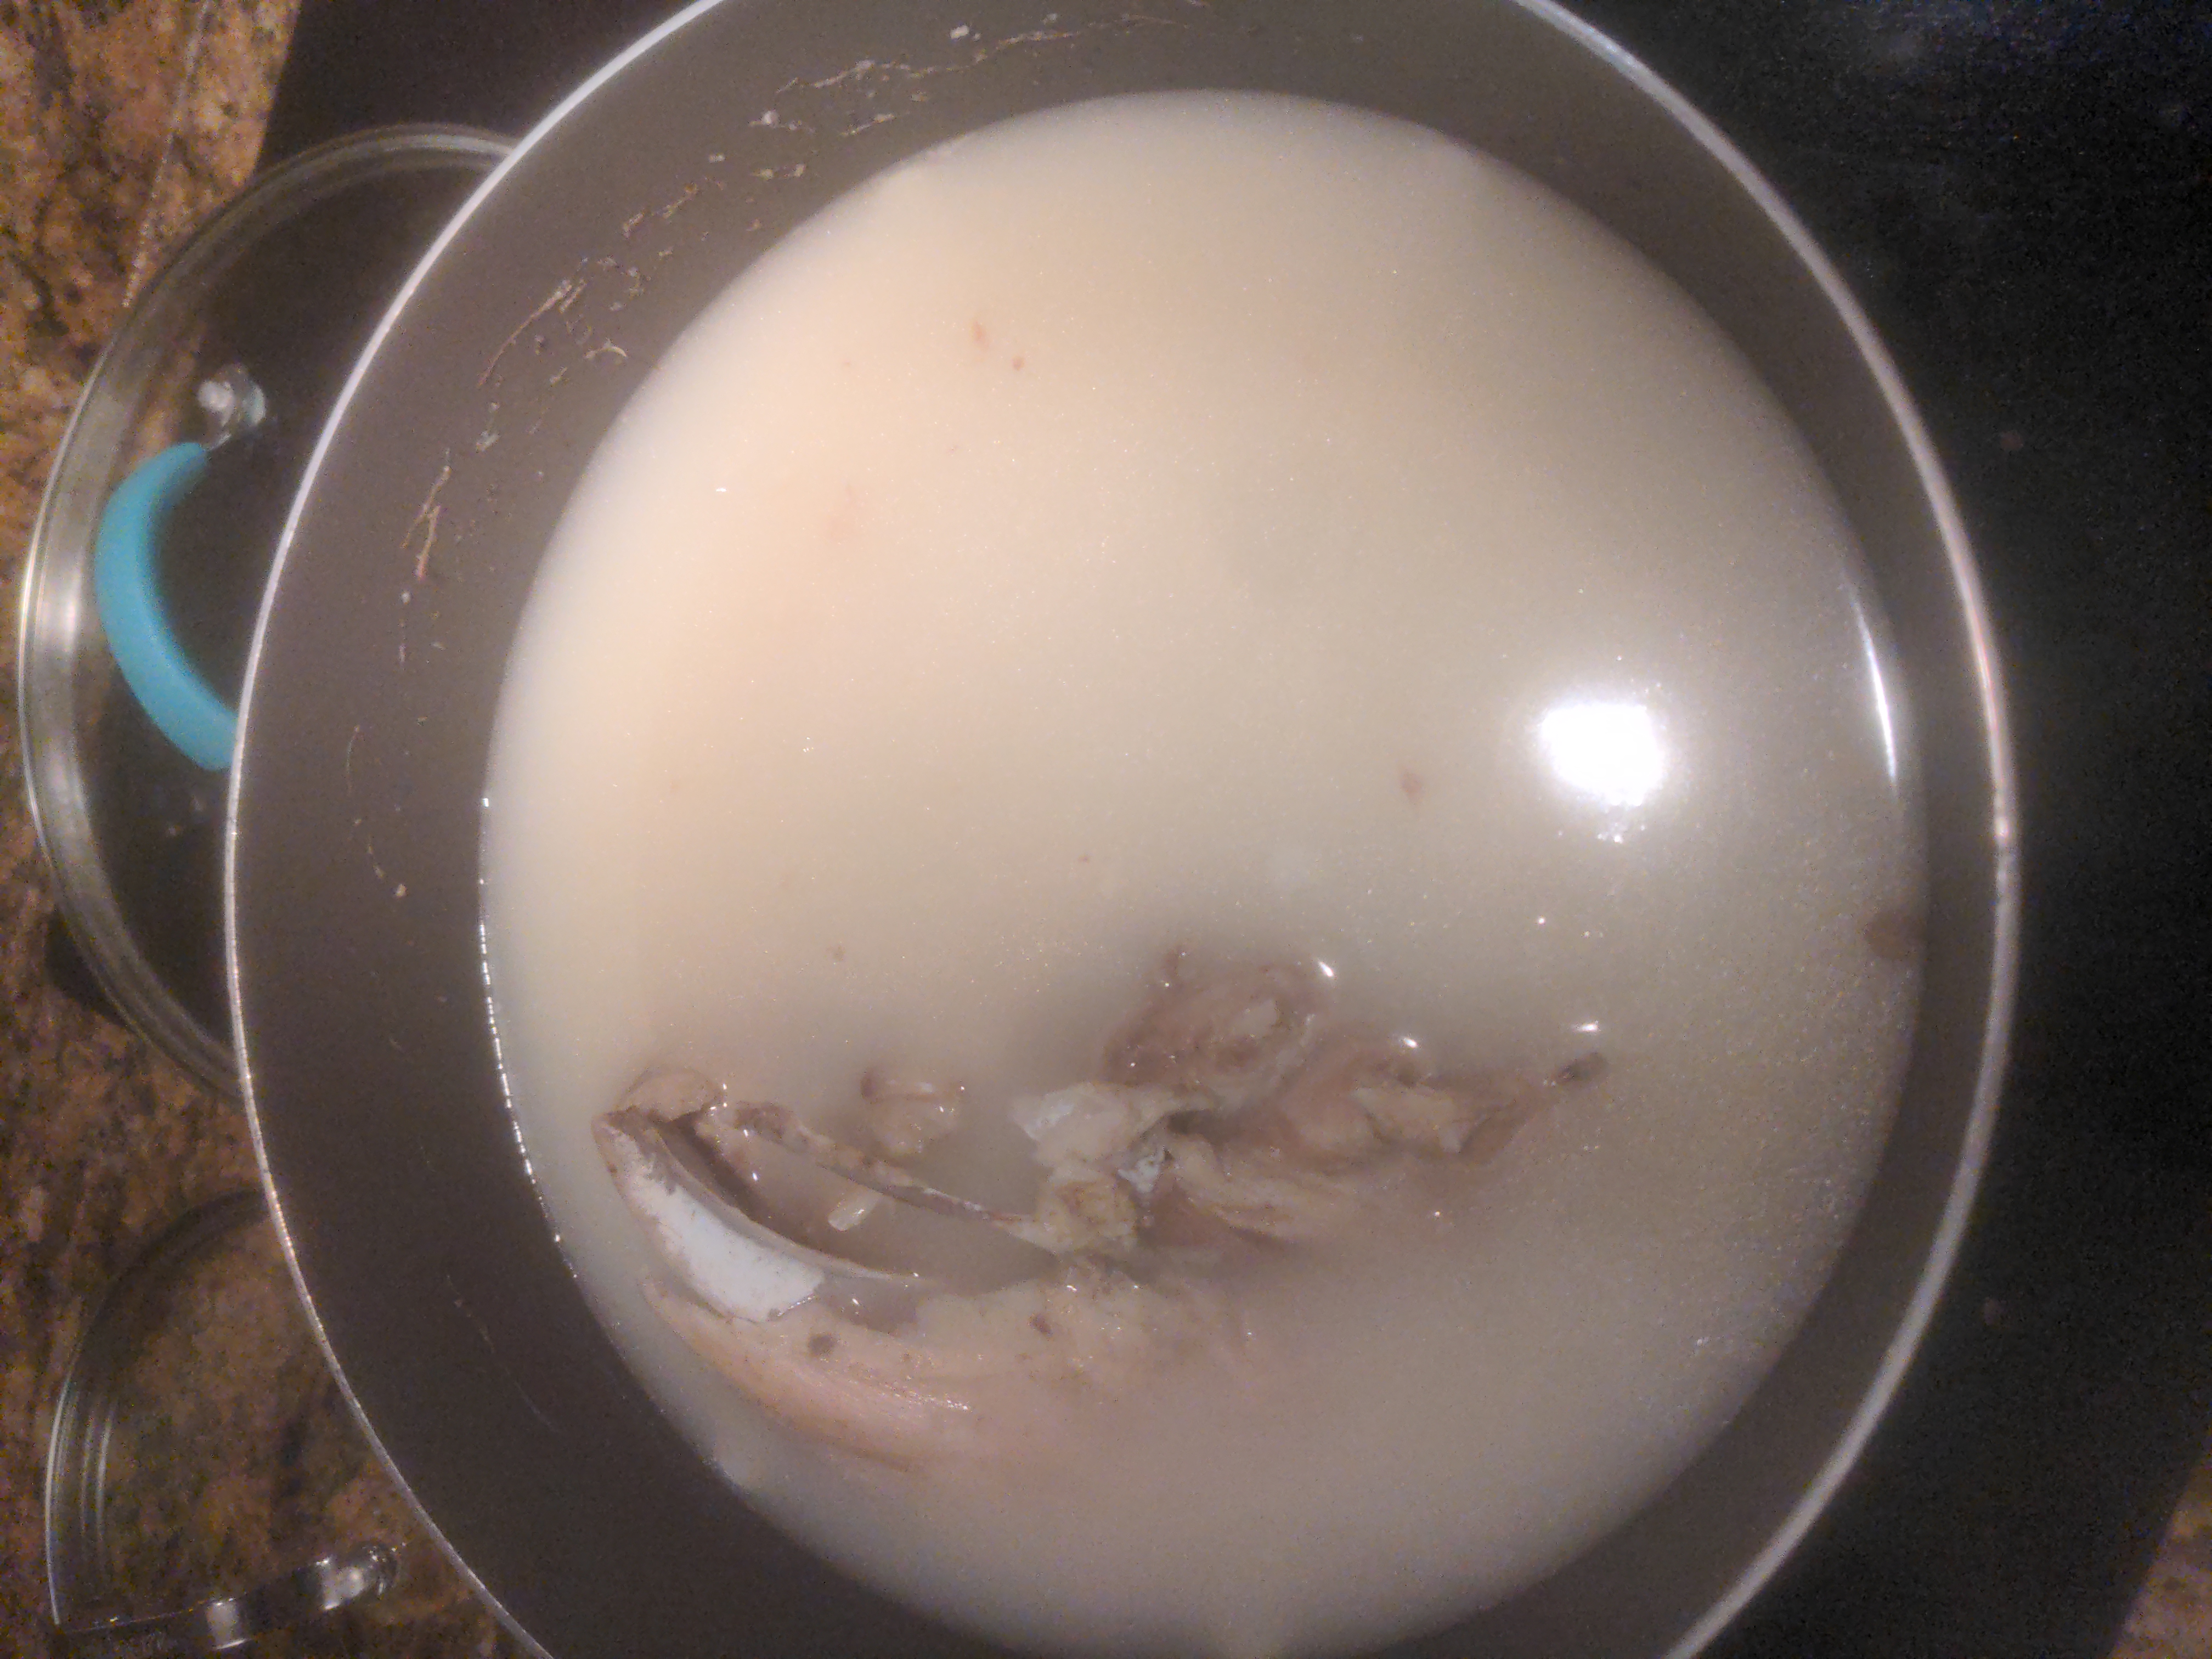
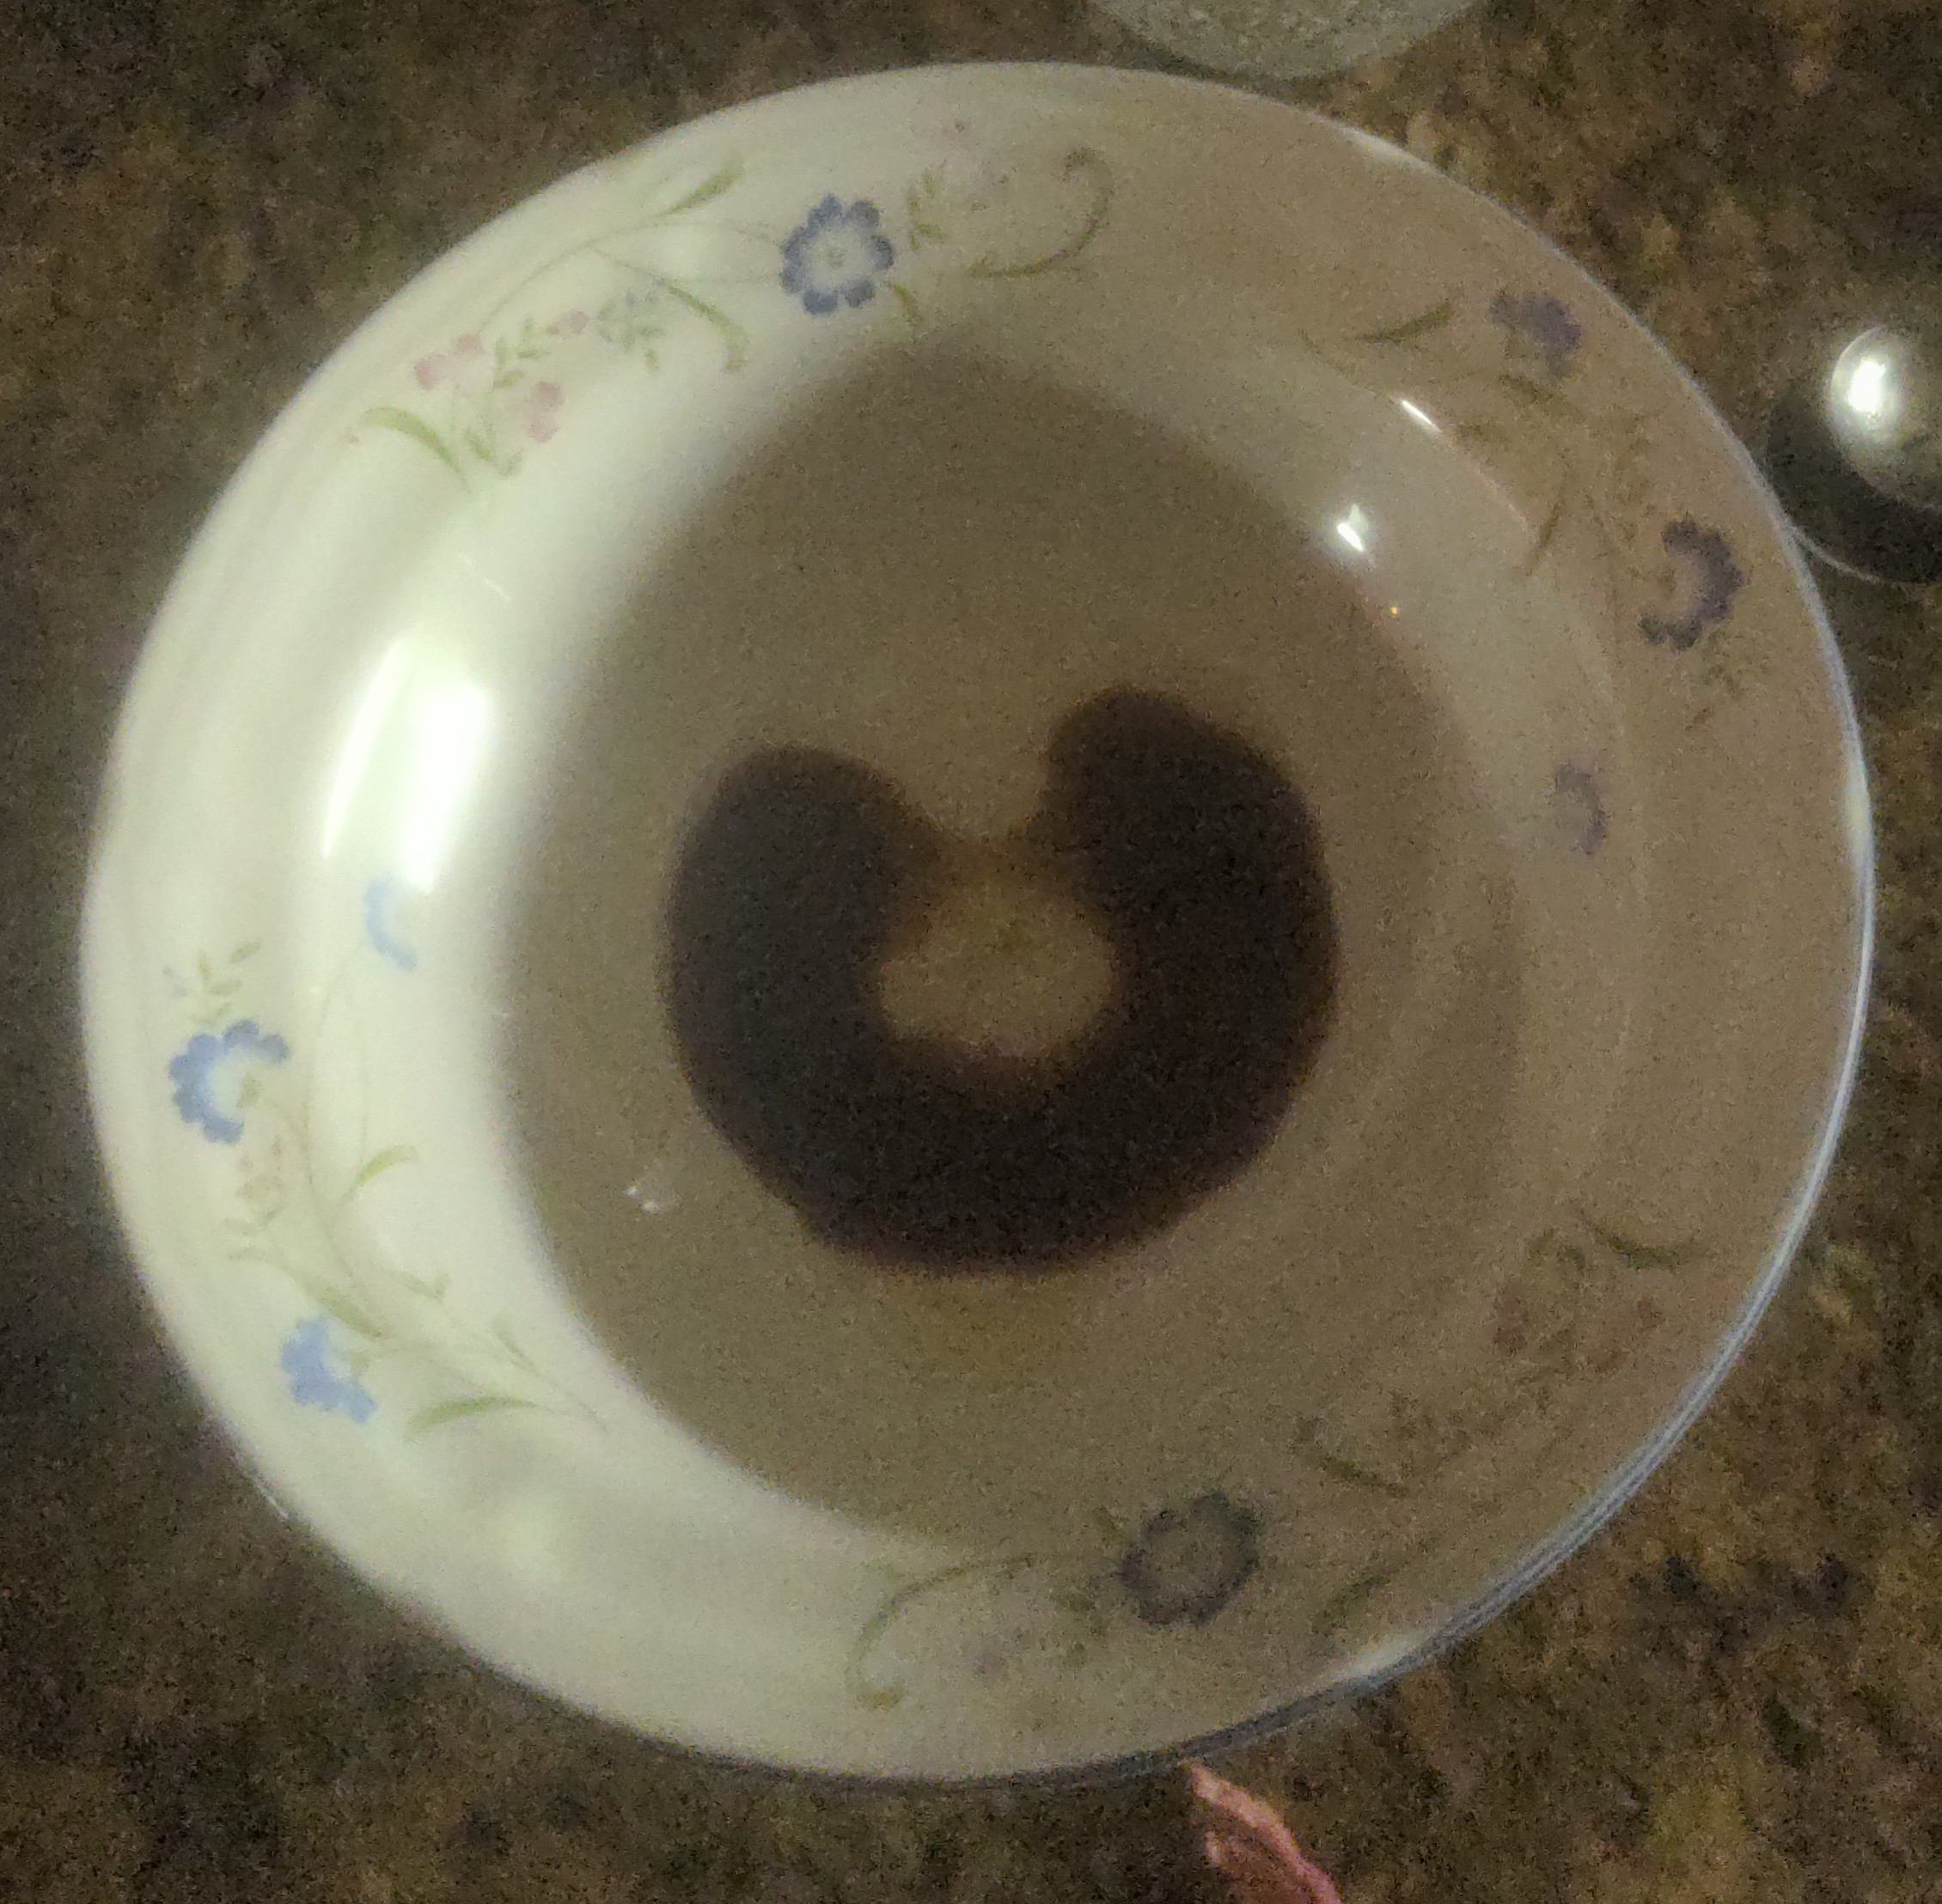
When the pressure cooking is done, we can finally enjoy our great- wait why does it look horrible?
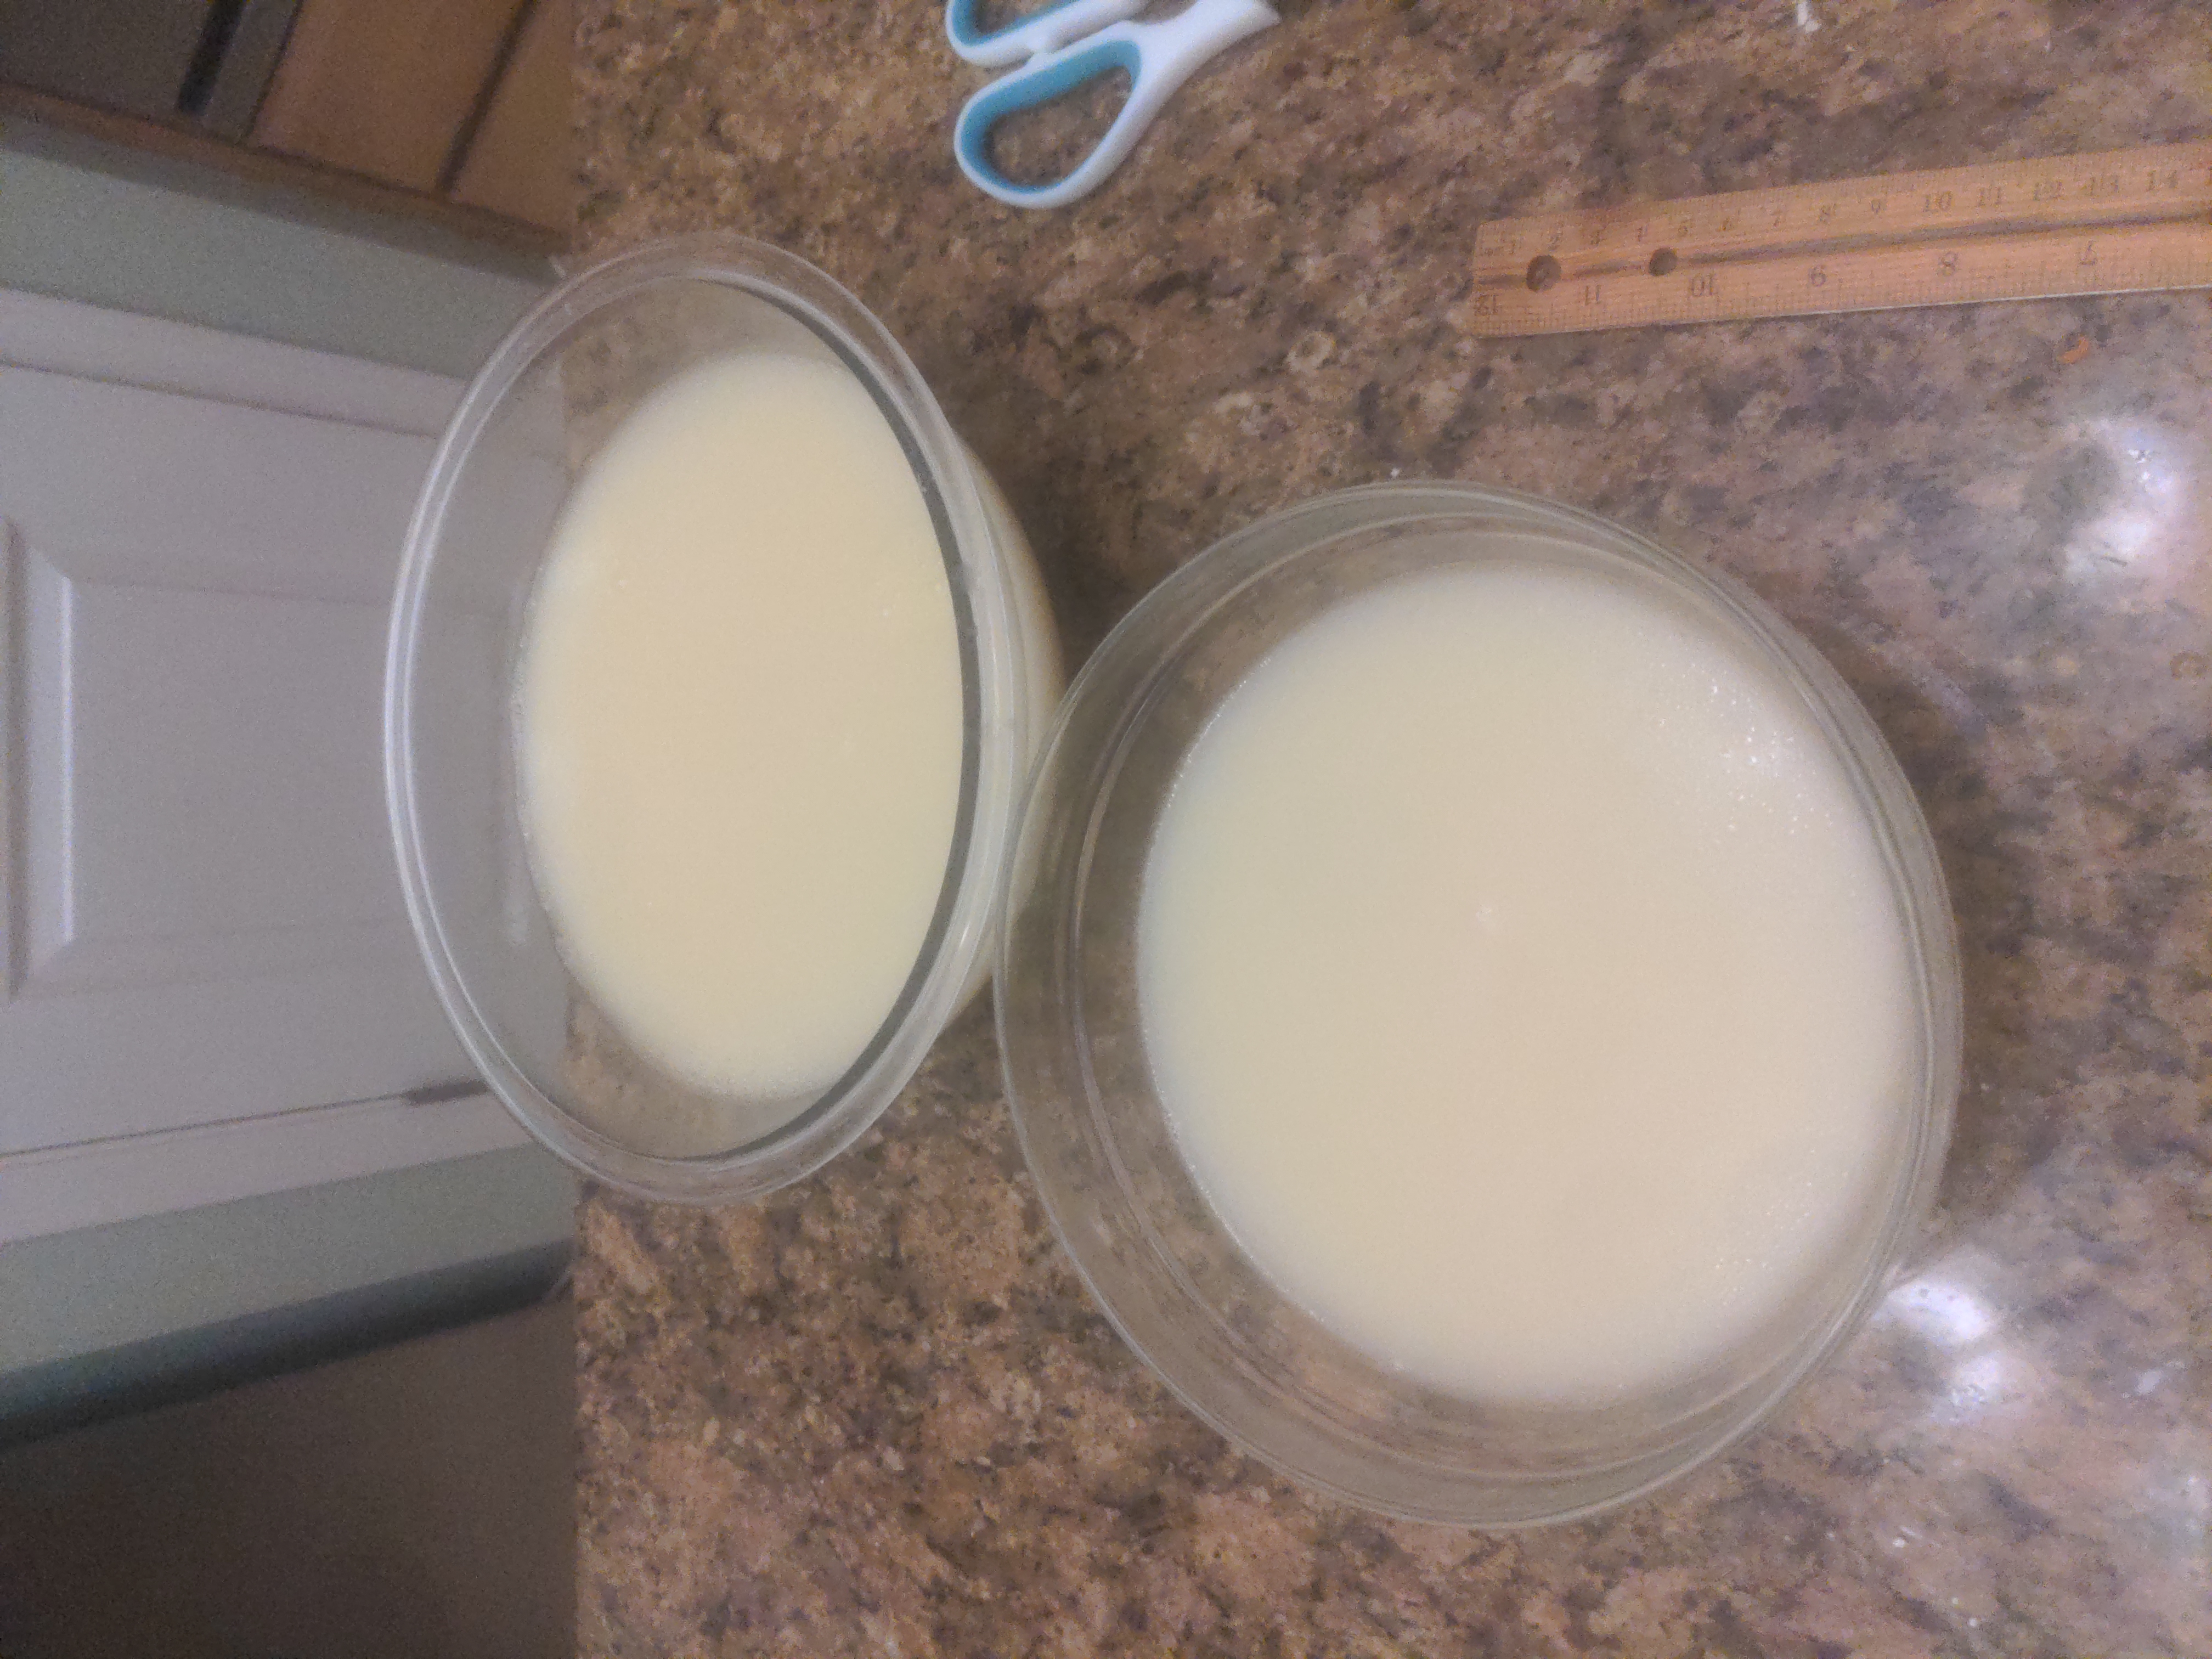
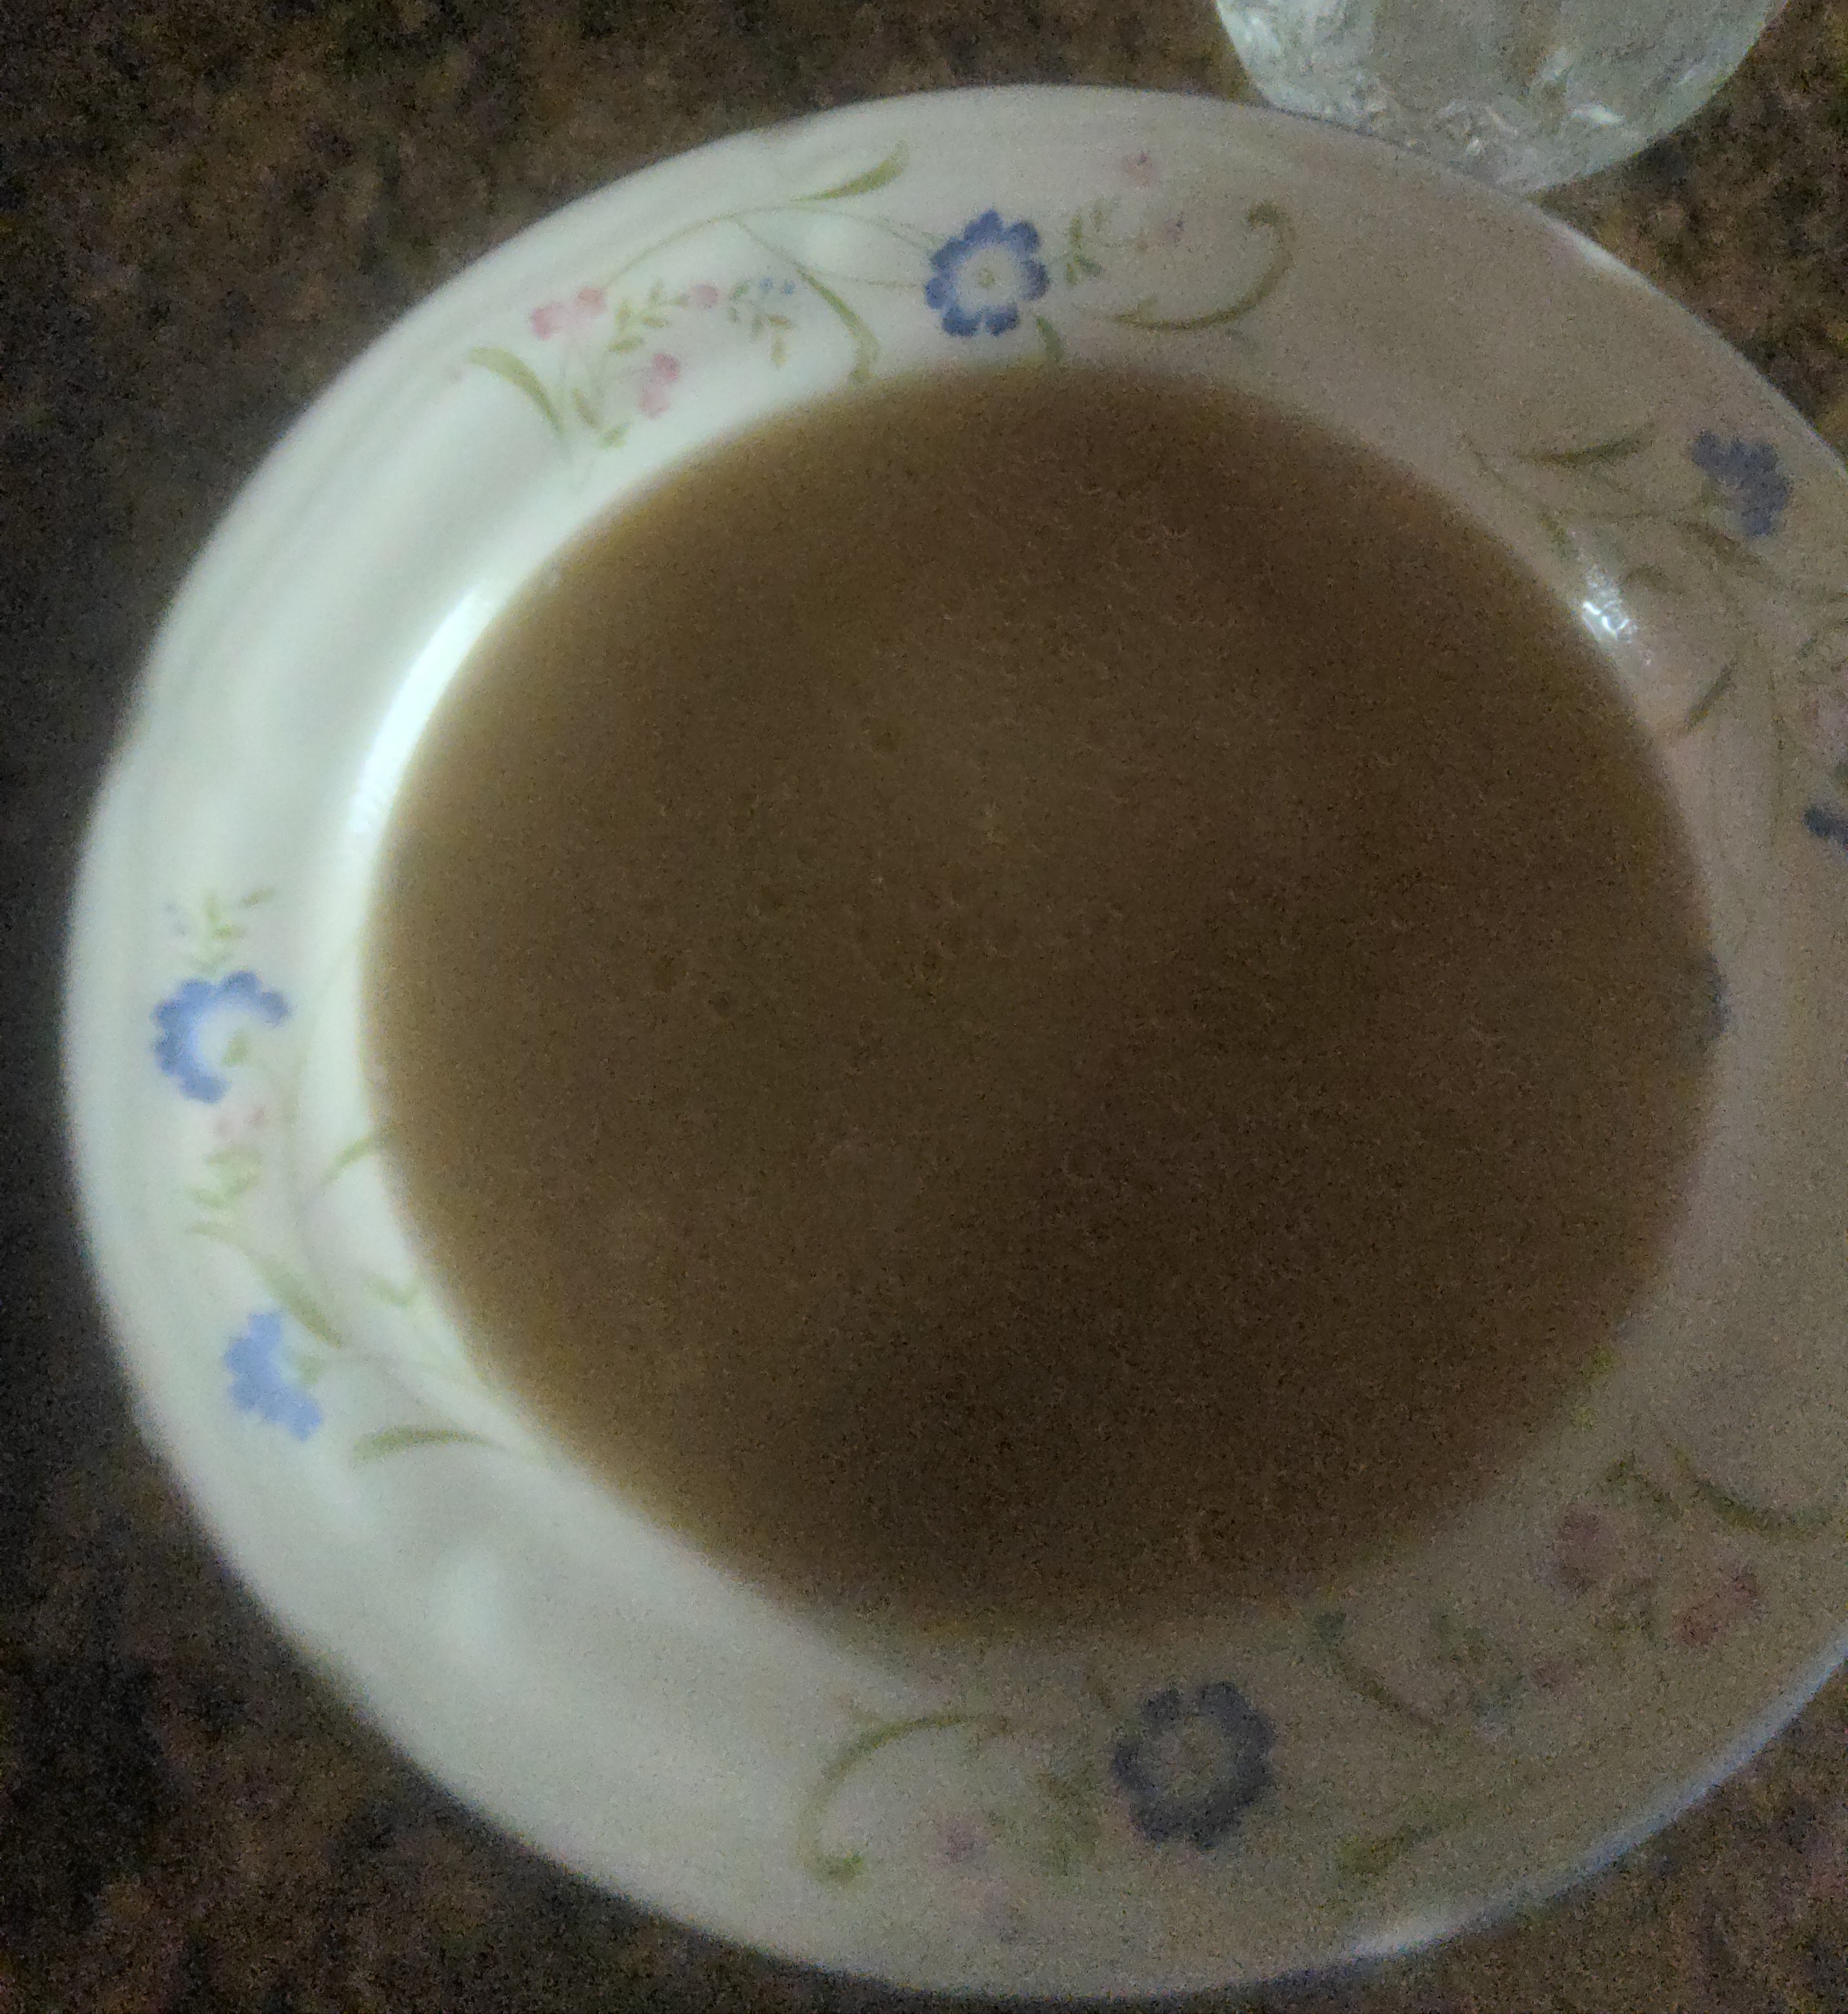
The answer is because the stock is not emulsified. A large amount of protein, fat, gelatin, etc. have been released in cooking but are not integrated into the water, leaving us with a grey cloudy mess. The next step is to transfer to a stock pot and boil with the bones at a rolling boil for one hour. This is the same time I used in my gumbo recipe-it's a good idea to go for at least an hour to make a good emulsion where fat is evenly spread among the water. Please don't try an immersion blender.
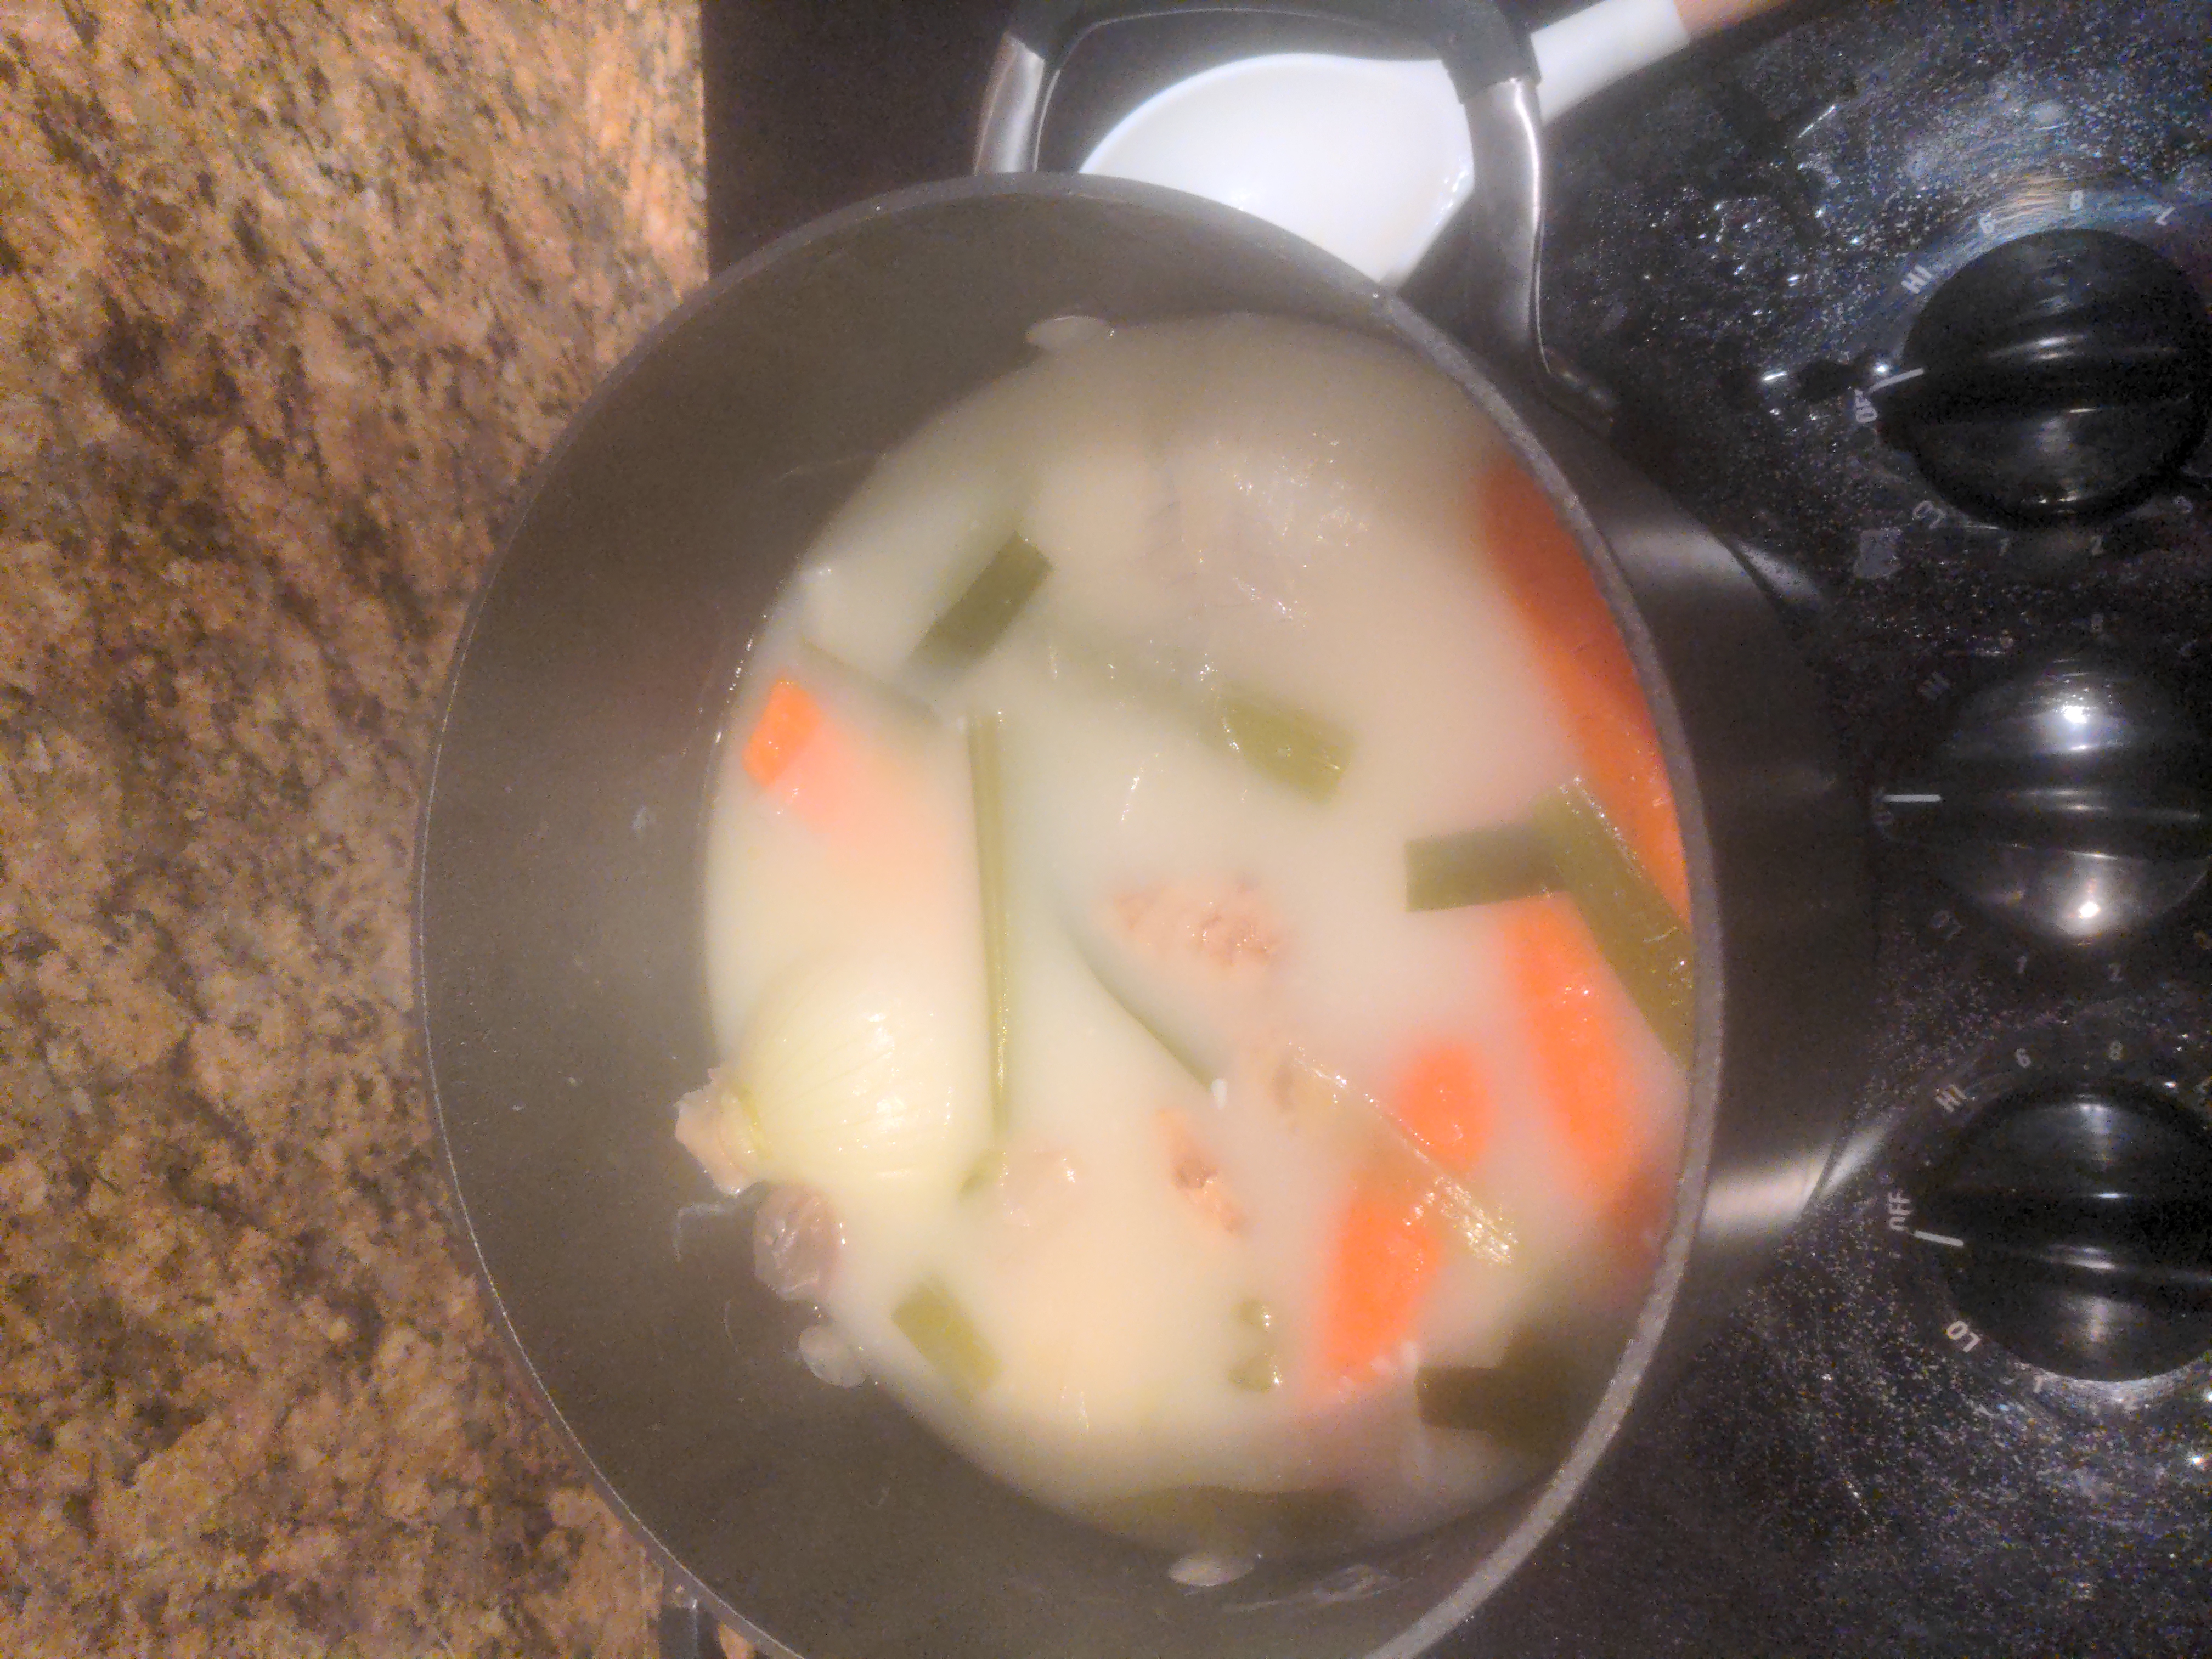
After an hour the emulsion is complete (notice the drastic change in appearance!) and we add aromatics - onion, garlic, scallion, carrot, celery, and ginger - to enhance the flavour profile. I go heavy on aromatics but that is also personal preference.
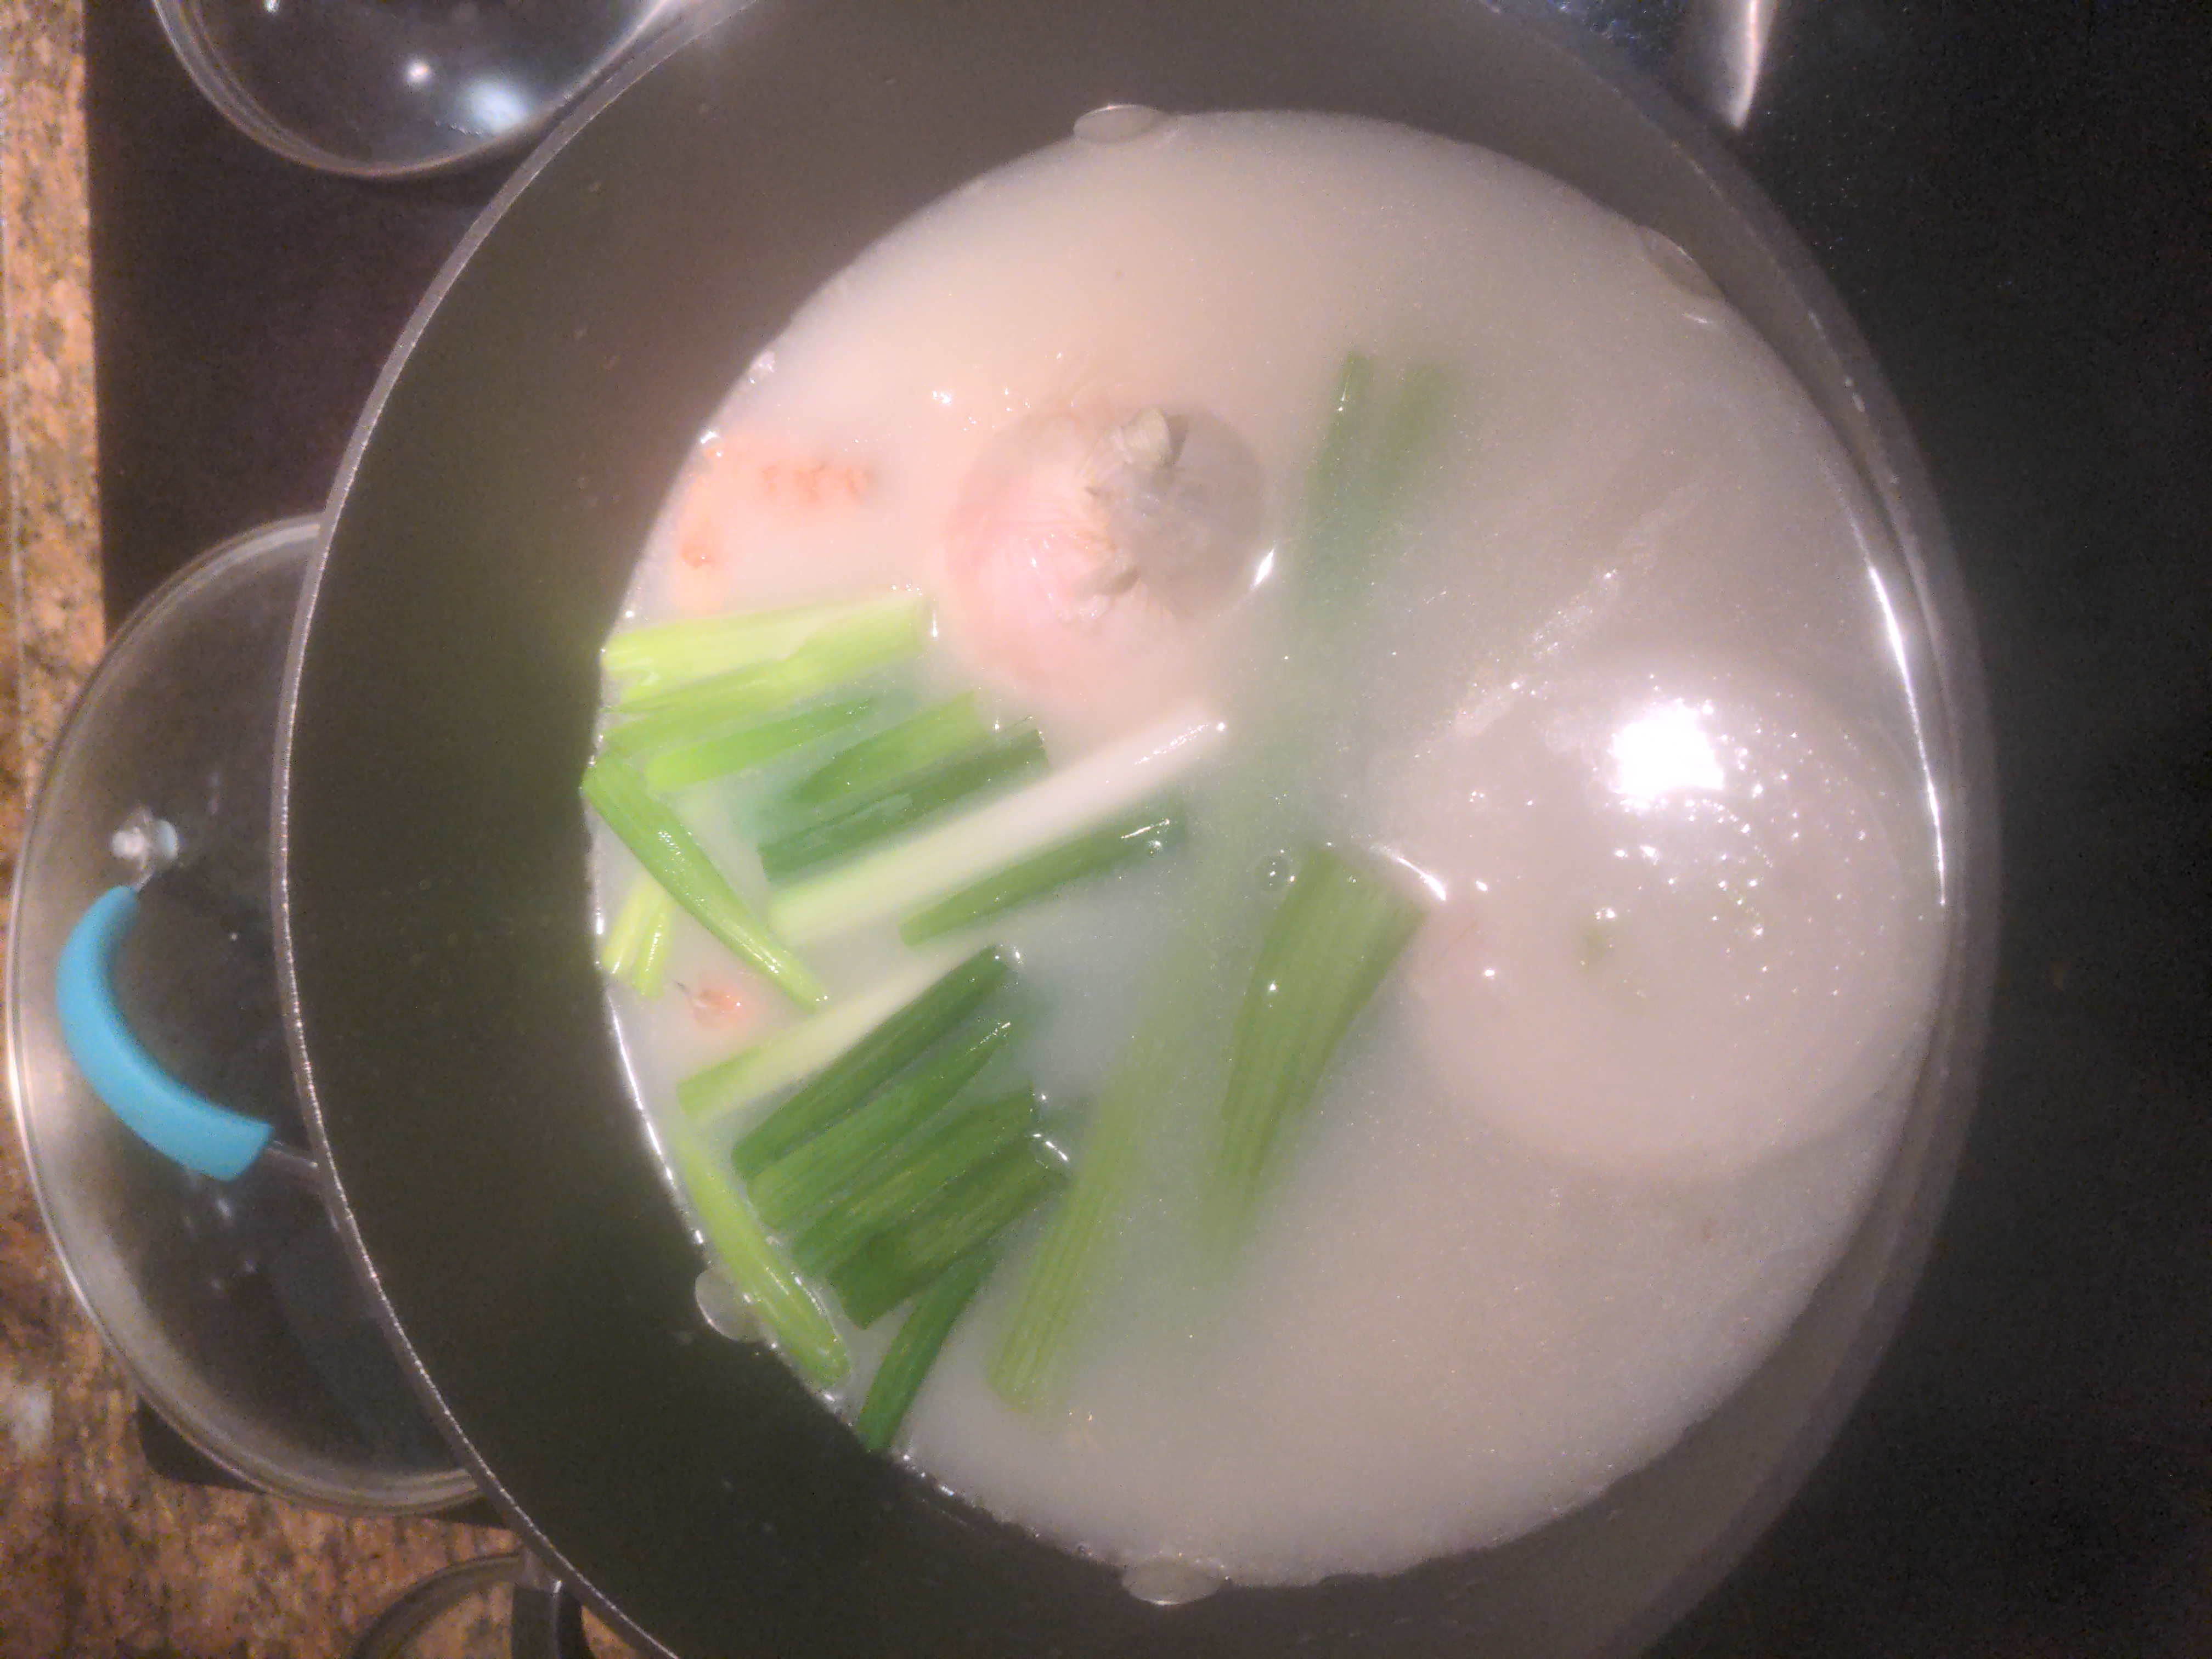
One our of cooking is peak infusion time for veggies, so we set the stock aside and begin work on our tare.
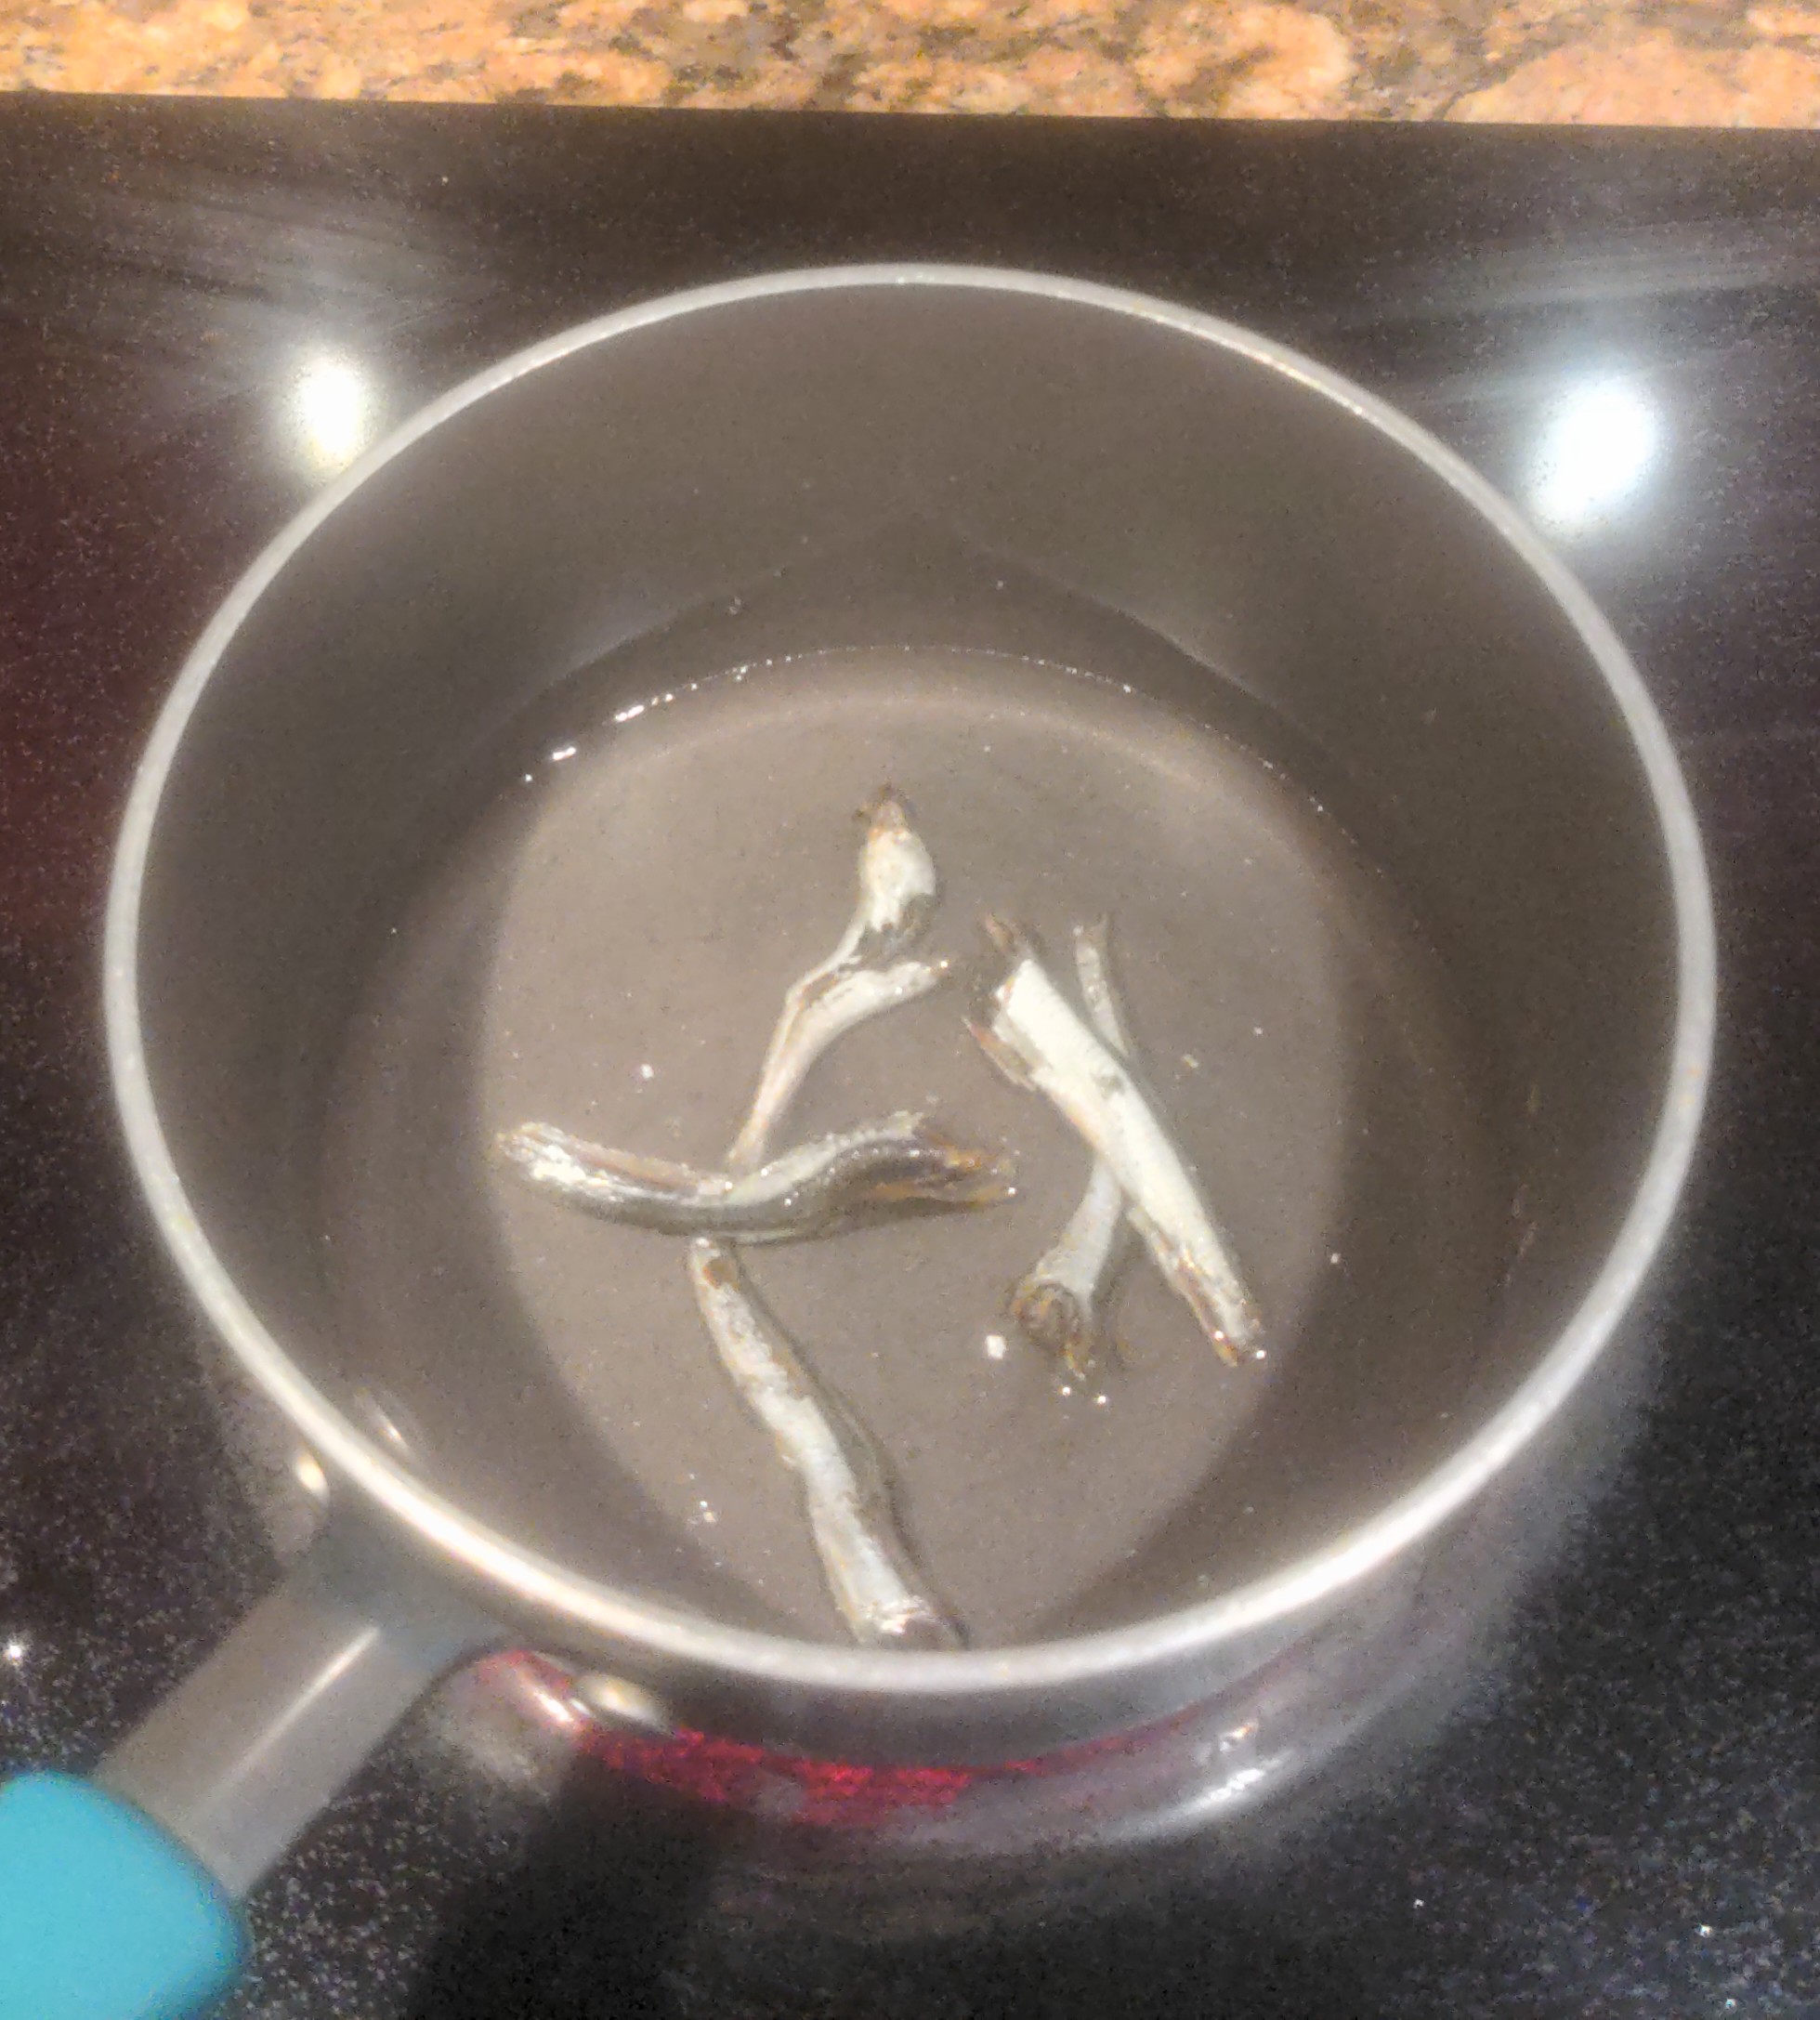
Tare is the broth seasoning of ramen. You'll notice that I didn't add any salt or pepper yet and this is intentional. A few teaspoons of tare is enough to season a whole bowl of ramen. This facilitates the restaurant culture where combinations between stock and tare can be made for each customer's ticket. In our case we'll make shoyu or soy sauce tare. We begin by making niboshi dashi from dried sardines:
Now we add the rest of the ingredients - one part dashi, four parts dark soy sauce (the ordinary kind you find in stores), two parts light soy sauce, half a part sake and half a part mirin, half a part salt and a quarter part MSG. (Optionally, a quarter part oyster sauce may be added.) Finally, some green onion and ginger are added and we simmer on the stove in a saucepan for a couple hours.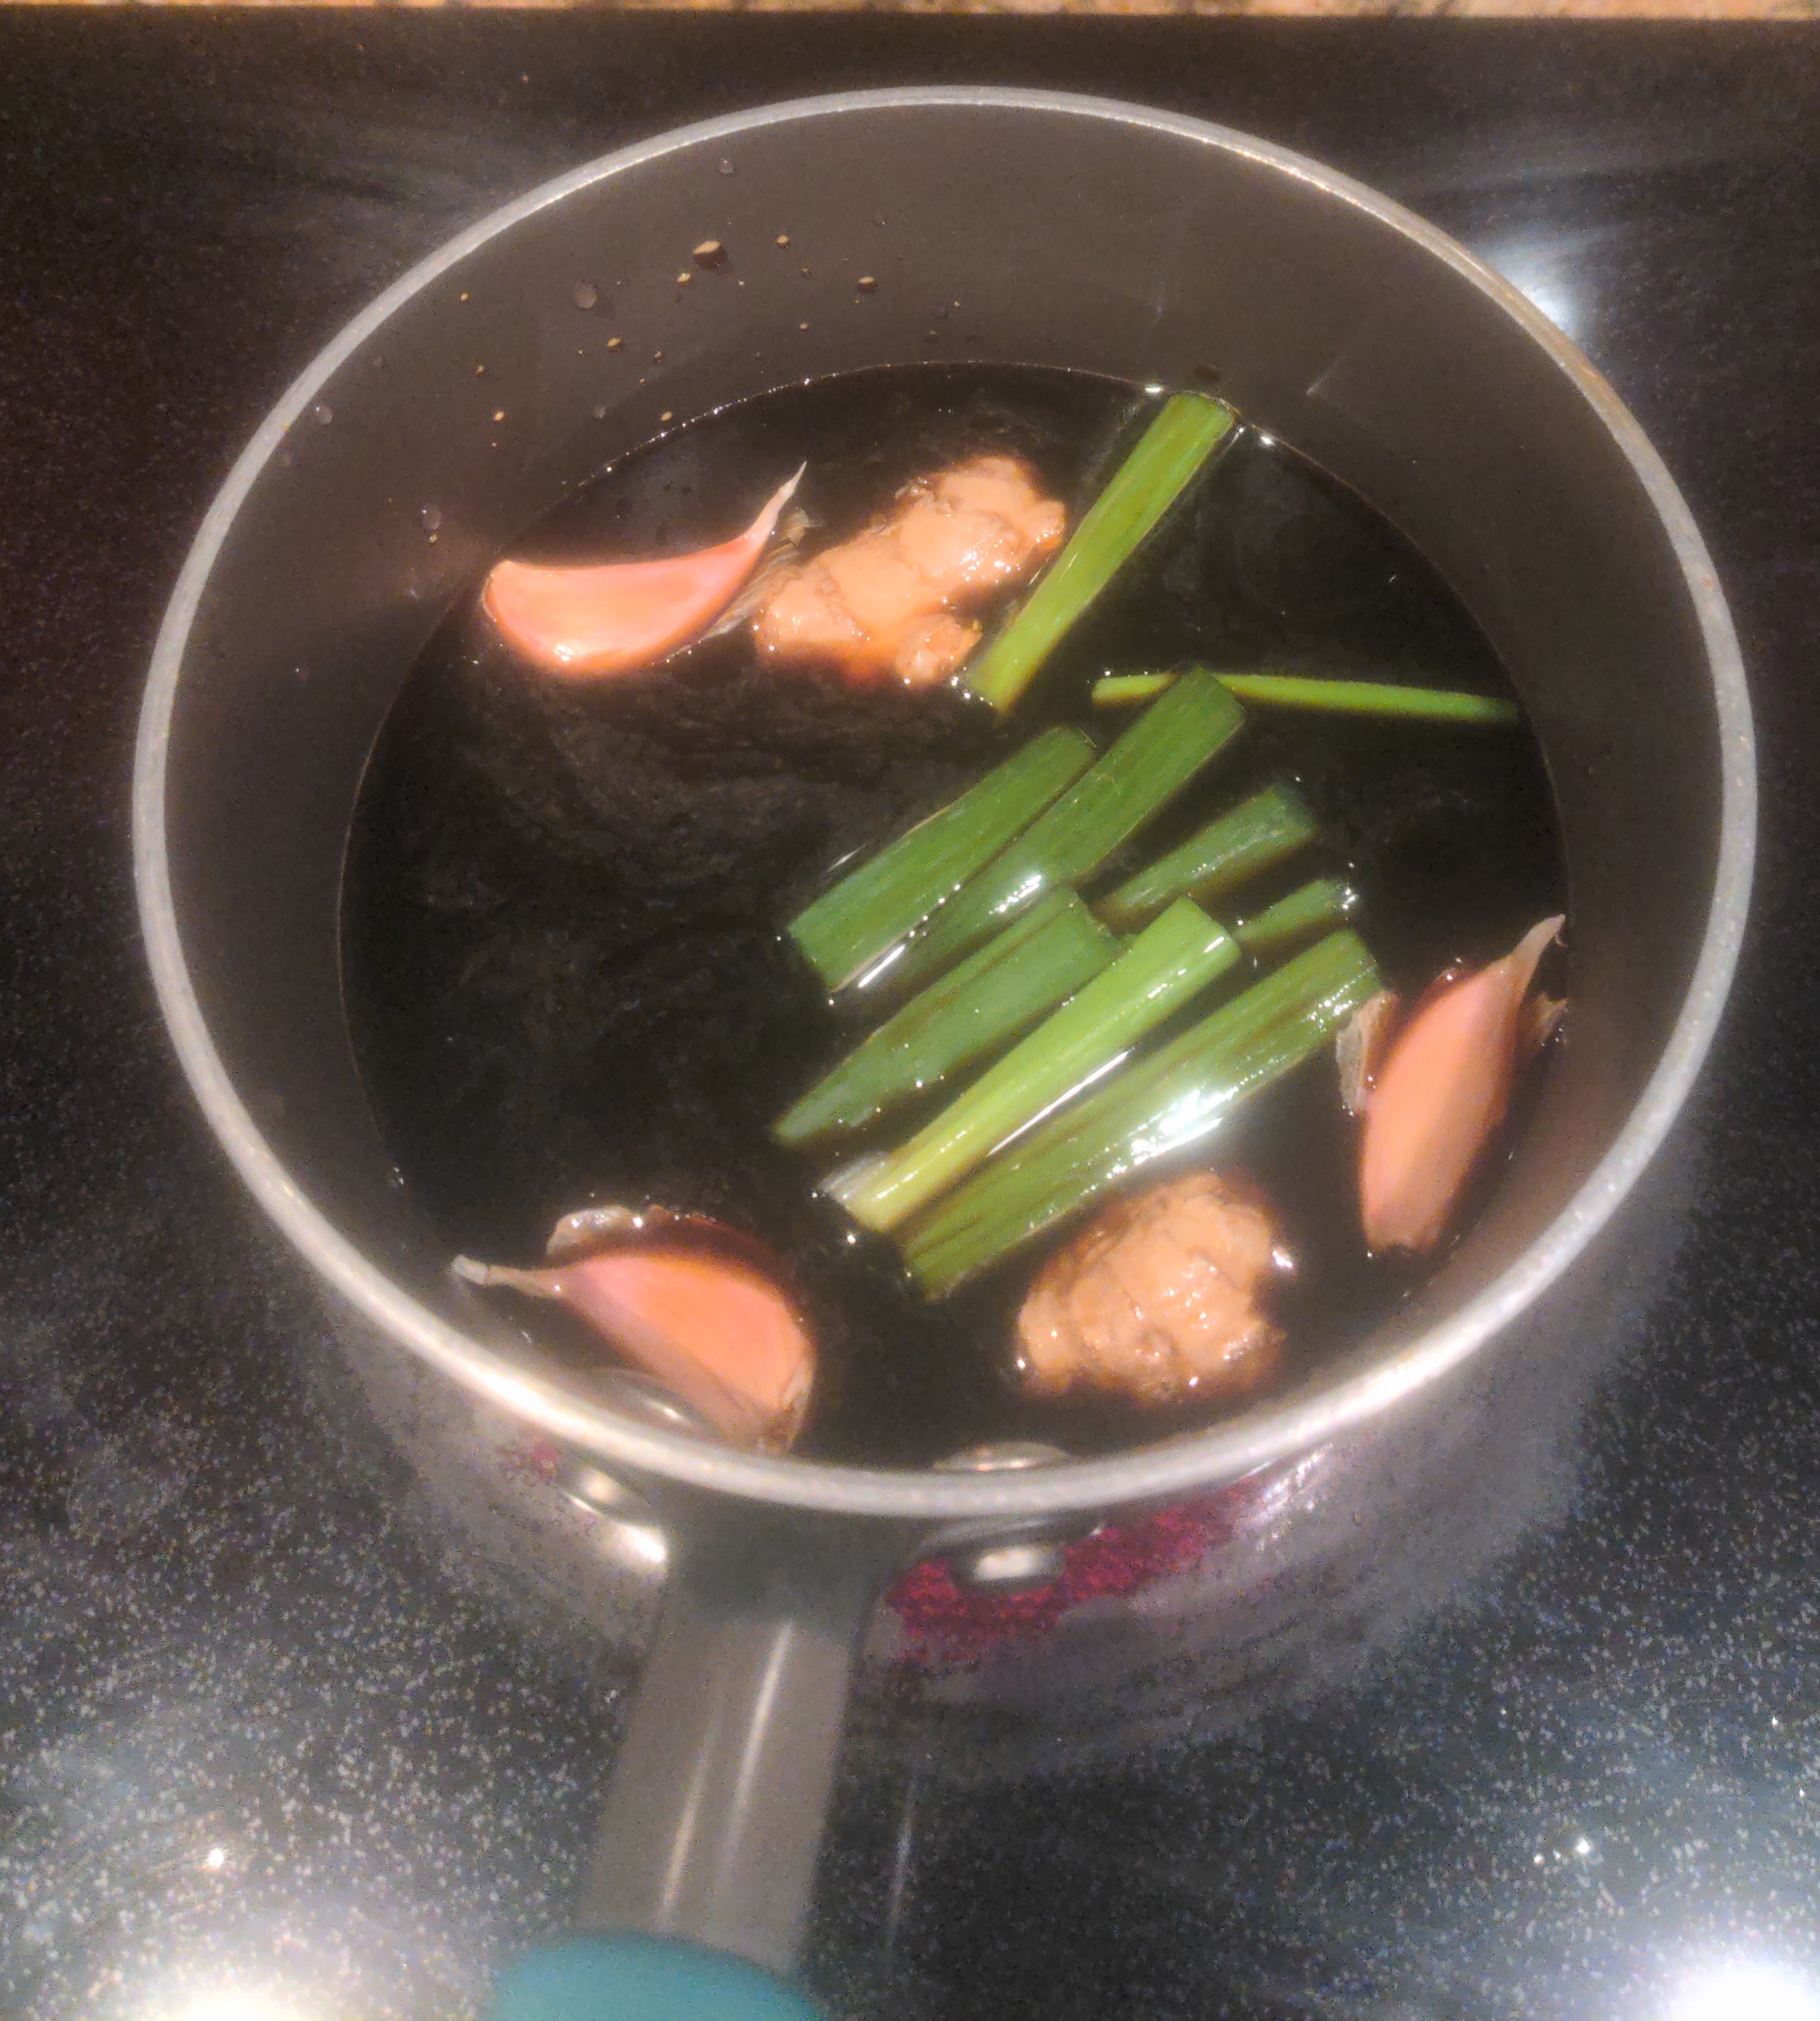
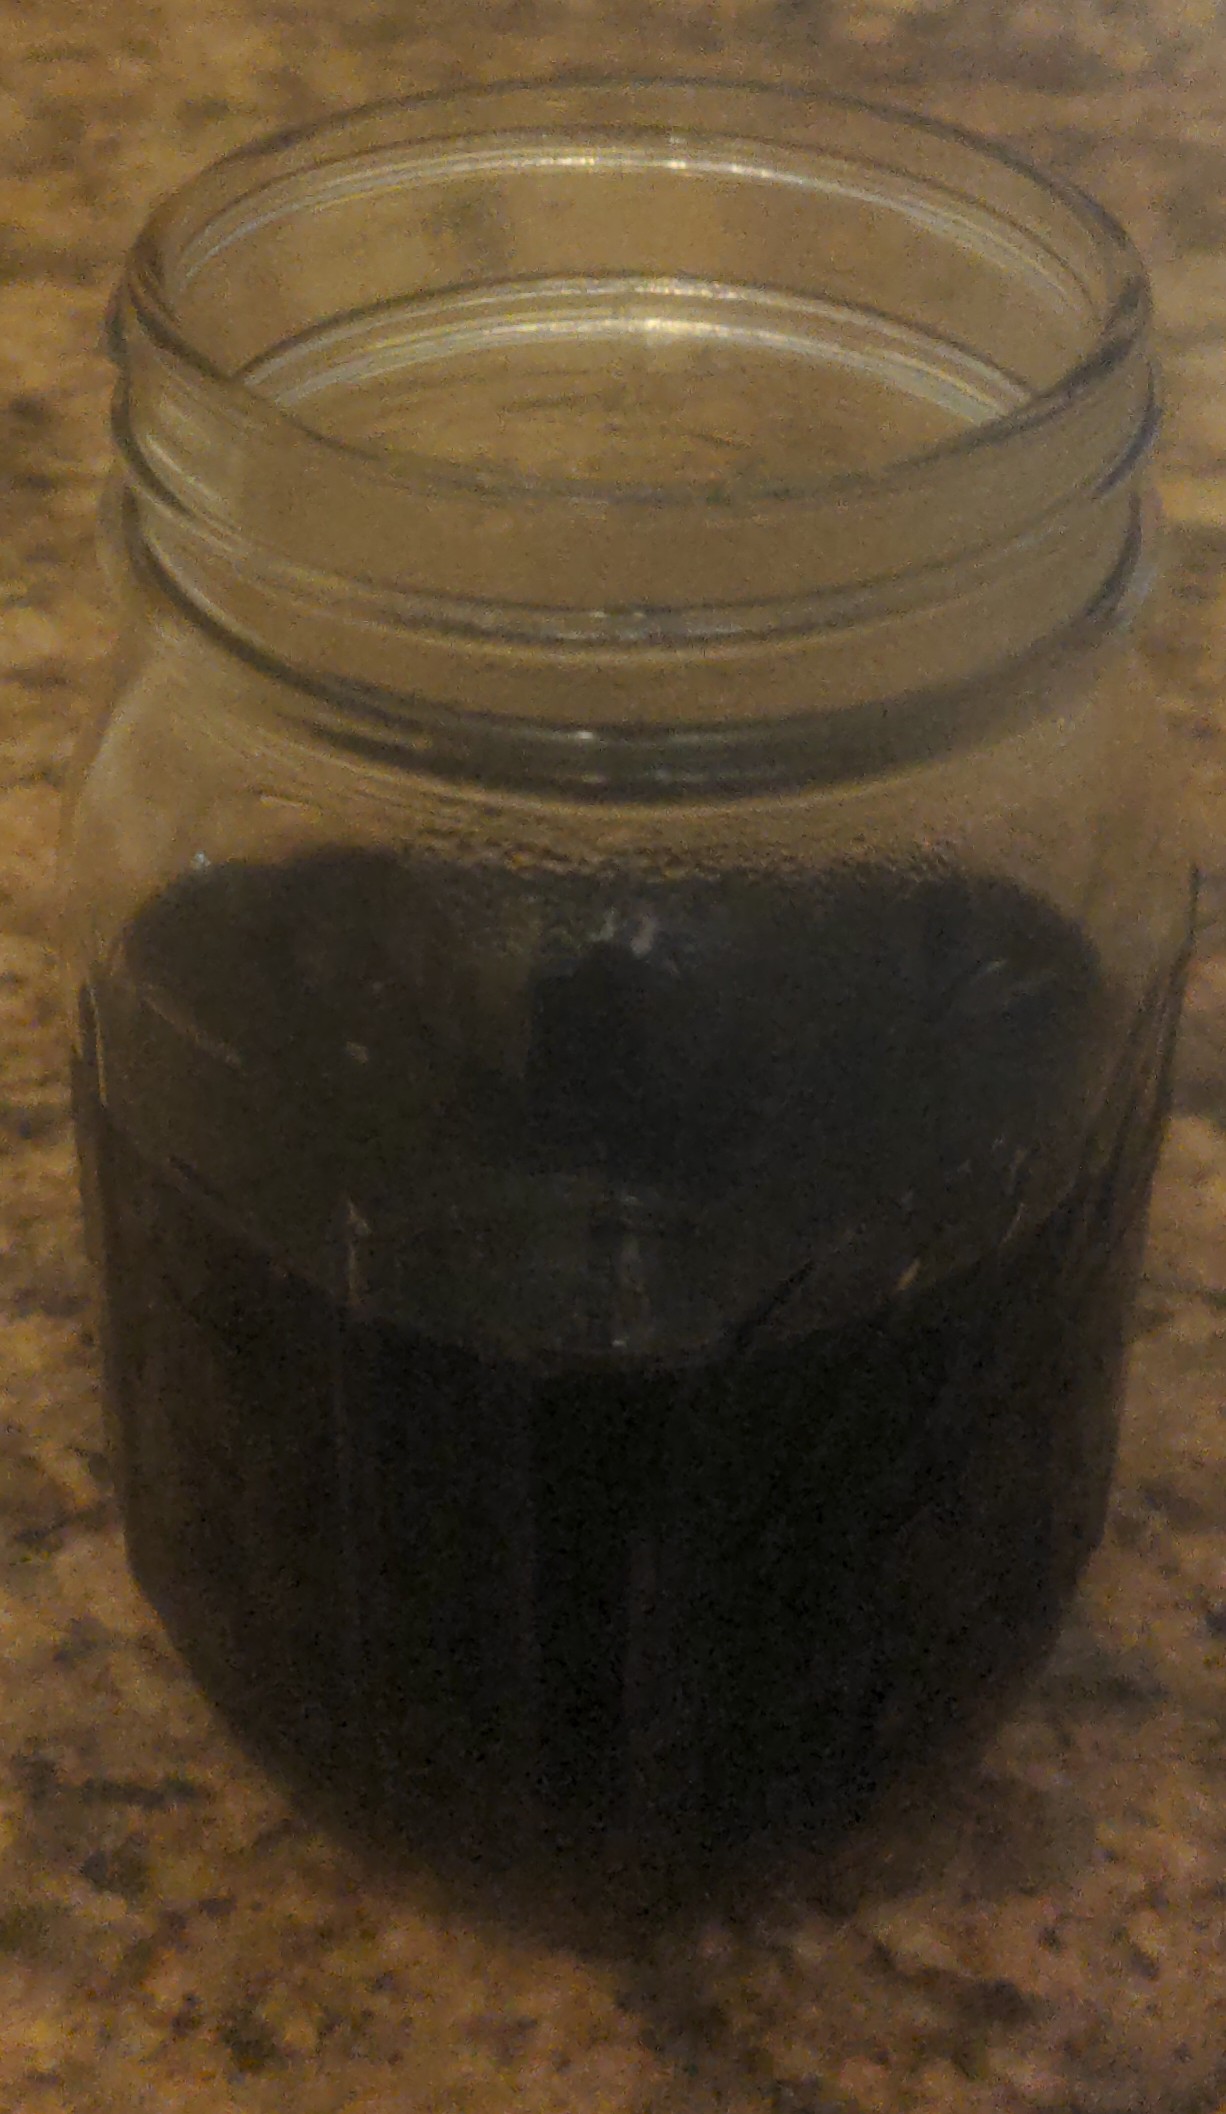
The result is a sauce so intense you should cringe in disgust from trying it, while also wanting more. This is adopted from an internet recipe I found. Notice the volume of the sauce has reduced a bit, from around 1.3 cups to 1 or so. You might want to water it down, or take this into account when preparing the bowls.
Finally, we can make aromatic oil. It's a special topping that is meant to distribute in the bowl when the broth is poured in, to add additional flavour. I like allium flavored oil, so I prepare chopped garlic, shallot, and scallion to add to a saucepan of oil, preferably peanut or clarified butter (I was in a jiffy so I used rapeseed oil, orz) and add some chicken skin for that chicken flavour. (I was also hoping it would bring the oil to a solid state in the fridge to help preservation, though this did not occur. If you do use a vegetable oil, I advise adding animal fat to achieve that.) It's worth mentioning there are many kinds of oil depending on the ramen style and you can experiment with your own ideas to complement your bowl.
Phew! That was a lot. Now all we have to do is make the noodles and put together a bowl. Join me tomorrow for the end of the ramen post which hopefully will inspire you to try and make your own soup. Mata ne!
Now it is time to make our ramen soup. Ramen stock is generally divided into two categories, based on the style of preparation: chintan, which is characterized by clear golden appearance like a french stock, or paitan, which is white, cloudy and creamy. Chintan means clear (or pure) soup, whereas paitan means white soup. In this case I'll make paitan.
First, I begin with a whole chicken. This one is a rooster; in fact I recommend either roosters or stewing hens, rather than ordinary whole chickens, as these have more flavour when making soup while costing much less. I won't show how to part out the chicken, since this is well known and you can learn how to do it on youtube.

The chicken carcass, as well as about 25% of its weight in chicken feet, are added to a stock pot. Our goal is to pre-boil the bones for 10-15 minutes to prepare for cooking proper.

The purpose of the pre-boiling process is to remove impurities which darken the stock and impart bitter flavour. Most pernicious is myoglobin, which, when coming into contact with fat at high temperatures, forms a disgusting compound of scum. Scum ruins the flavour of the stock and looks gross. It is a grey-red foam which looks almost like sea foam. Using a spoon or fine mesh strainer, skim off the scum. Then agitate the meat to release more and continue until none remains.

Once the scum is skimmed, wash the bones under water and then transfer to a pressure cooker, cooking at least 2 (for chicken, or 3 for pork) hours under pressure.


When the pressure cooking is done, we can finally enjoy our great- wait why does it look horrible?

The answer is because the stock is not emulsified. A large amount of protein, fat, gelatin, etc. have been released in cooking but are not integrated into the water, leaving us with a grey cloudy mess. The next step is to transfer to a stock pot and boil with the bones at a rolling boil for one hour. This is the same time I used in my gumbo recipe-it's a good idea to go for at least an hour to make a good emulsion where fat is evenly spread among the water. Please don't try an immersion blender.

After an hour the emulsion is complete (notice the drastic change in appearance!) and we add aromatics - onion, garlic, scallion, carrot, celery, and ginger - to enhance the flavour profile. I go heavy on aromatics but that is also personal preference.


One our of cooking is peak infusion time for veggies, so we set the stock aside and begin work on our tare.


Tare is the broth seasoning of ramen. You'll notice that I didn't add any salt or pepper yet and this is intentional. A few teaspoons of tare is enough to season a whole bowl of ramen. This facilitates the restaurant culture where combinations between stock and tare can be made for each customer's ticket. In our case we'll make shoyu or soy sauce tare. We begin by making niboshi dashi from dried sardines:

Now we add the rest of the ingredients - one part dashi, four parts dark soy sauce (the ordinary kind you find in stores), two parts light soy sauce, half a part sake and half a part mirin, half a part salt and a quarter part MSG. (Optionally, a quarter part oyster sauce may be added.) Finally, some green onion and ginger are added and we simmer on the stove in a saucepan for a couple hours.

The result is a sauce so intense you should cringe in disgust from trying it, while also wanting more. This is adopted from an internet recipe I found. Notice the volume of the sauce has reduced a bit, from around 1.3 cups to 1 or so. You might want to water it down, or take this into account when preparing the bowls.

Finally, we can make aromatic oil. It's a special topping that is meant to distribute in the bowl when the broth is poured in, to add additional flavour. I like allium flavored oil, so I prepare chopped garlic, shallot, and scallion to add to a saucepan of oil, preferably peanut or clarified butter (I was in a jiffy so I used rapeseed oil, orz) and add some chicken skin for that chicken flavour. (I was also hoping it would bring the oil to a solid state in the fridge to help preservation, though this did not occur. If you do use a vegetable oil, I advise adding animal fat to achieve that.) It's worth mentioning there are many kinds of oil depending on the ramen style and you can experiment with your own ideas to complement your bowl.

Phew! That was a lot. Now all we have to do is make the noodles and put together a bowl. Join me tomorrow for the end of the ramen post which hopefully will inspire you to try and make your own soup. Mata ne!
Ramen Part 3: Noodles
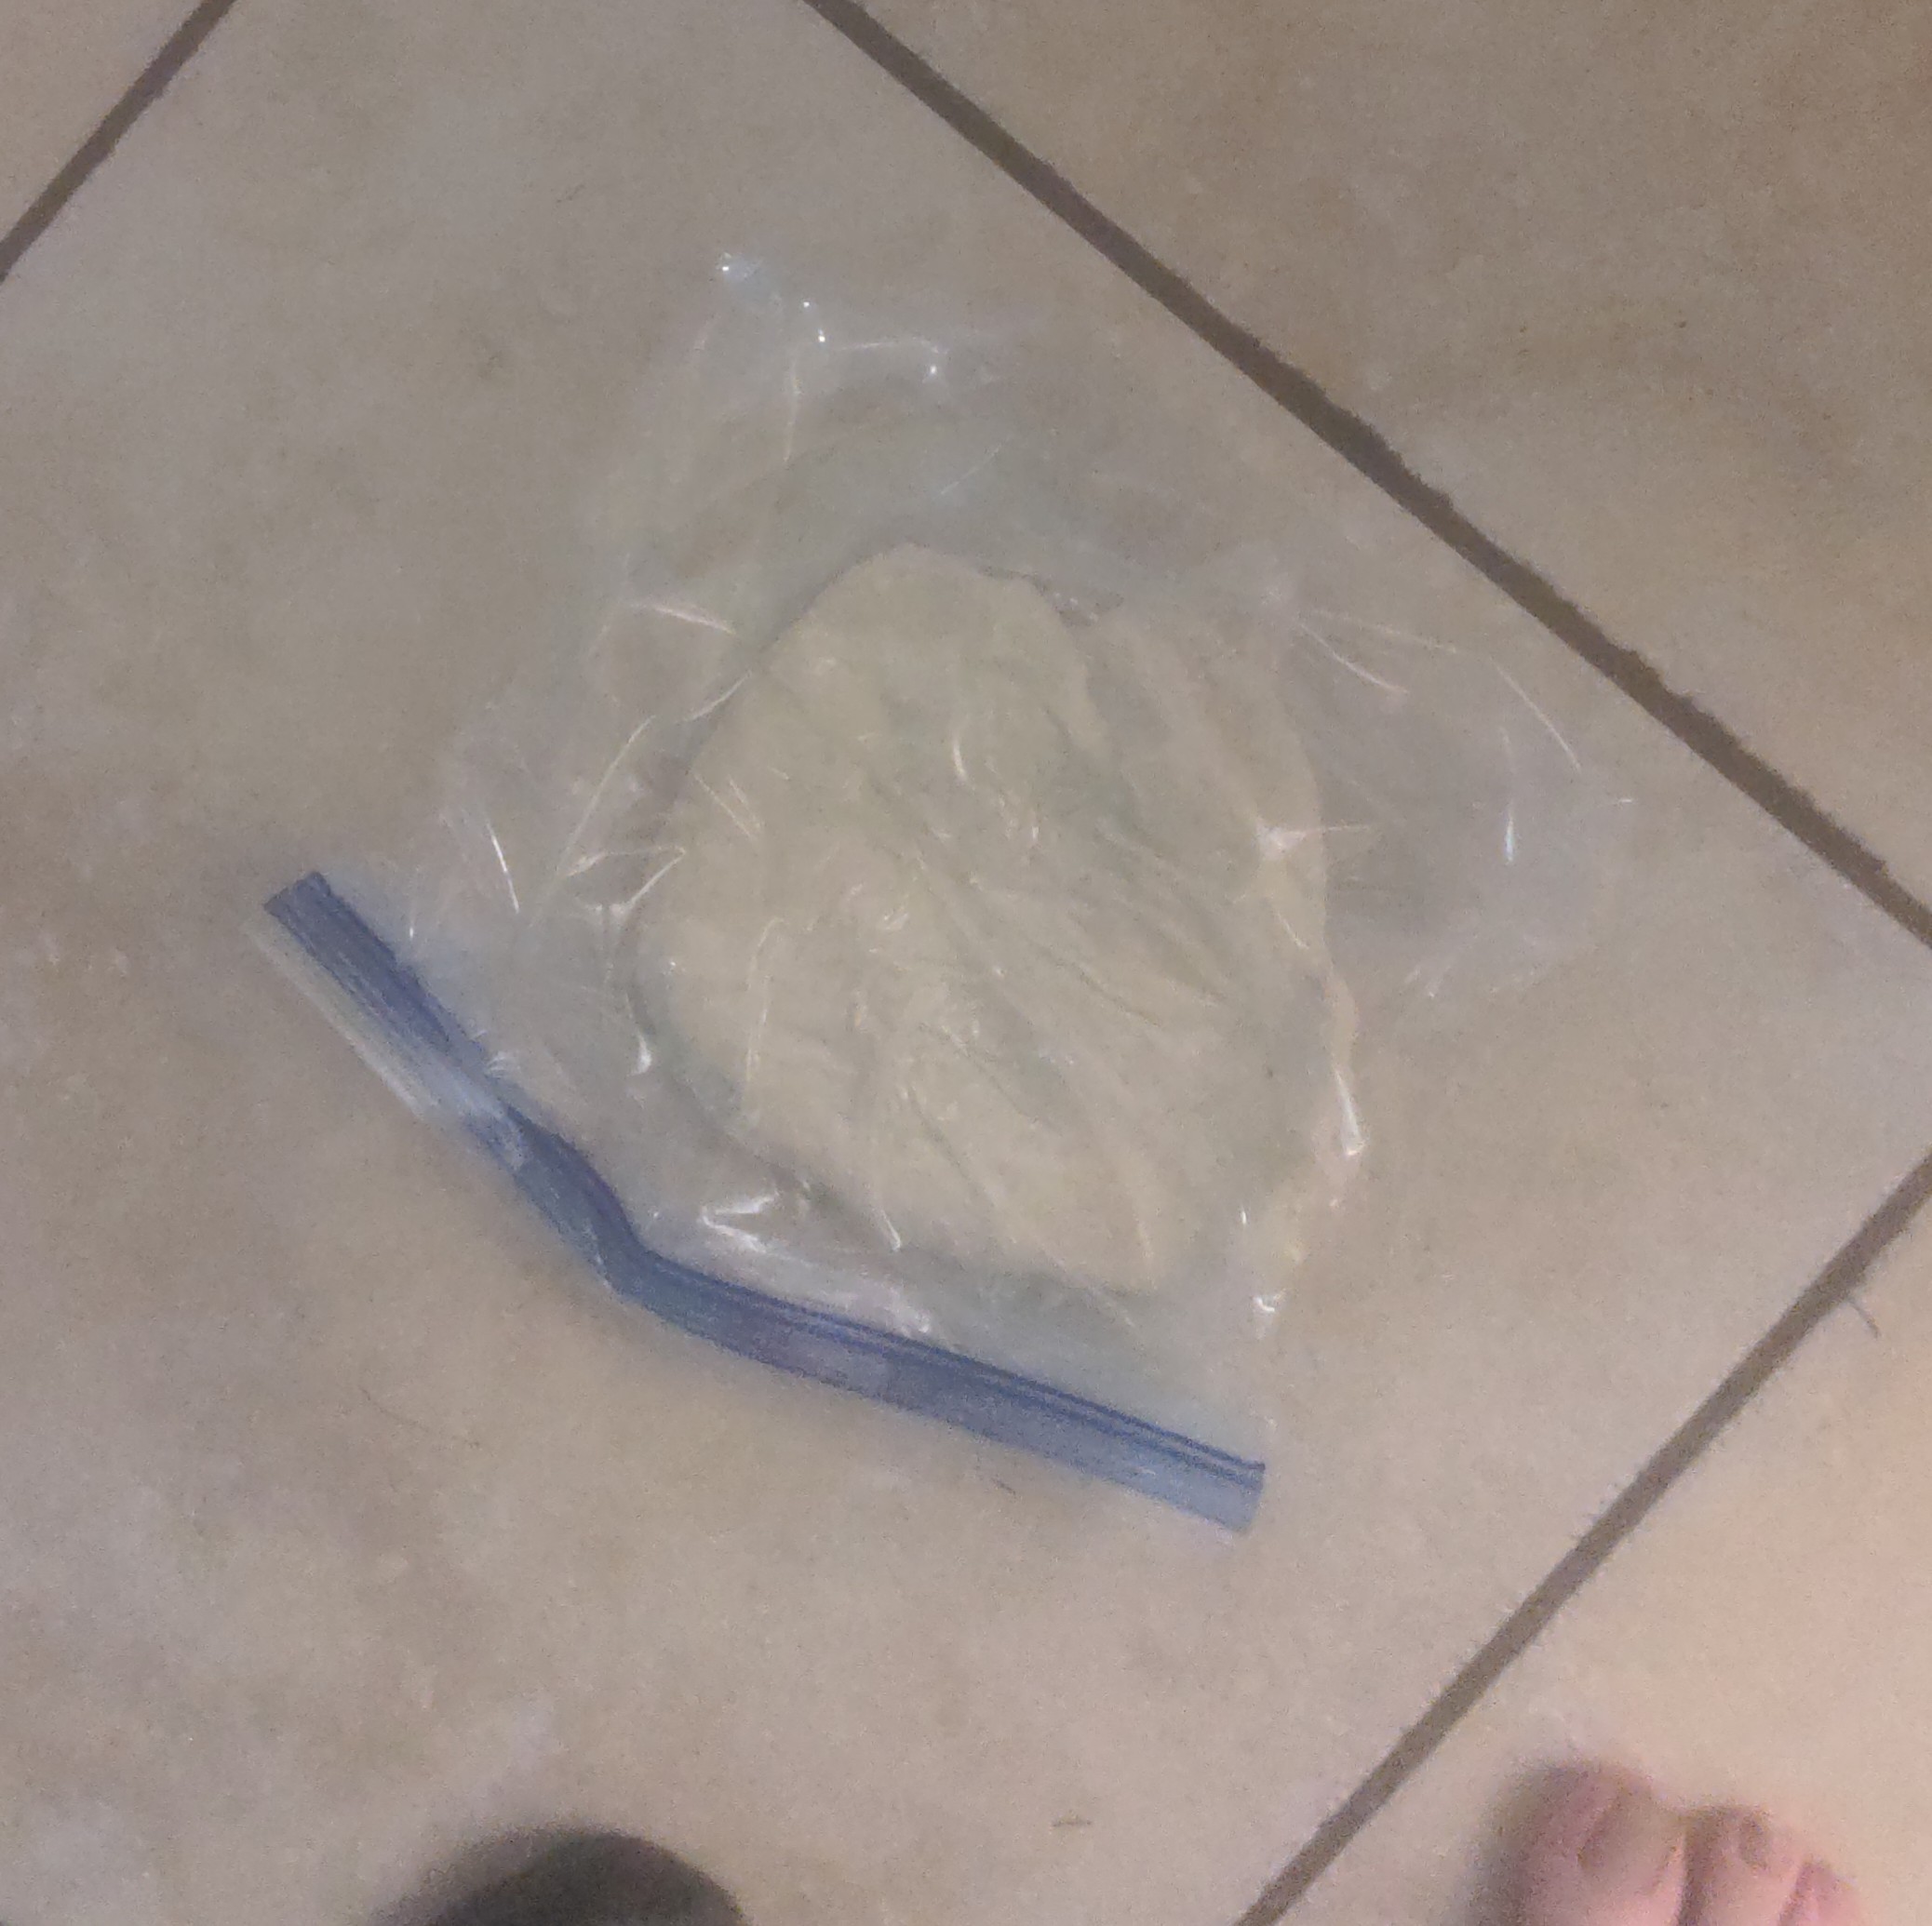
And now it is time for the final part. Get excited! I'll start by making noodles. Here I mix 100g of flour, 1g of salt, 1g of kansui (usually salts like sodium carbonate, sodium bicarbonate, and potassium carbonate) with 45cc of water and combine with chopsticks.
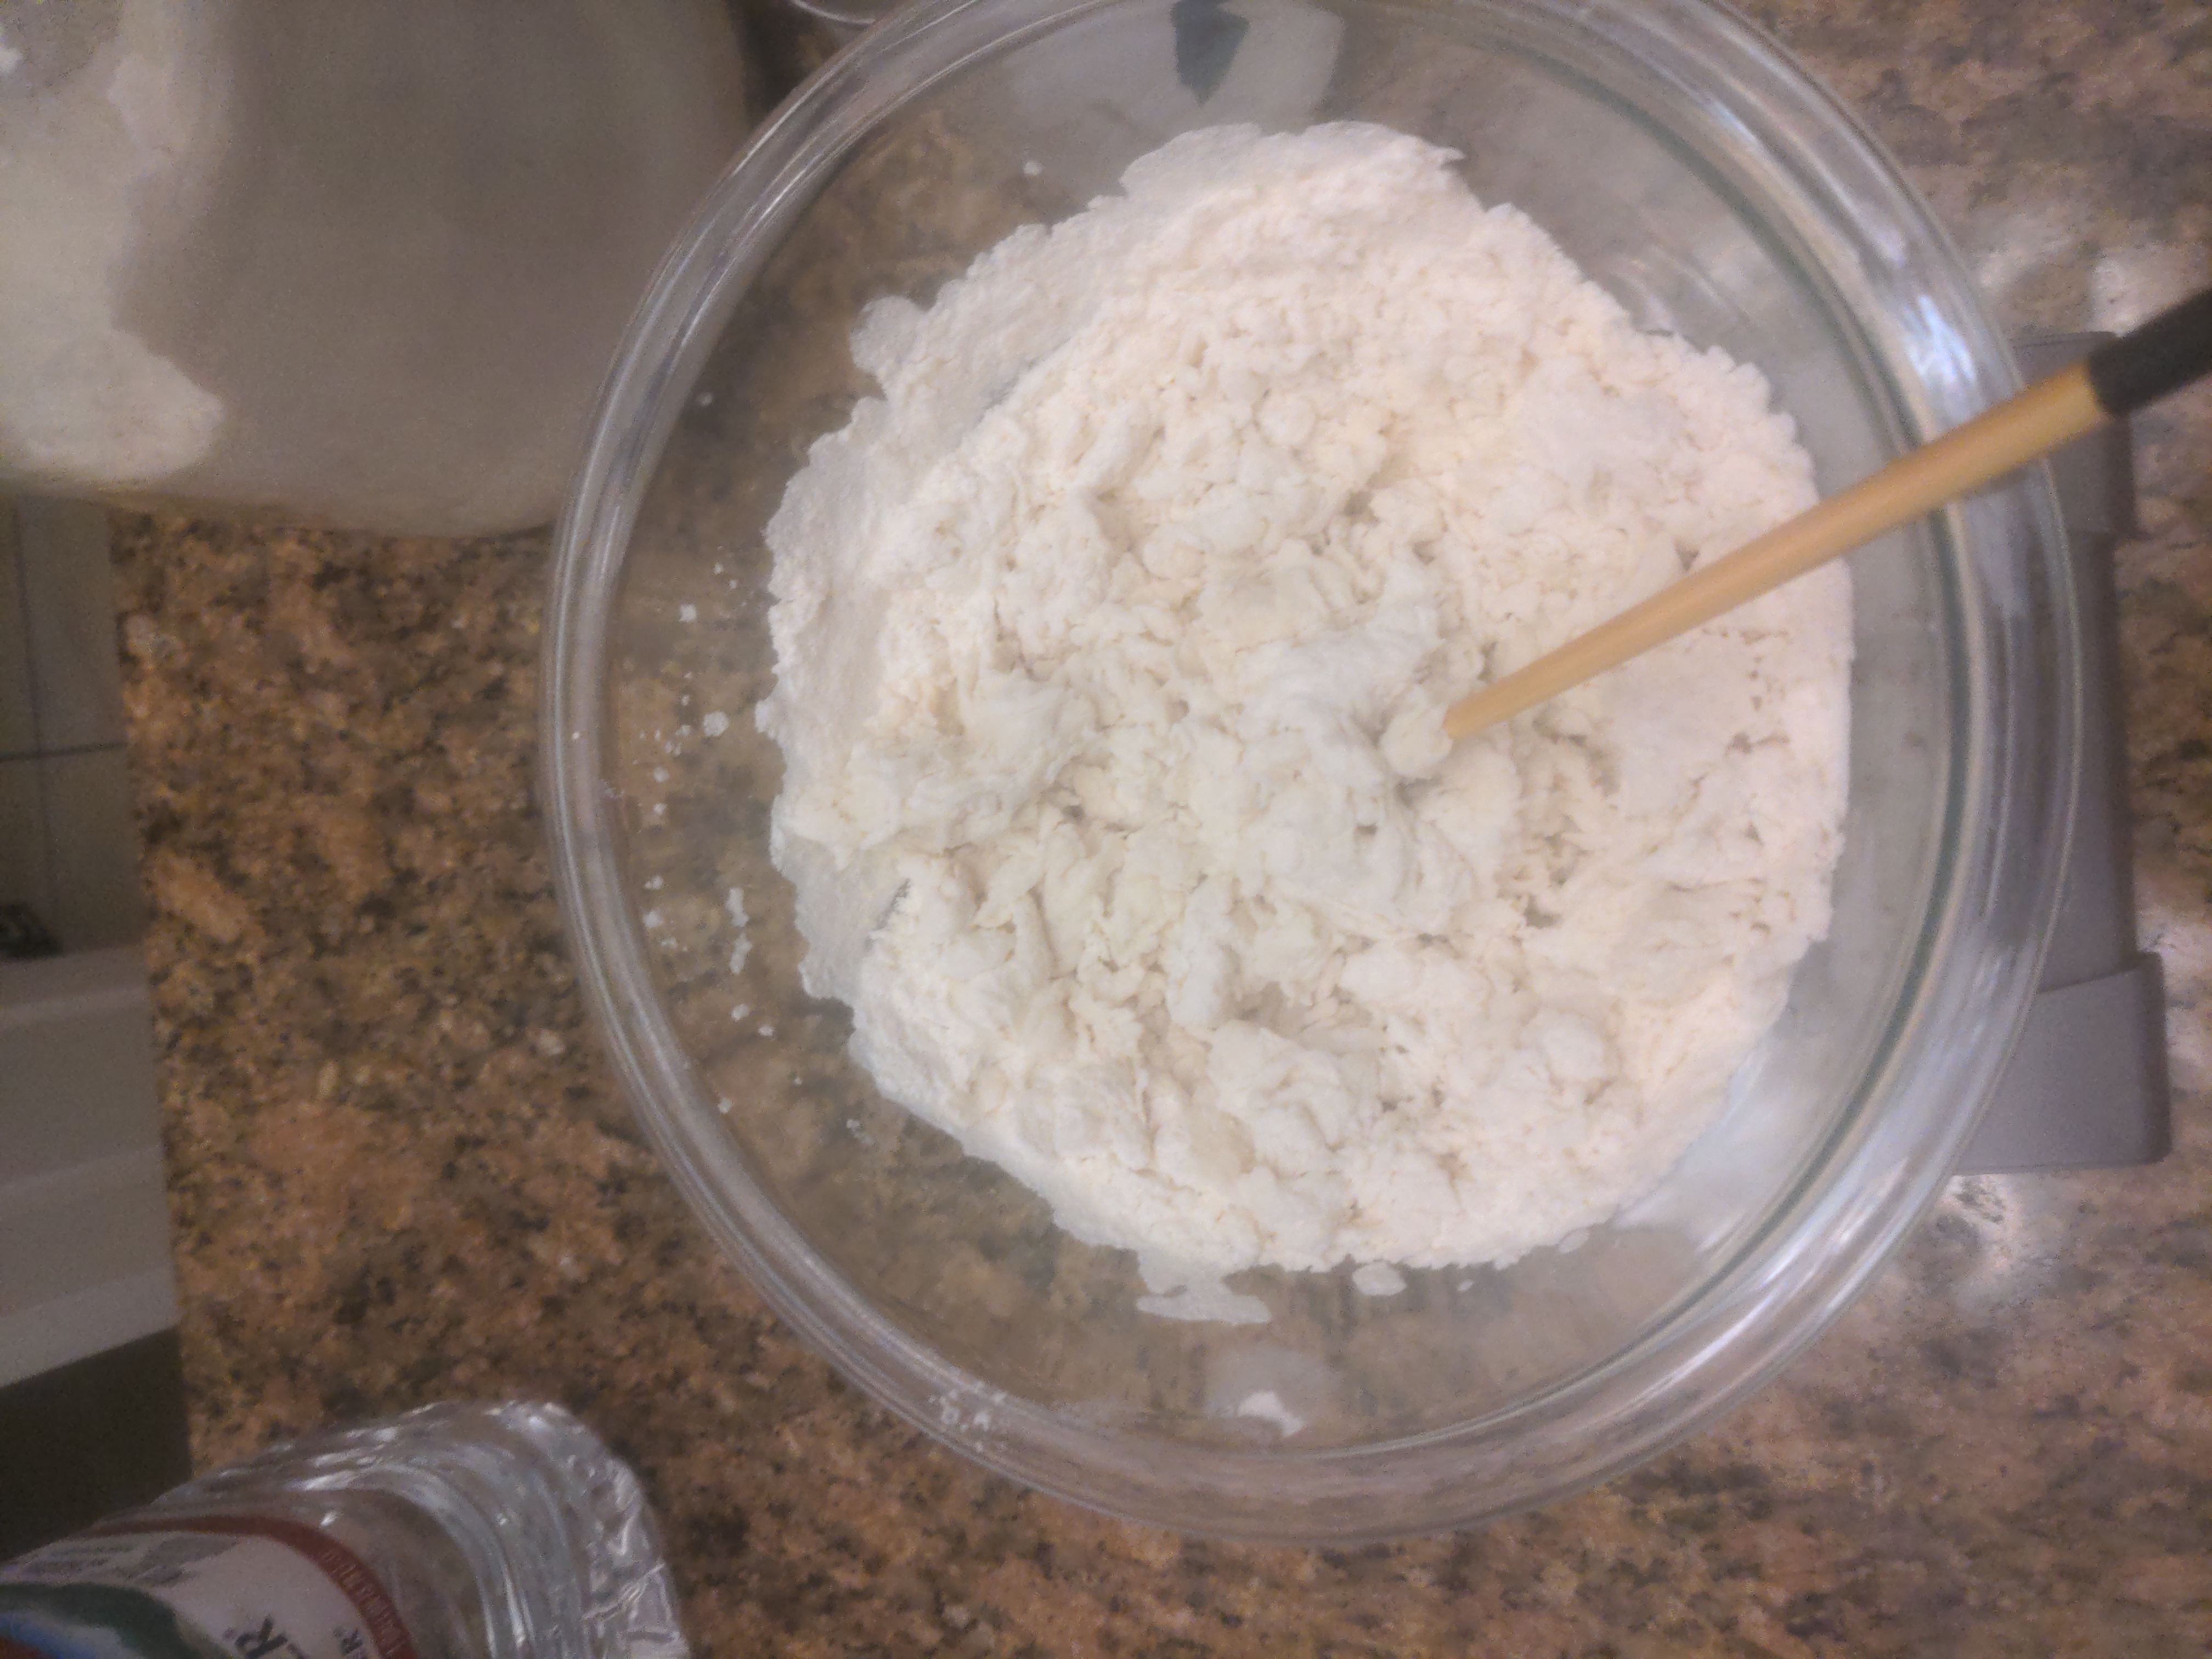
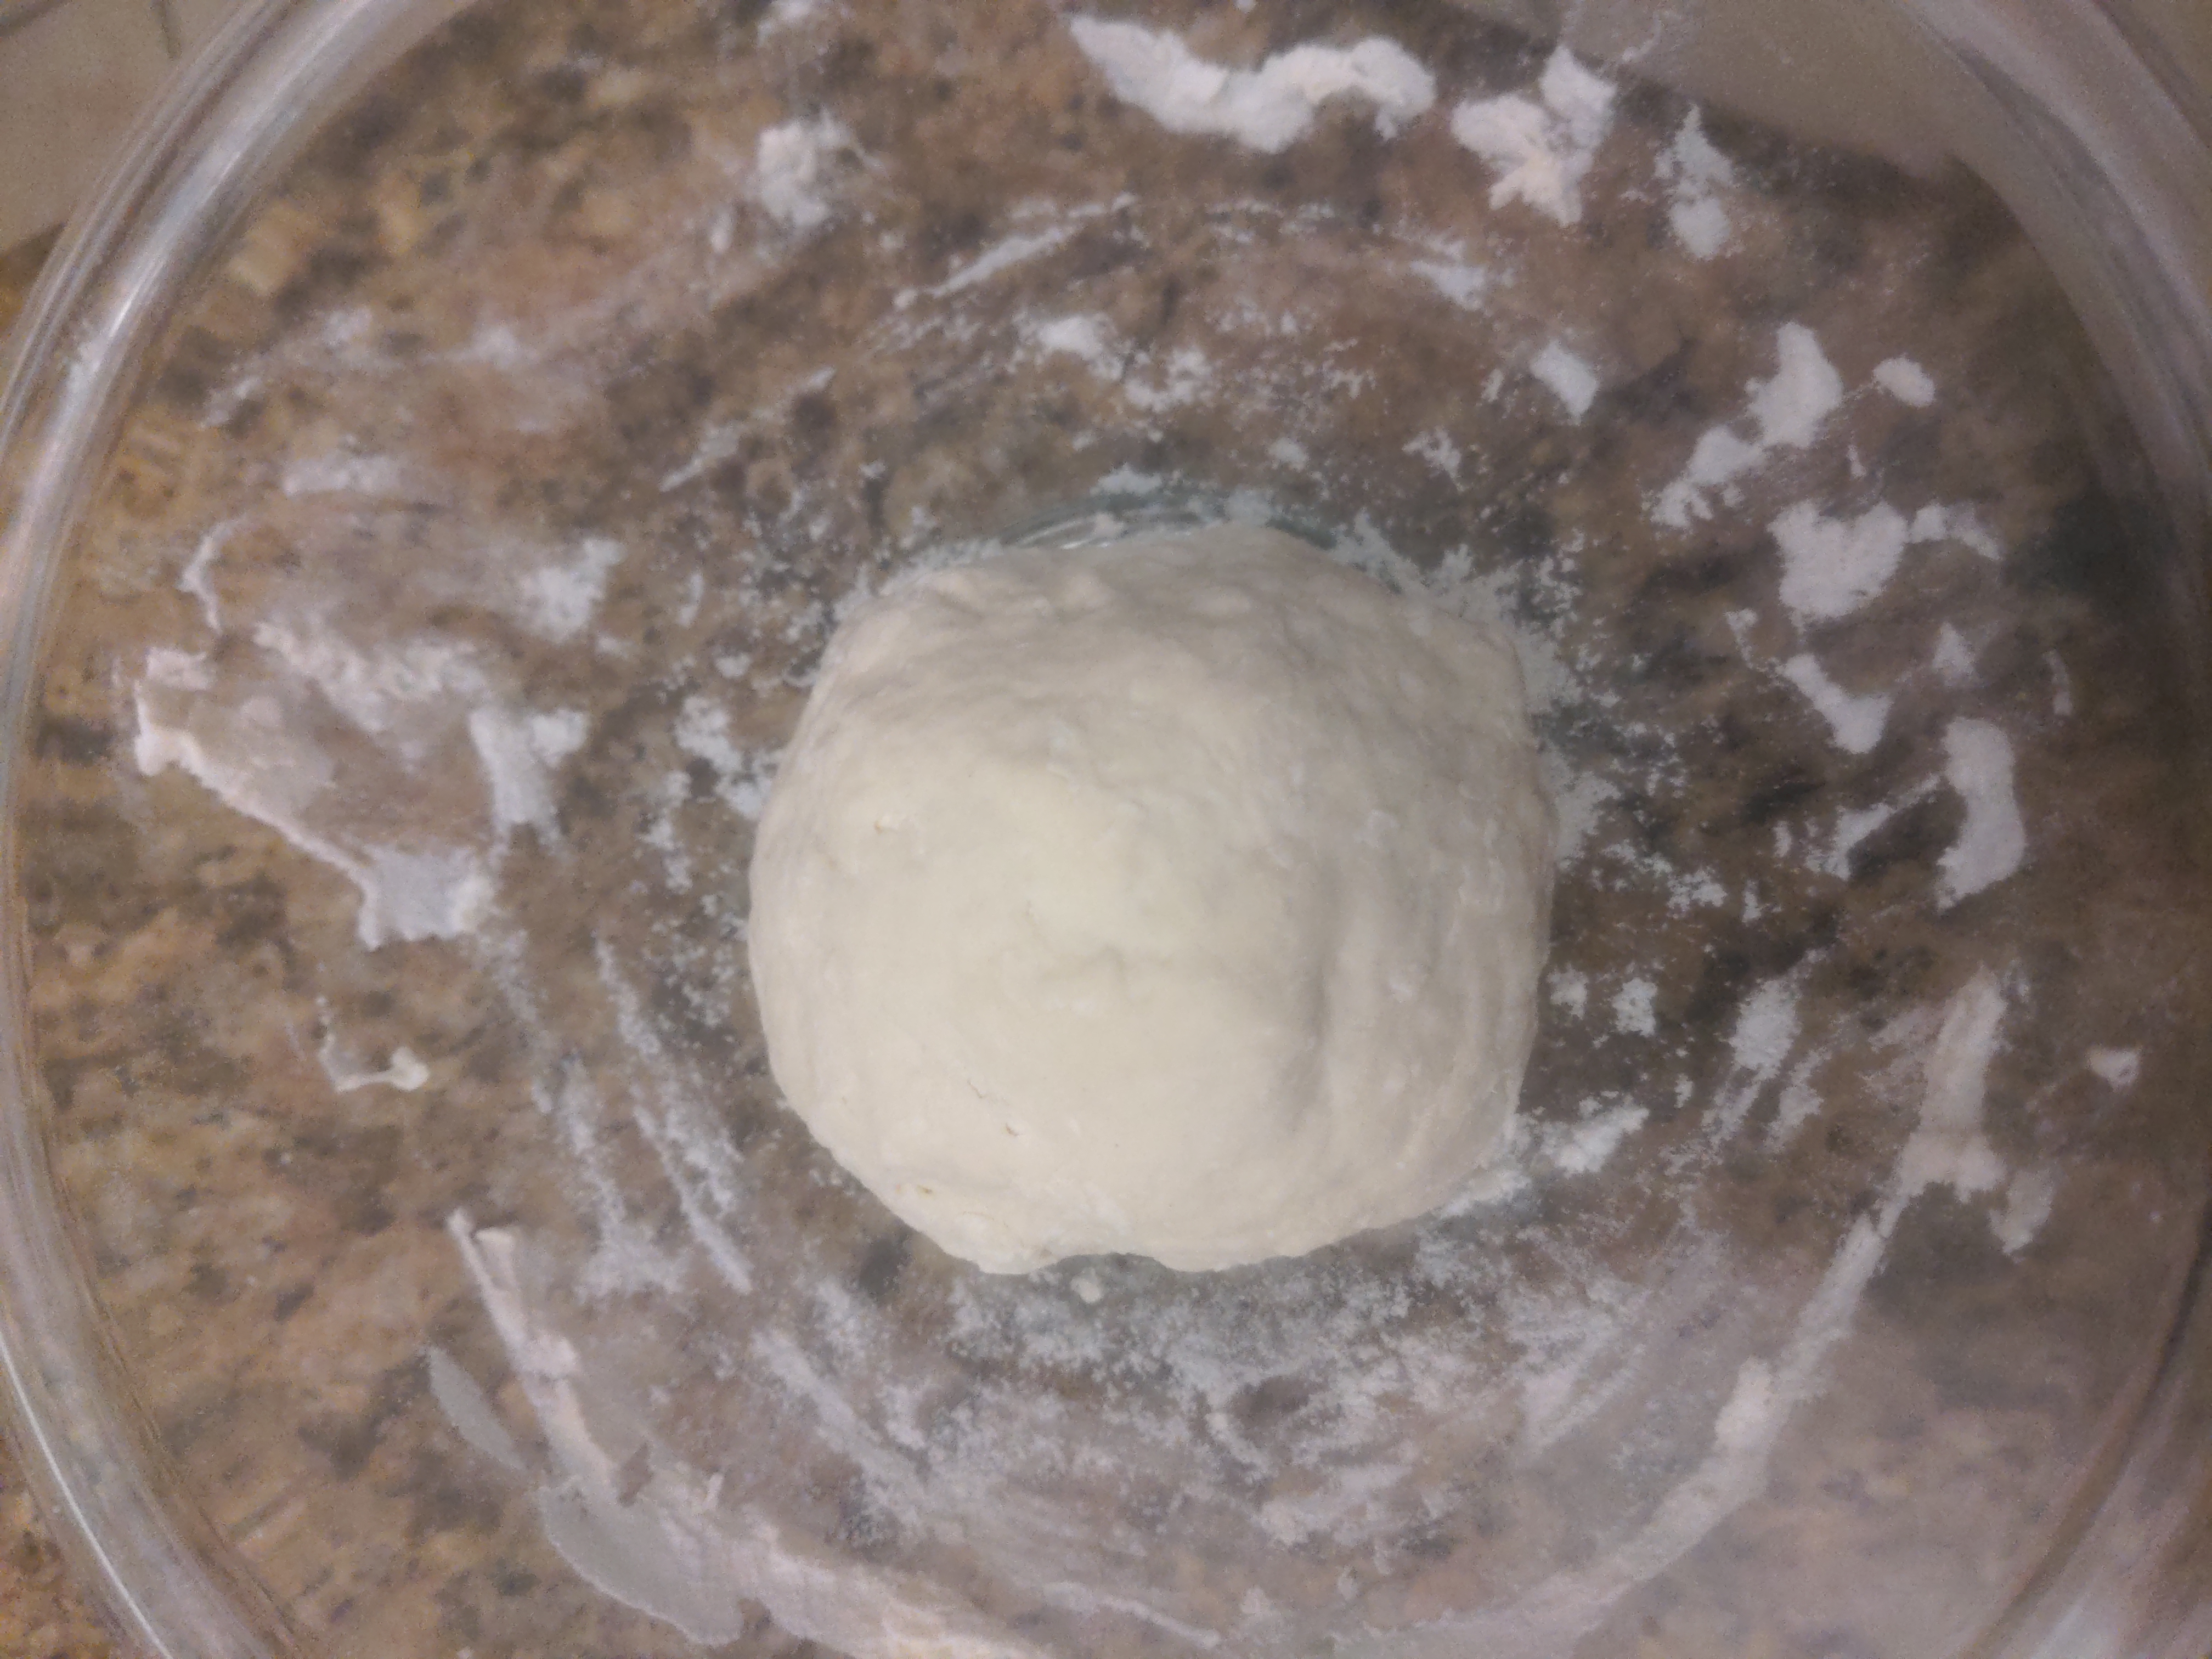
Then I use my hands to combine into a shaggy dough. Next, the dough is placed in a plastic bag. This dough is low hydration like all Japanese noodles so we need to step on it to kneed. Kneed until the dough refuses to flatten out under your feet, then set aside for 30 minutes.
Now I bring out my pasta cutter. I was very blessed to get this at a fraction of its sale price at a thrift store.
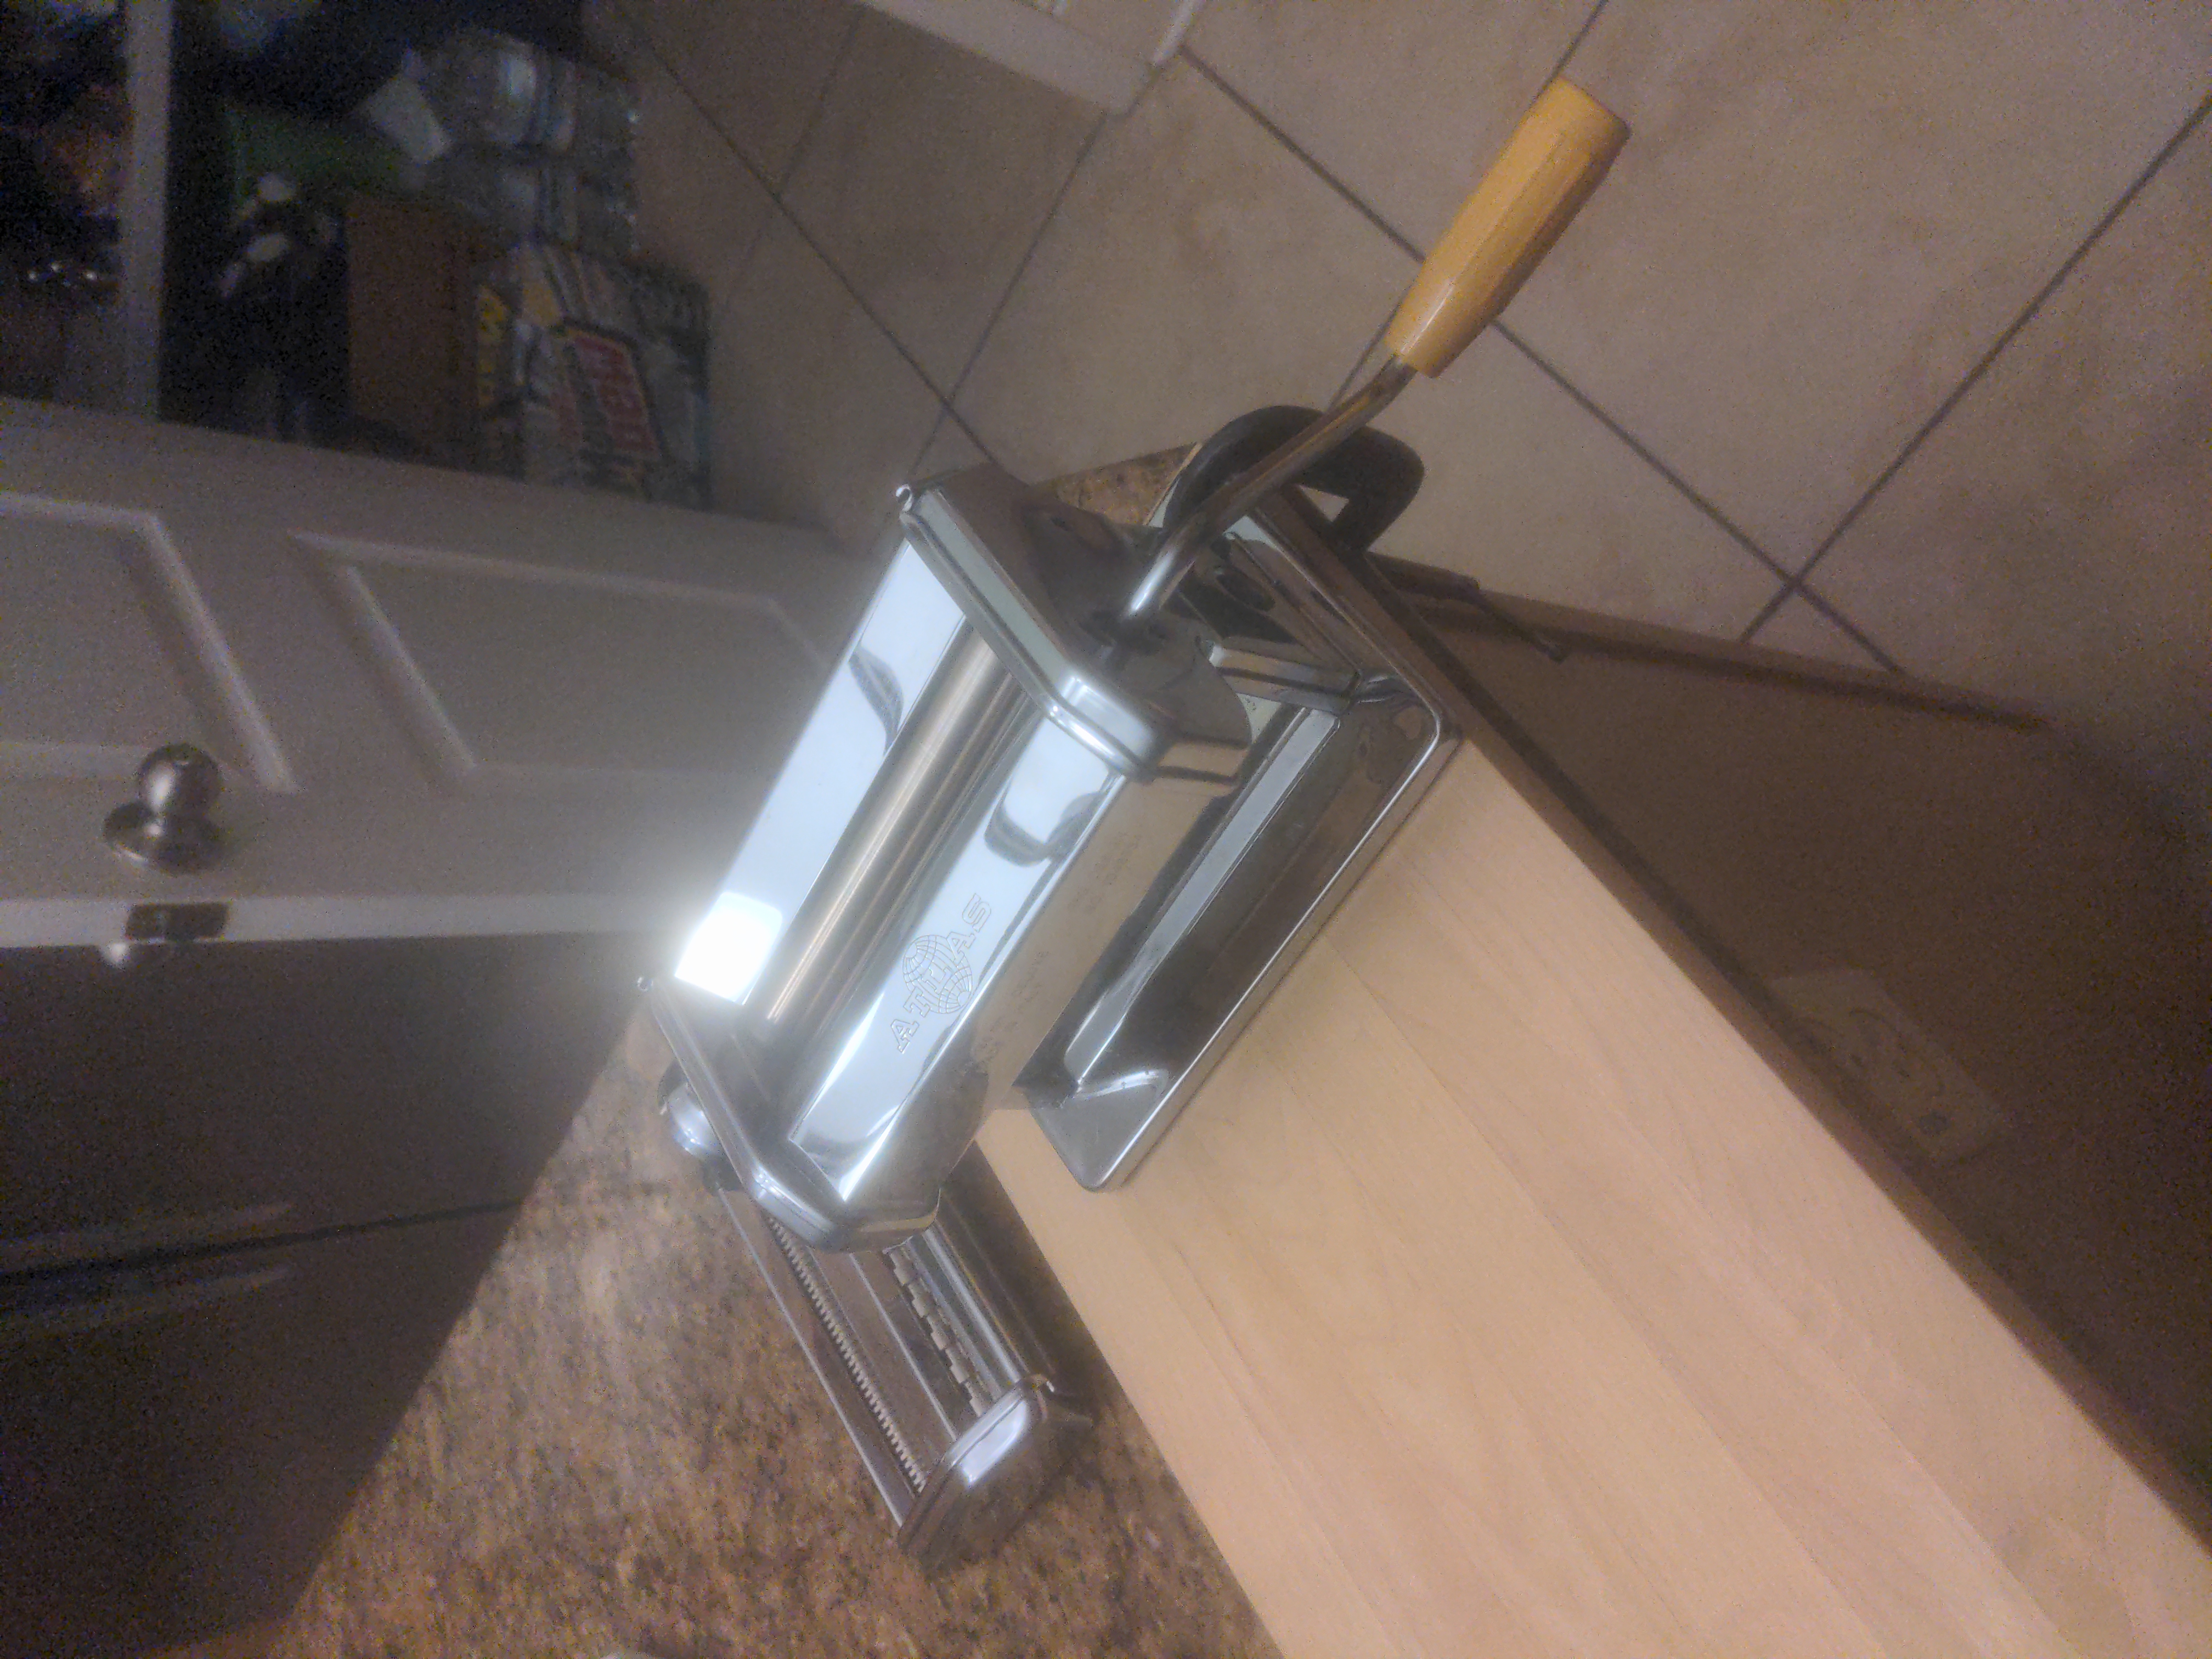
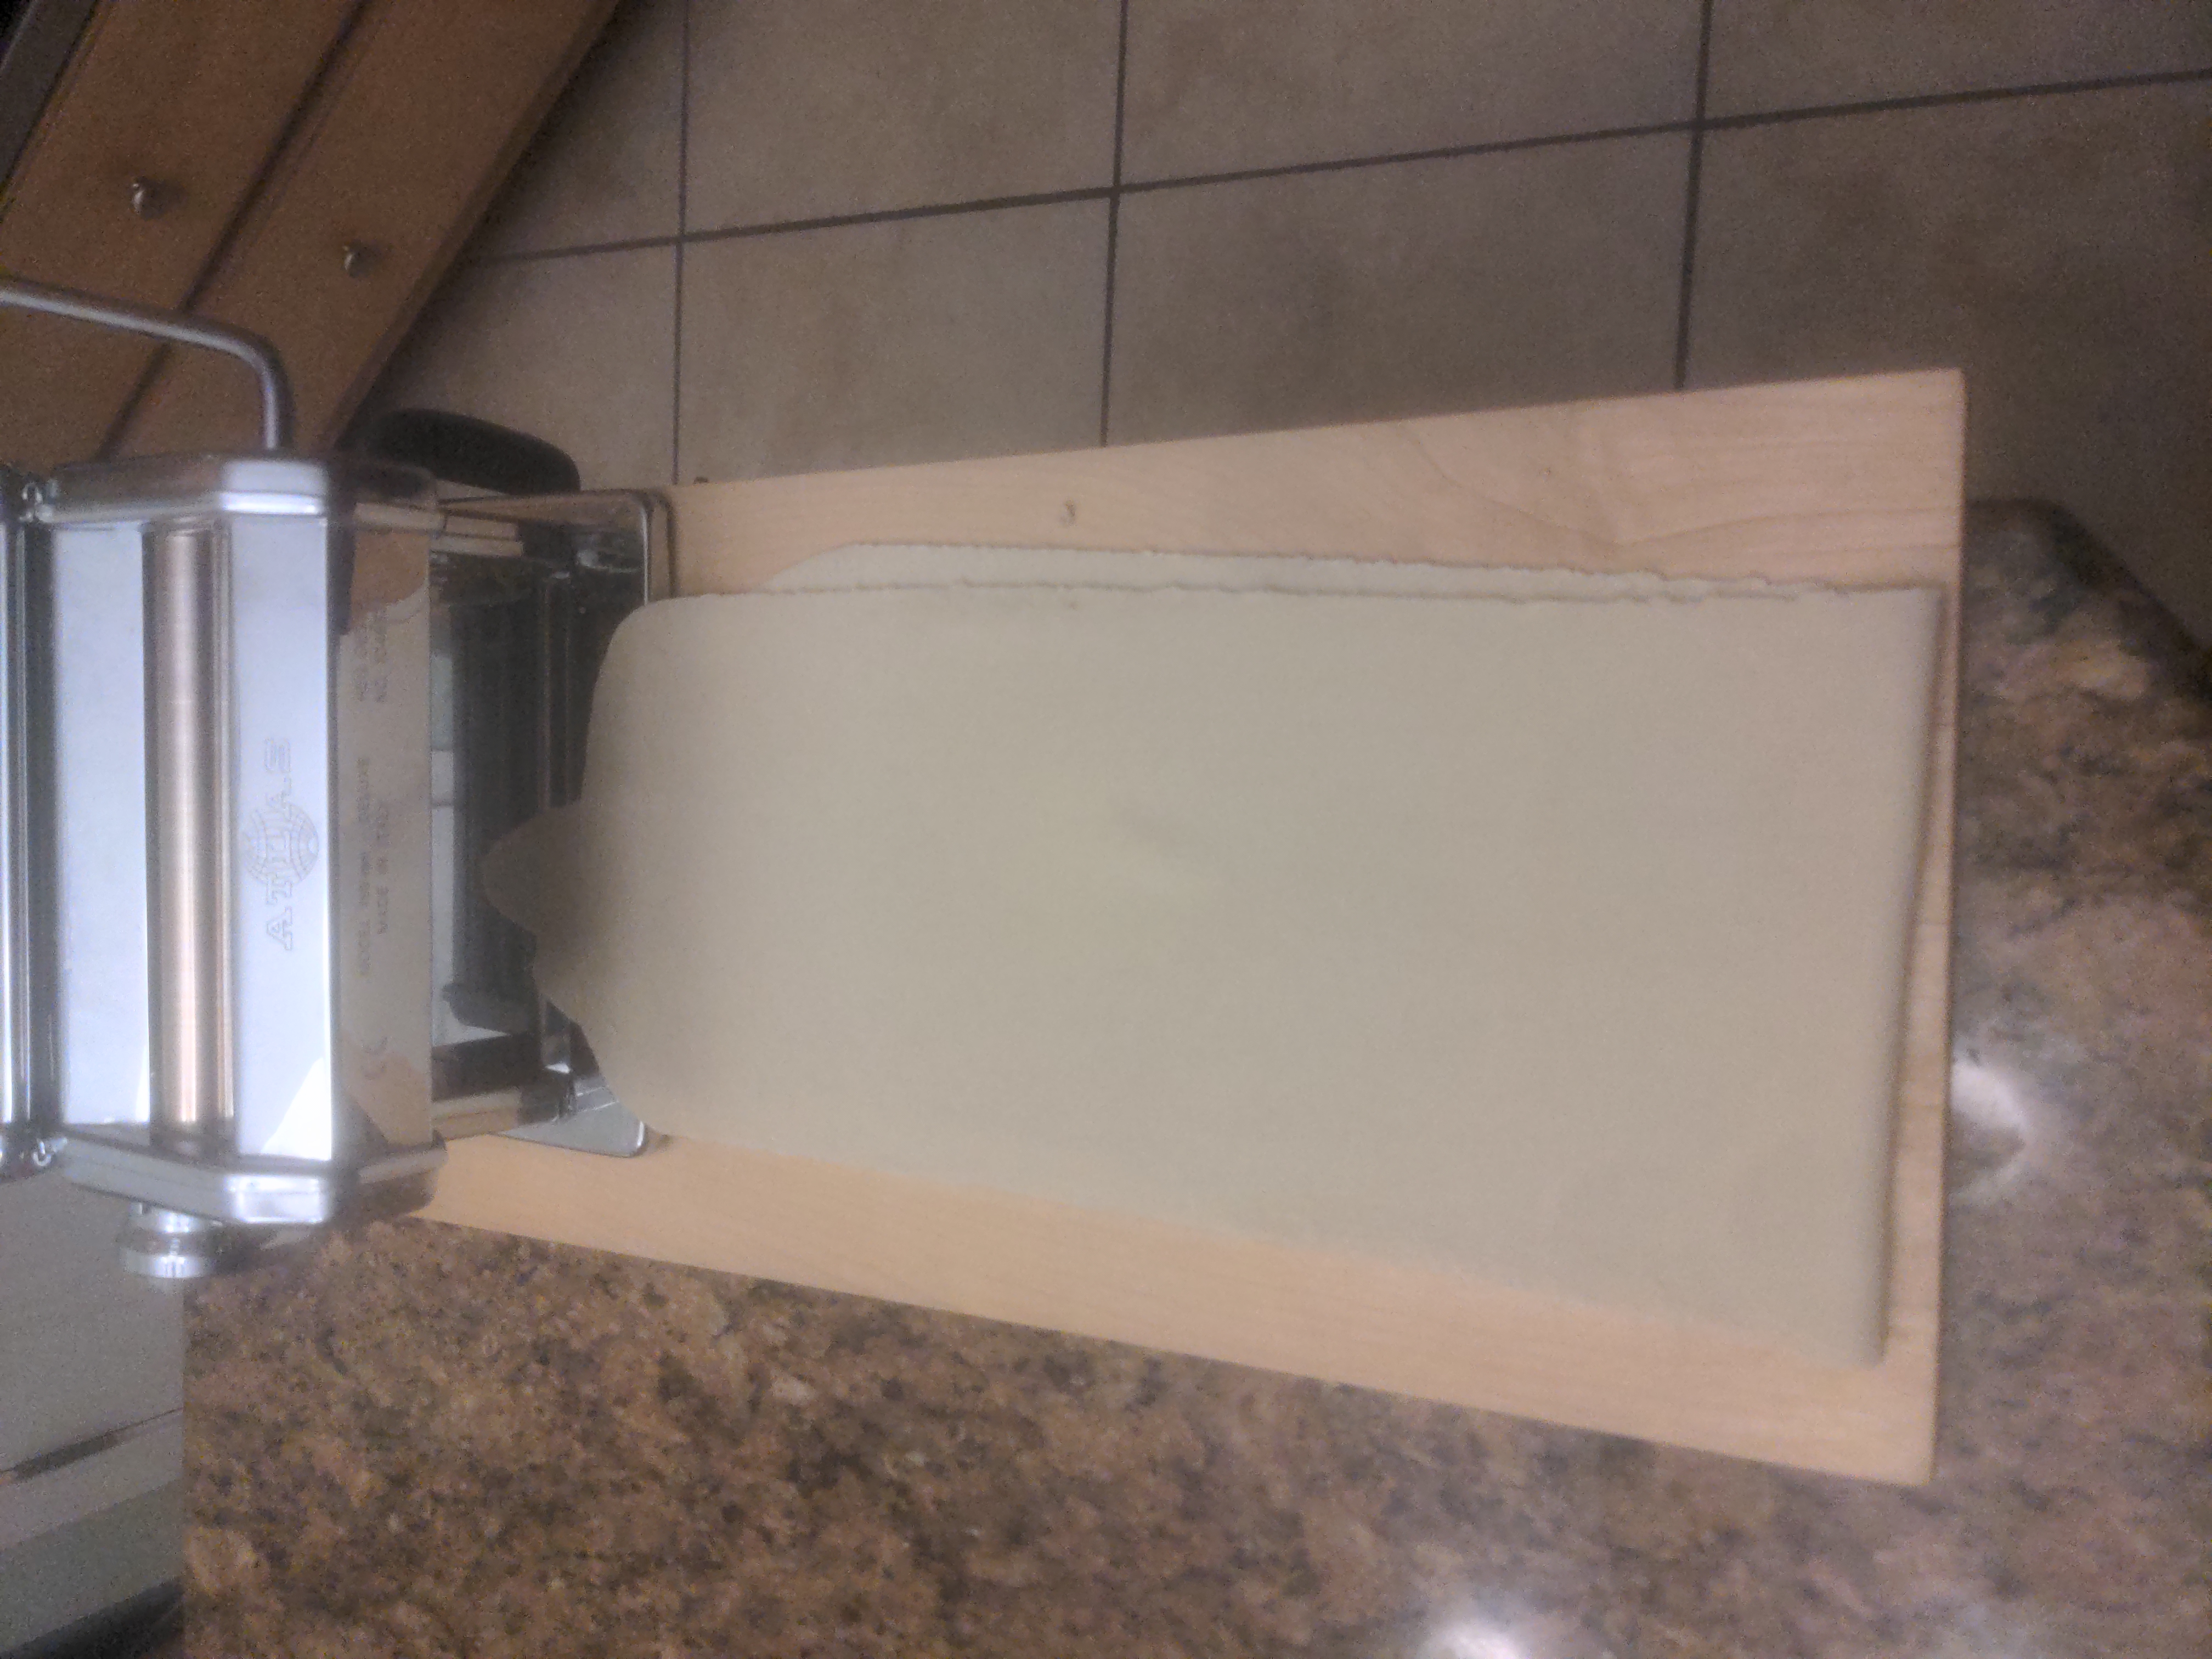
After resting, the dough is rolled through the roller side of the pasta machine on the maximum thickness for additional kneeding. After each rolling, the dough is folded over itself and run through again, until it is too tough for the machine to handle. Then, I rest for 30 minutes. It is worth noting that these home pasta machines have very small gears that will break and snap their teeth if your dough is too low in hydration. Please avoid using ramen noodle recipes intended for commercial kitchens with very low hydration.
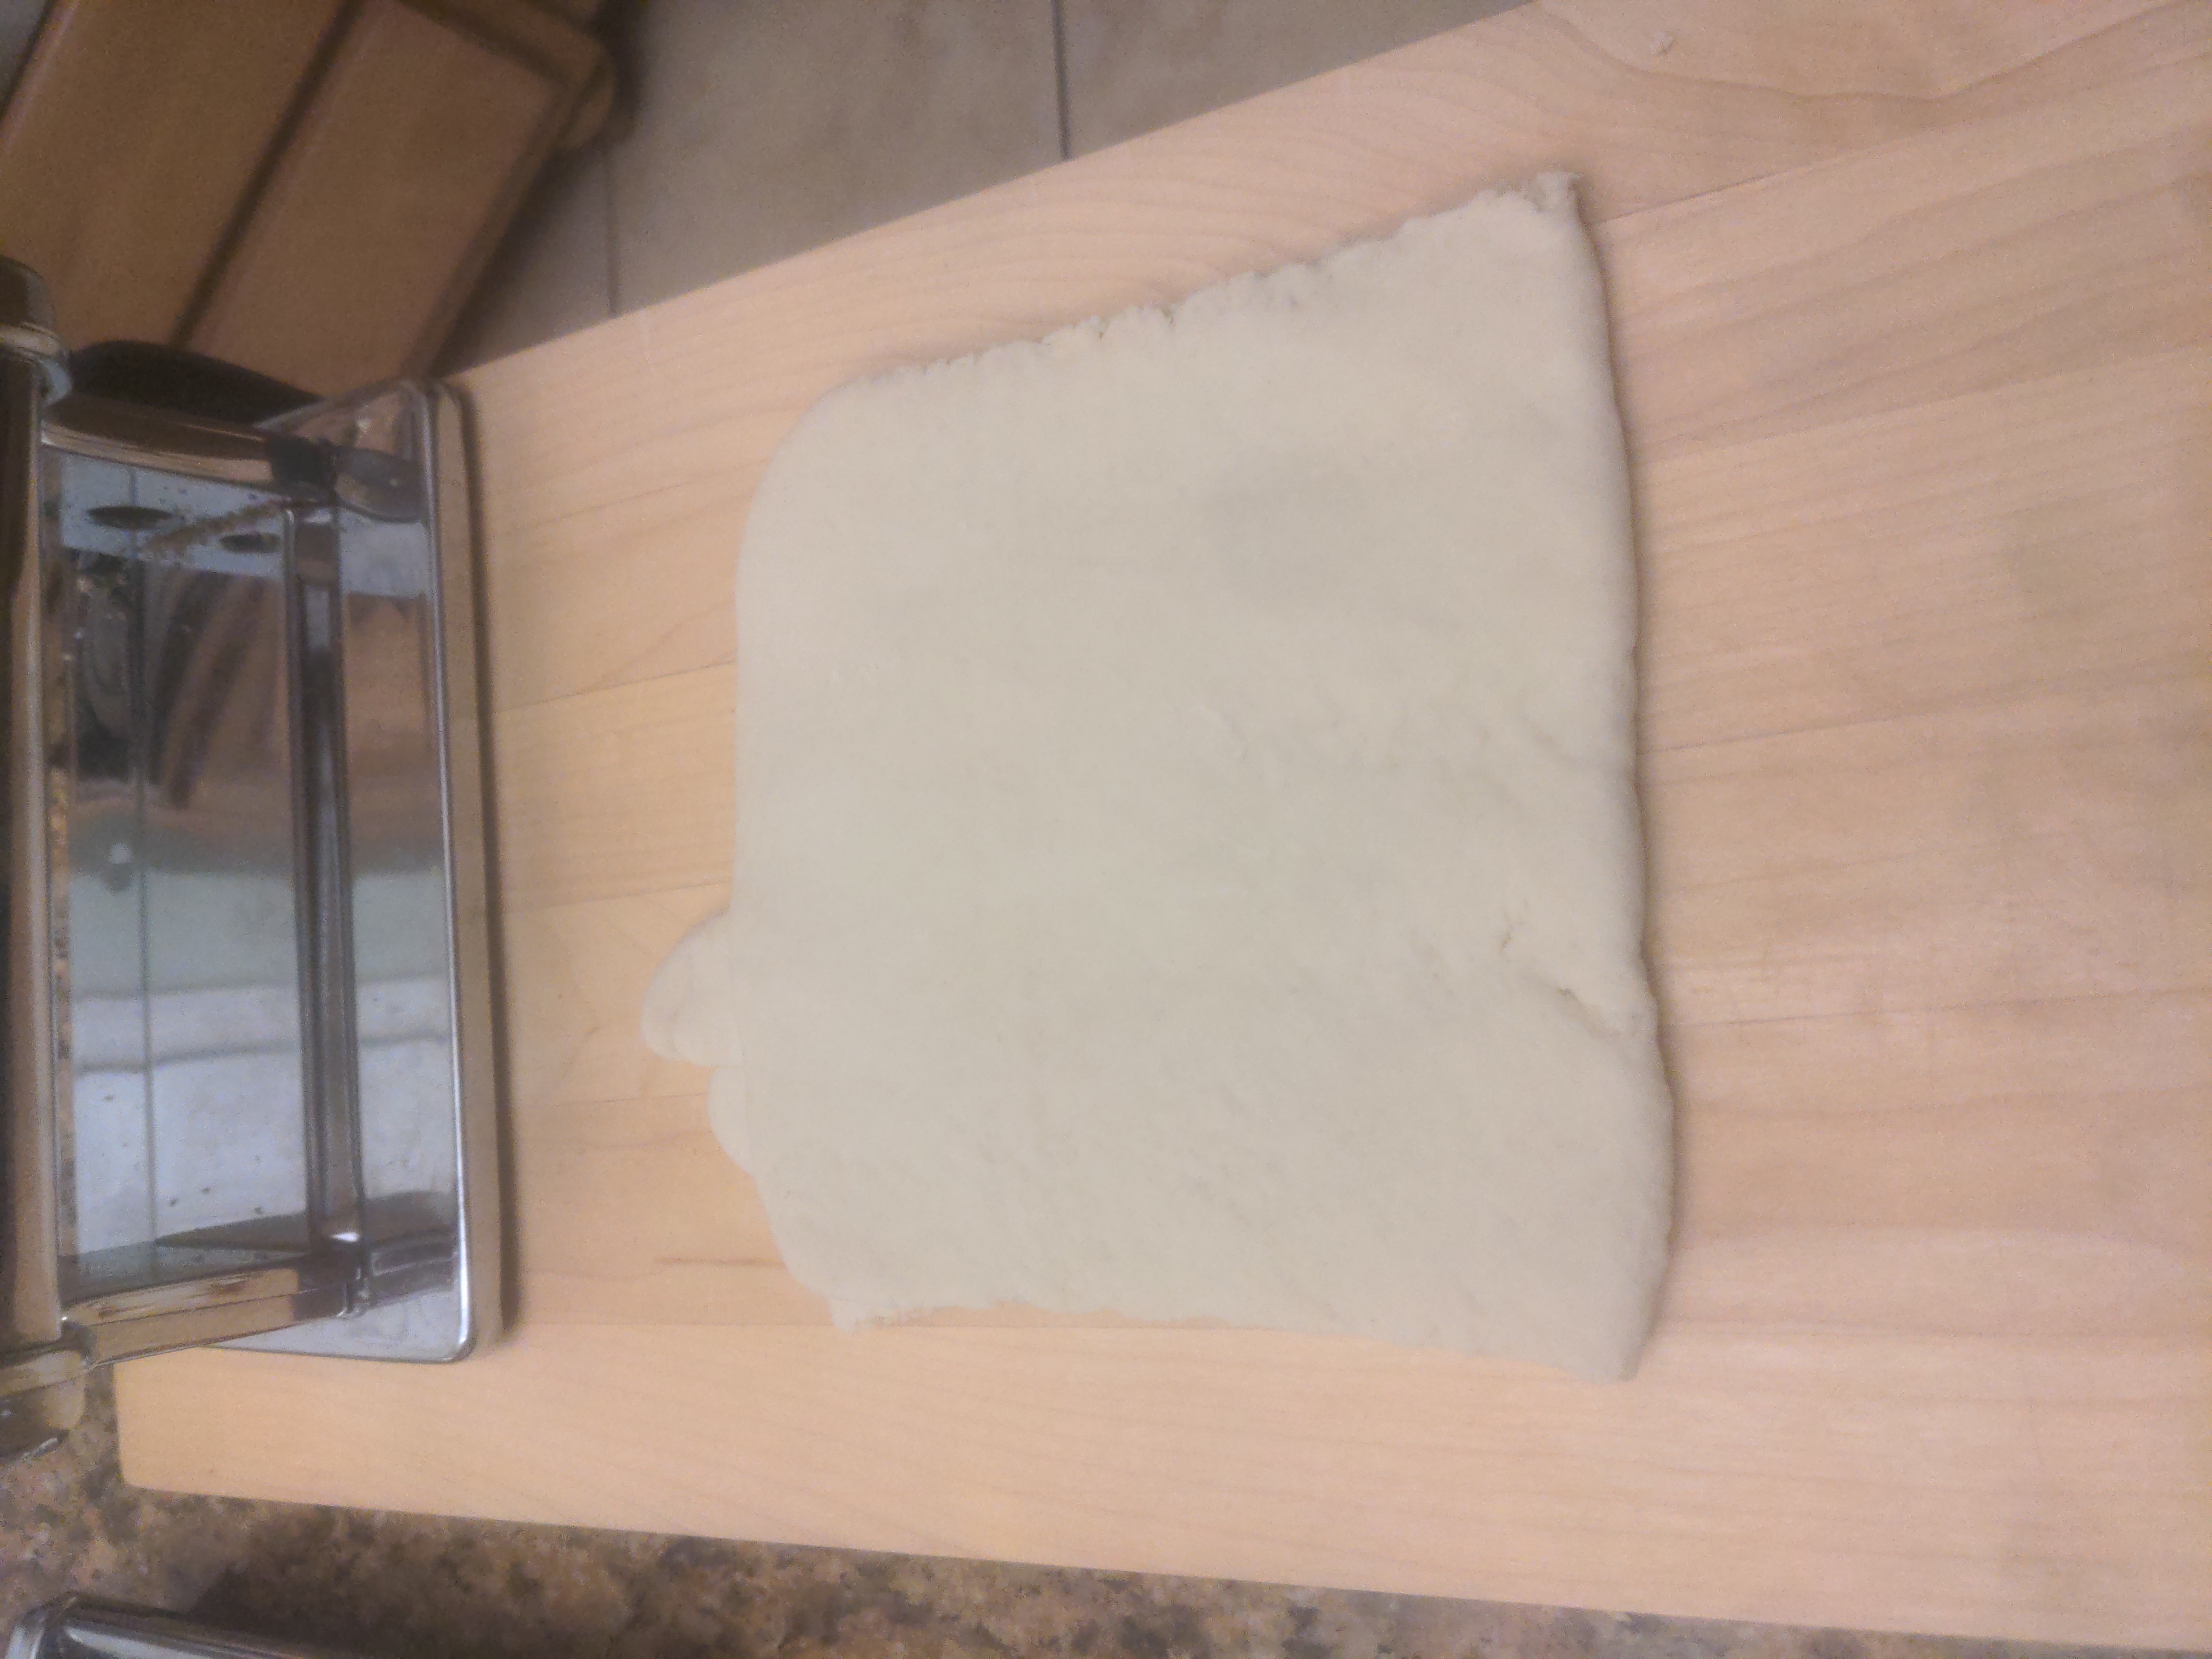
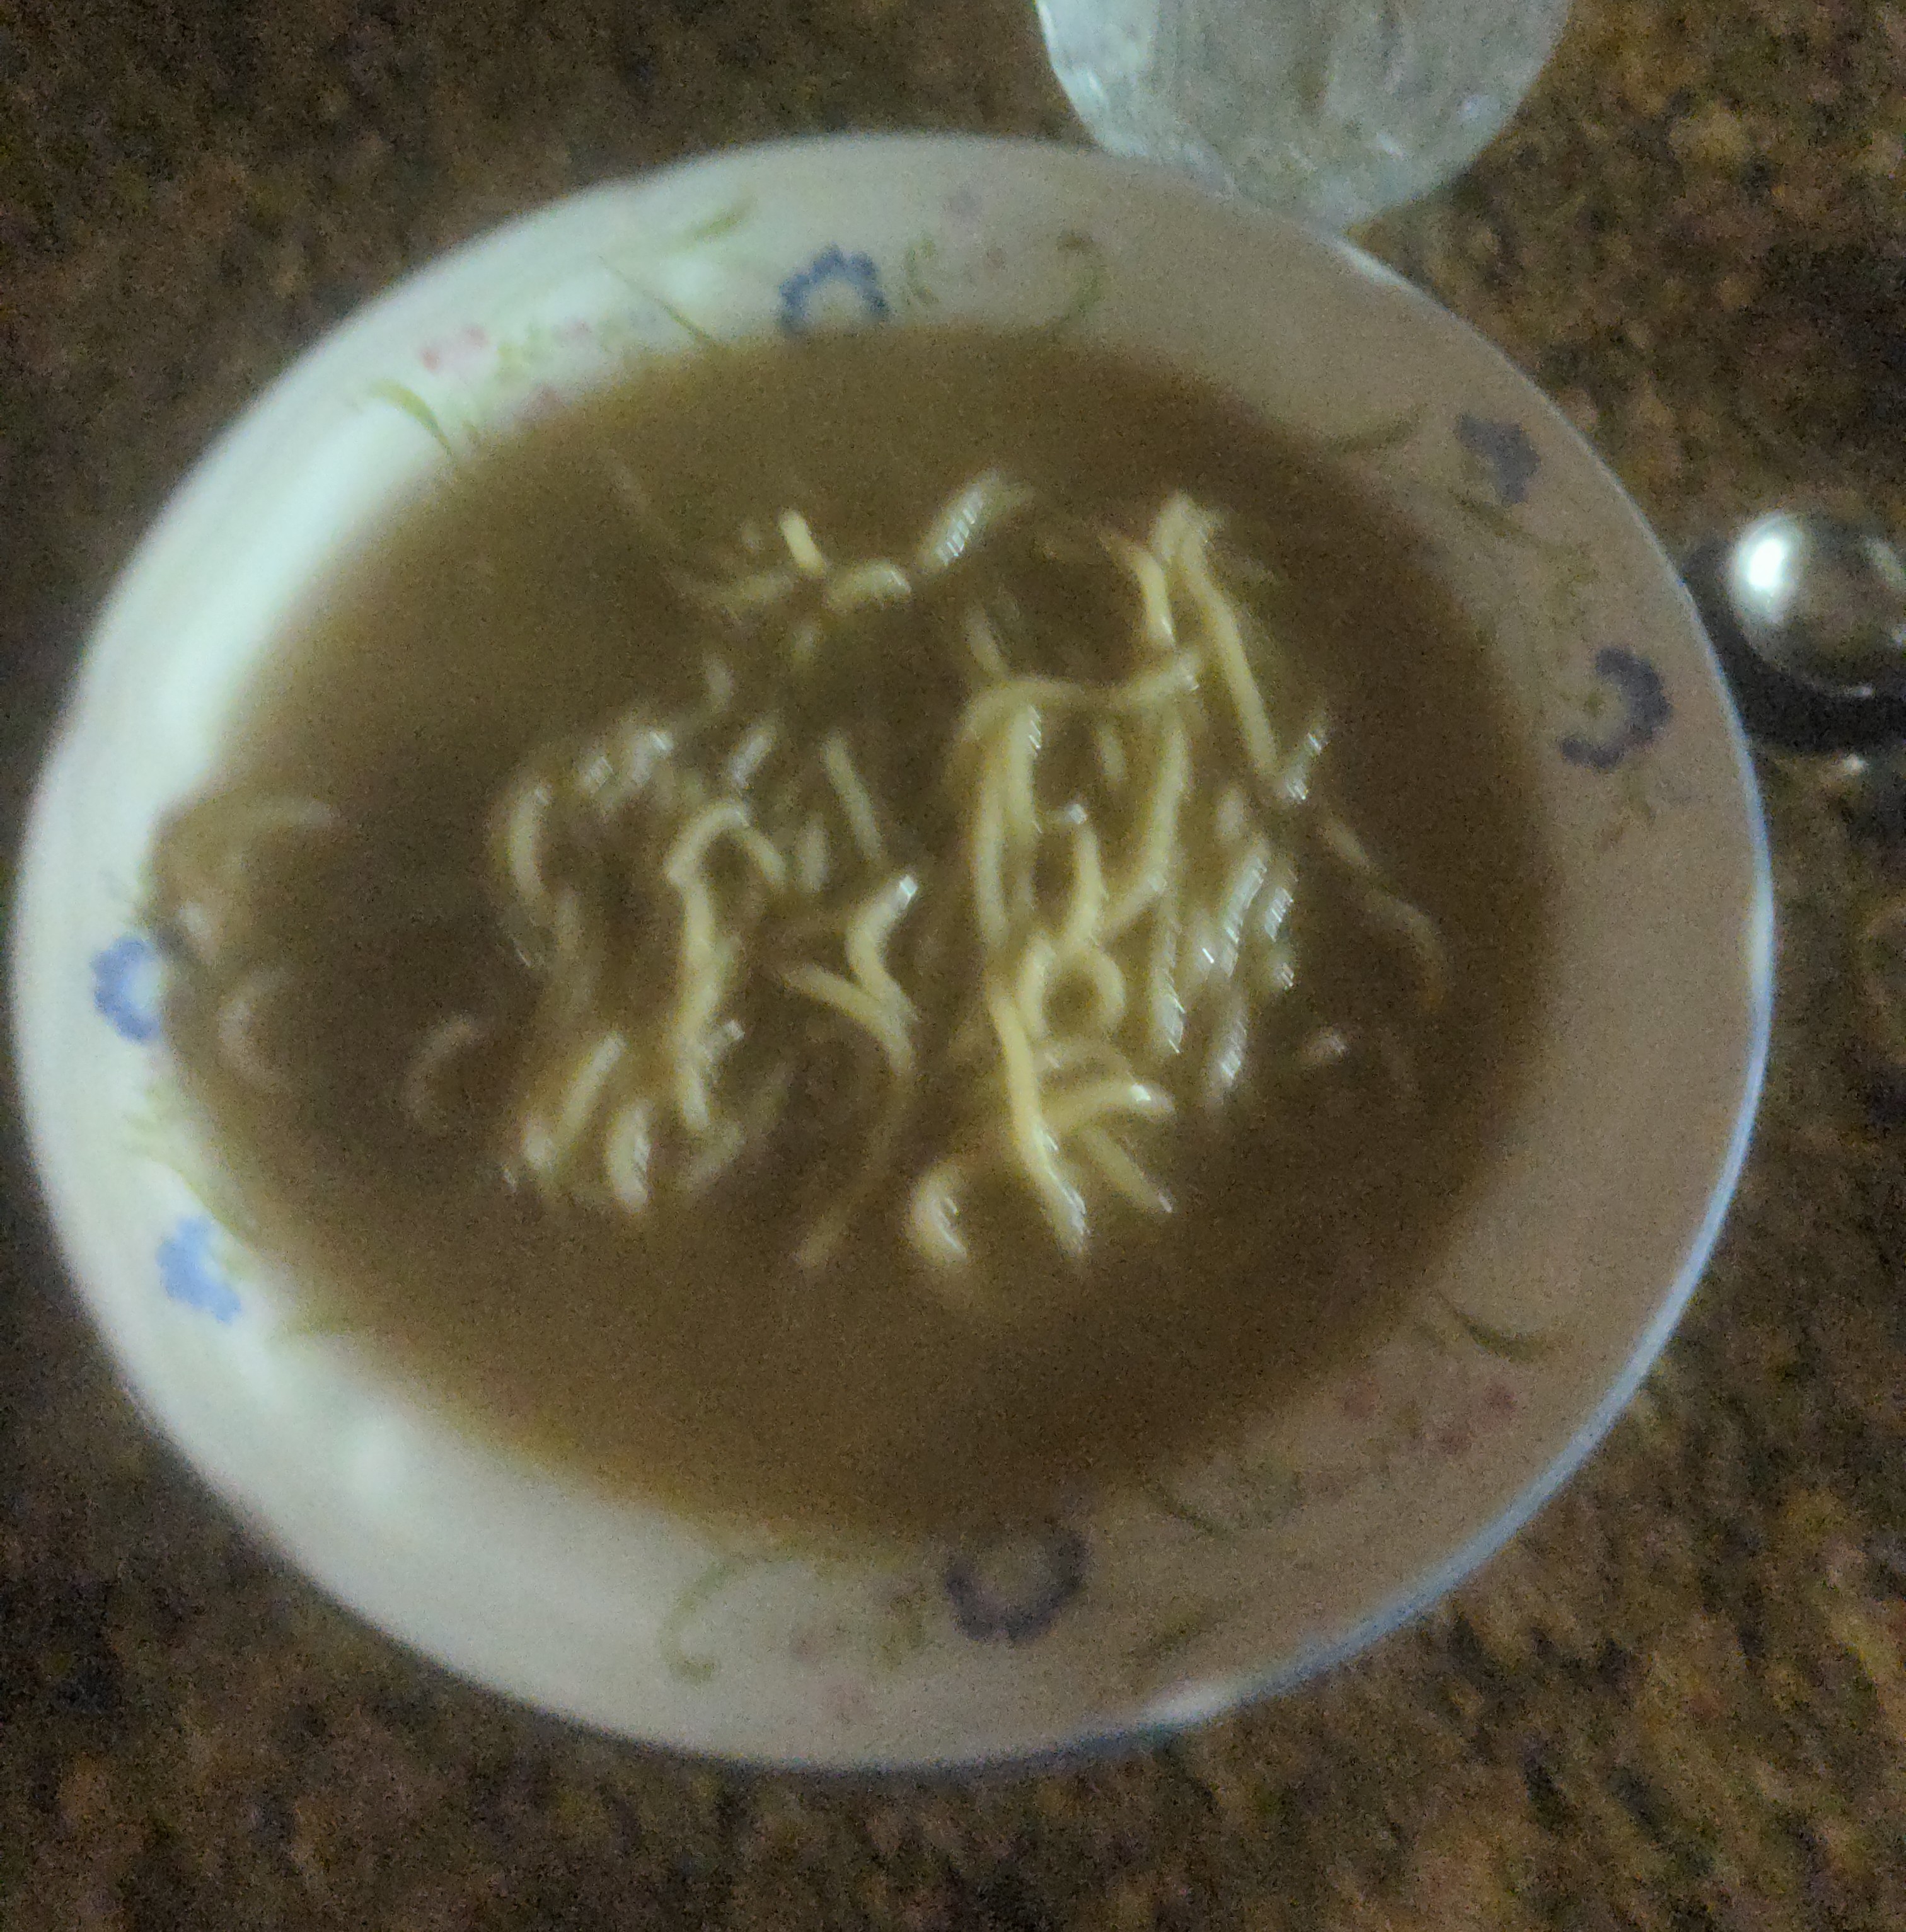
Now we are ready to cut the noodles, so I run the roller with each iteration decreasing the thickness, until I hit about the thickness of spaghetti. You may go as thin as you like, though I think ramen noodles should have some thickness to them. I don't have an image cutting the noodles, so you'll just have to imagine.
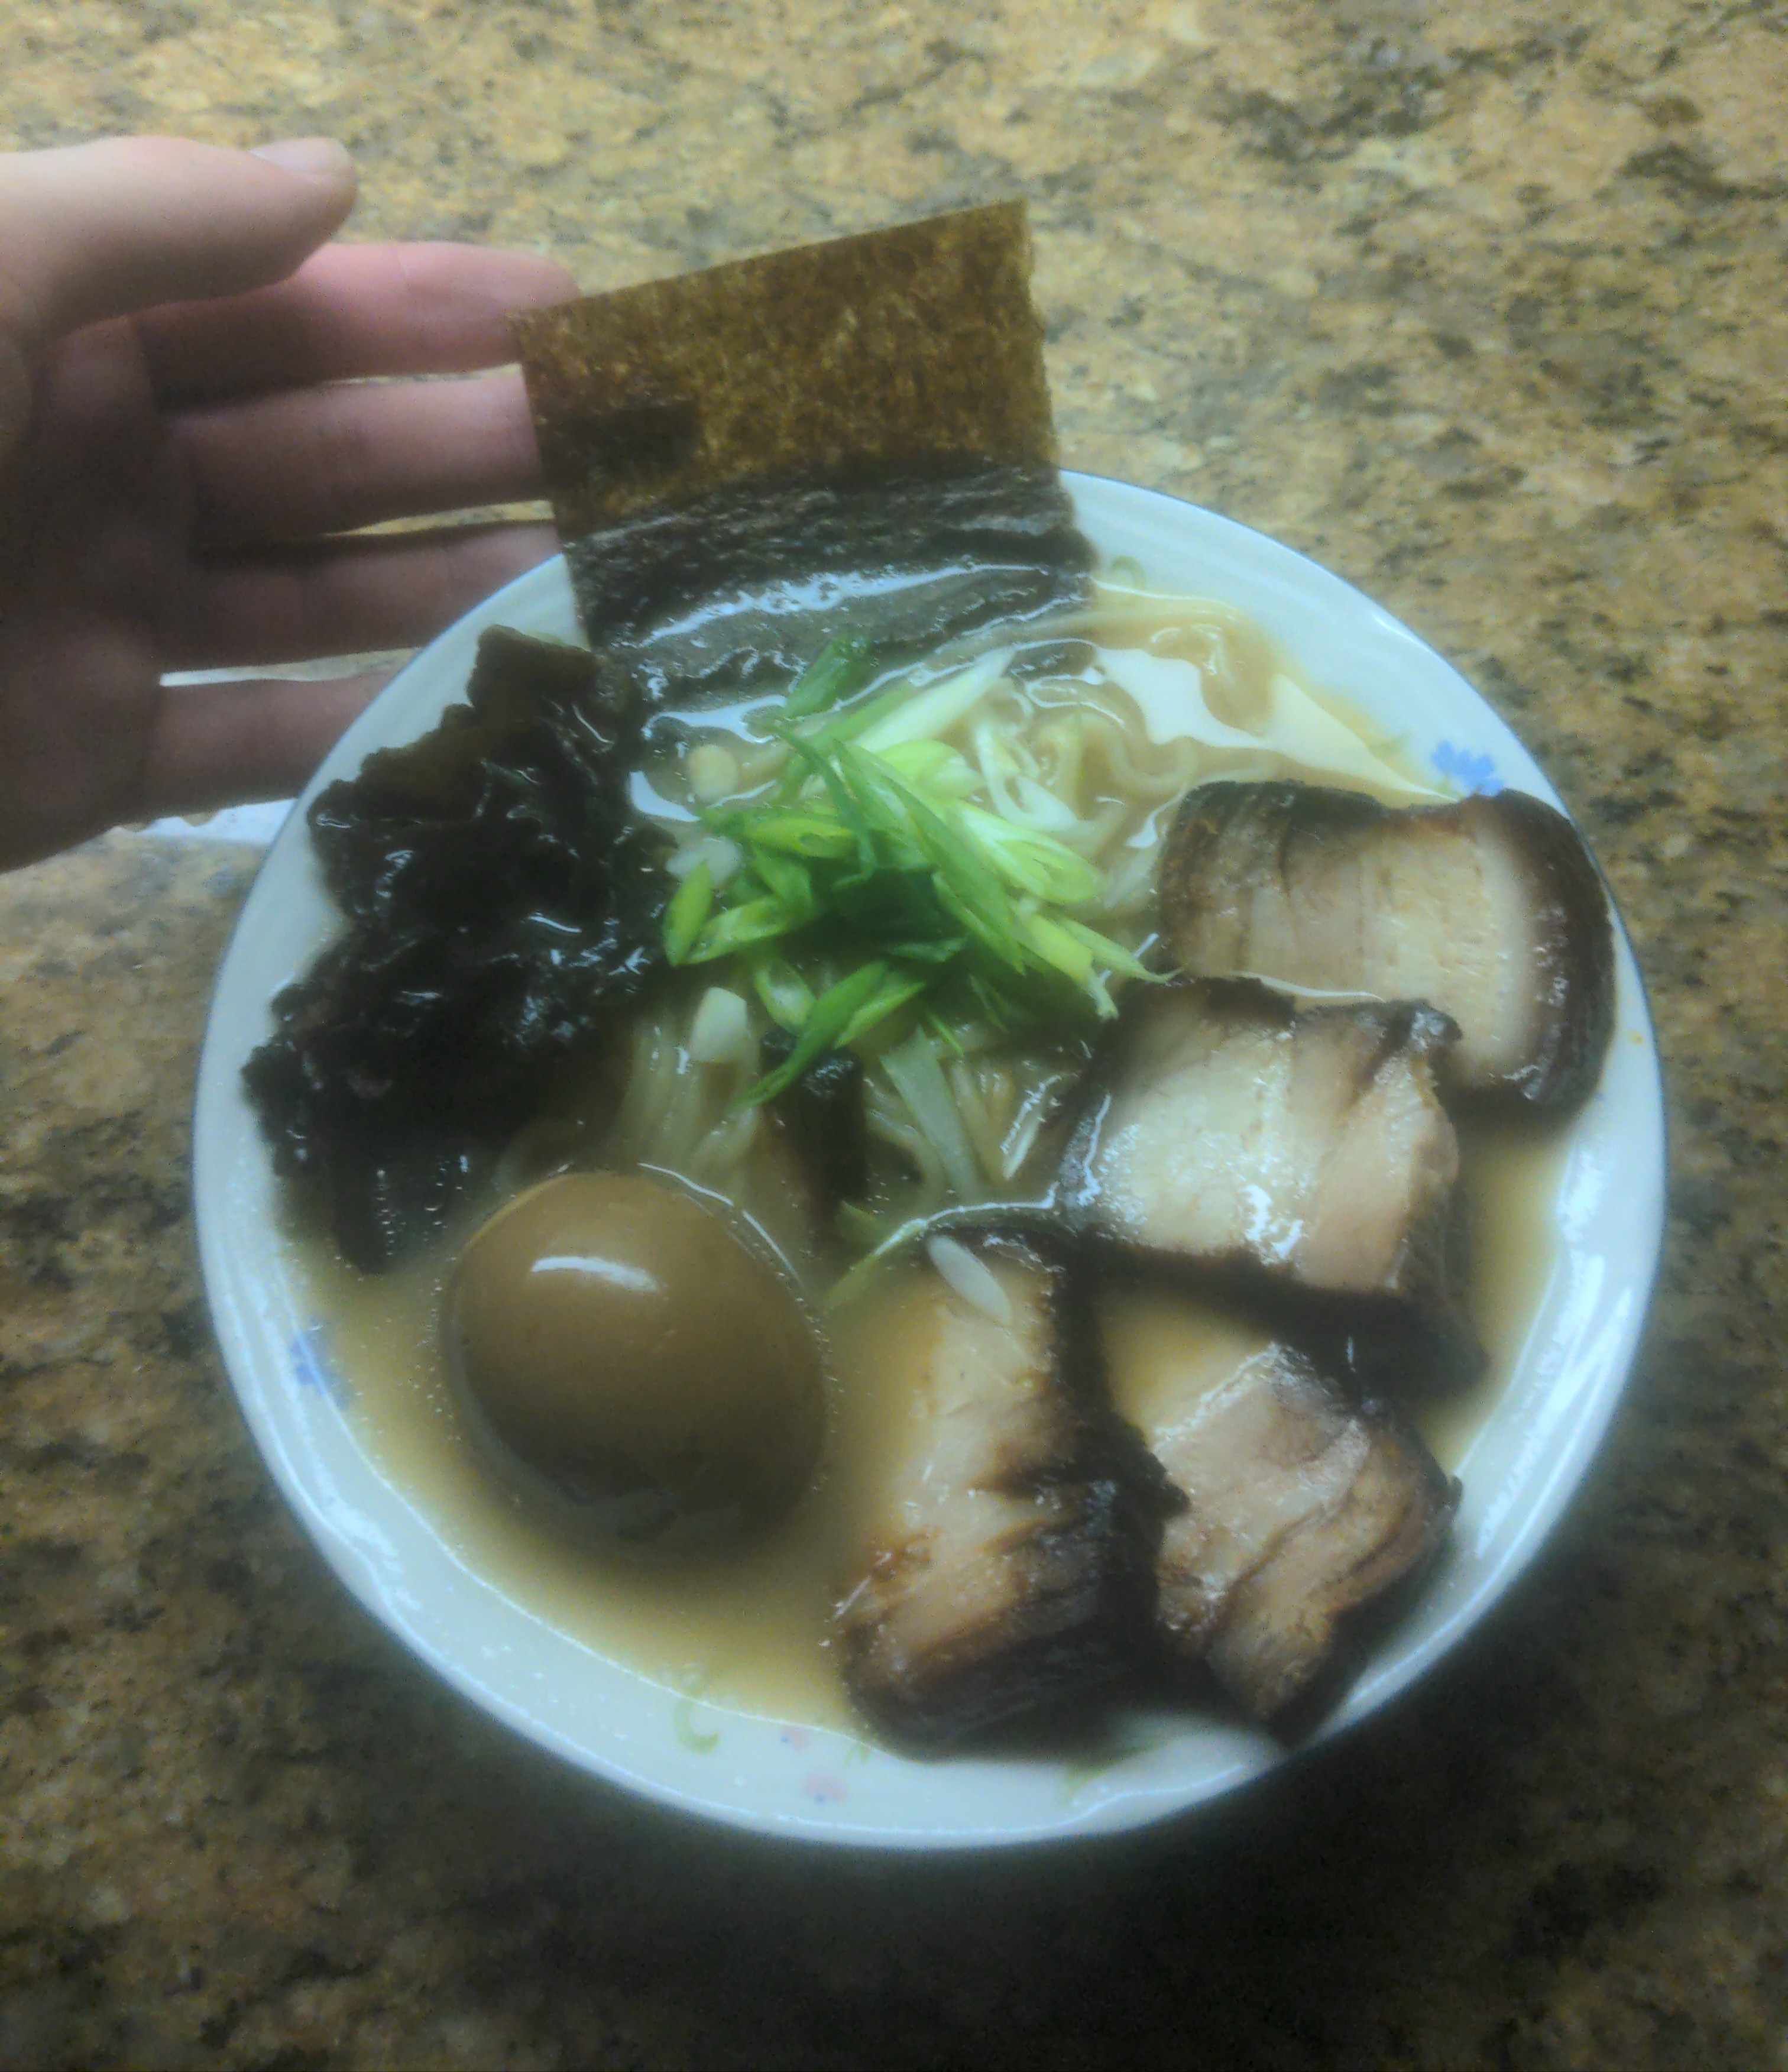
Finally I can put everything together. I begin with 4 teaspoons of tare and a teaspoon of aromatic oil, then add 1 cup of ramen broth, the noodles cooked for 2 minutes (folded into a platform shape to elevate the toppings over the broth), and the toppings I prepared earlier, as well as nori, black mushrooms, and green onions.
...and that concludes the series of ramen posts. I know my descriptions were brief, and things might not have been clear though I tried to mention the most essential steps while keeping things interesting. Hopefully this encourages someone else here to make ramen. I am by no means a master and still trying to learn many techniques myself. But it is fun to show the fruits of working on this recipe.
And now it is time for the final part. Get excited! I'll start by making noodles. Here I mix 100g of flour, 1g of salt, 1g of kansui (usually salts like sodium carbonate, sodium bicarbonate, and potassium carbonate) with 45cc of water and combine with chopsticks.

Then I use my hands to combine into a shaggy dough. Next, the dough is placed in a plastic bag. This dough is low hydration like all Japanese noodles so we need to step on it to kneed. Kneed until the dough refuses to flatten out under your feet, then set aside for 30 minutes.


Now I bring out my pasta cutter. I was very blessed to get this at a fraction of its sale price at a thrift store.

After resting, the dough is rolled through the roller side of the pasta machine on the maximum thickness for additional kneeding. After each rolling, the dough is folded over itself and run through again, until it is too tough for the machine to handle. Then, I rest for 30 minutes. It is worth noting that these home pasta machines have very small gears that will break and snap their teeth if your dough is too low in hydration. Please avoid using ramen noodle recipes intended for commercial kitchens with very low hydration.

Now we are ready to cut the noodles, so I run the roller with each iteration decreasing the thickness, until I hit about the thickness of spaghetti. You may go as thin as you like, though I think ramen noodles should have some thickness to them. I don't have an image cutting the noodles, so you'll just have to imagine.

Finally I can put everything together. I begin with 4 teaspoons of tare and a teaspoon of aromatic oil, then add 1 cup of ramen broth, the noodles cooked for 2 minutes (folded into a platform shape to elevate the toppings over the broth), and the toppings I prepared earlier, as well as nori, black mushrooms, and green onions.


...and that concludes the series of ramen posts. I know my descriptions were brief, and things might not have been clear though I tried to mention the most essential steps while keeping things interesting. Hopefully this encourages someone else here to make ramen. I am by no means a master and still trying to learn many techniques myself. But it is fun to show the fruits of working on this recipe.
really cool sangui thank you
i may actually follow this recipe one day
will post the result if it happens
i may actually follow this recipe one day
will post the result if it happens