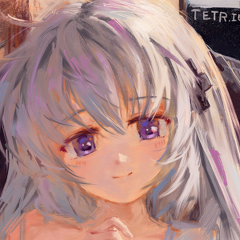
So you might have seen the things people have created with AI and thought "hmm i want to do that too". Understandable, it's pretty fun when you get the hang of it, and with the tech maturing a bit, there's now ample resources that make it "somewhat easy" if you have a good instinctive understanding of making the computer do what you want it to. The moral and legal questions behind AI art are something for another time... personally I find it can be a great tool for artists but that the models thrown in are akin to piracy. Playing with it, knowing a bit of how it works, and getting a grasp of the community behind it might help you form a more informed opinion on that, too, but this post is more an informative dump on how it works (a very general overview) and how to use it.
I'm by no means a pro, so if you're particularly interested, please look for guides beyond this post.
How does it work? (hyper simplified)
In essence, Stable Diffusion is an algorithm that allows you to combine noise and a prompt, and gain an image that visually resembles the prompt as we understand it as output. When you type a prompt and hit Generate, it:
- Generates an image completely filled with random noise,
- Reads your prompt and collects a bunch of "mini-networks" from the model to use to fulfill it,
- Combines those mini-networks into one big neural network,
- Runs the neural network, converting the noise into an image.
The magic exists in the combining of networks. Normal image formats, can't be combined. You can overlap two images, or put them next to eachother, or cross-fade them, but it's impossible to combine the "concepts" of the images, the elements that make them what they are. Stable Diffusion makes this possible, allowing you to combine the concepts behinds images, to create new images. In a way, Stable Diffusion is a new type of collage tool, except instead of combining image data, you're combining concepts.
What do I need?
This post only covers rendering & training on your own device. There's great support for renting GPU time, including free GPU time, from things like Google Colab, but in this post I'll only talk about how to do it yourself. Here's what you'll need:
- A modern GPU with at least 2~4GB of VRAM, 8+GB recommended
- NVidia will be a LOT easier on you. AMD GPUs are not good for things like this. (Actually, they're not good in general, let's be real honest)
- A good amount of drive space (models are large!). You'll need at least 10GB or so, but the more the more you can experiment around.
- A good amount of RAM (at least 16GB). For me, it happily eats 10GB to load a model (frees to about 4GB after loading finishes) and about 18GB while training.
- you need to really enjoy fucking about with python. not like, writing python. just trying to get python to work at all.
Installing Stable Diffusion
The program everyone uses is AUTOMATIC1111's WebUI: https://github.com/AUTOMATIC1111/stable-diffusion-webui#installation-and-running
In short (for Windows):
- Get Python 3.10.9 ← IMPORTANT! This differs from the official instructions, 3.10.9 works better with training so get that
- Make sure to enable Tk/Tcl integration in the installer. If you forget you'll need to reinstall Python.
- Also, don't upgrade from one Python version to another, that breaks Tk/Tcl because fuck you.
- Yes that also installs IDLE, because fuck you.
- Make sure Python 3.10.9 is in your PATH and is the one that responds to simply "python" in the console.
- Make sure to enable Tk/Tcl integration in the installer. If you forget you'll need to reinstall Python.
- Make sure you have Git.
- Clone the repo into a folder.
- Run
webui-user.bat. It should set up on its own.
Getting models
By default, WebUI downloads Stable Diffusion 1.5 for you. That's great, but I know you're all here for flat anime chests so you'll want to download anime models. There's many but the one I like using is Anything4.5. Here's how to get it:
- Grab
anything-v4.5-pruned.safetensorsandanything-v4.0.vae.ptfrom https://huggingface.co/andite/anything-v4.0/tree/main - Place them in the
models/Stable-diffusionfolder in your WebUI directory - Rename
anything-v4.0.vae.pttoanything-v4.5-pruned.vae.pt(so WebUI picks it up automatically) - Restart WebUI
- Switch to Anything-v4.5 from the spinner menu in the top left. (Note: loading a model takes a bit.)
- If your output is desaturated, the VAE isn't set up properly. Make sure it has the same name as the model file. If that doesn't work, you can select it in the settings.
You might be wondering what a .safetensors or a VAE are.... In short, there's a few words you want to know:
- A model is the base of your generations. They're massive (multiple gigabytes), and are what everything builds upon.
- An embedding is an old way teach an existing model extra things. Generally superseded by LoRAs.
- A LoRA is a newer, far more efficient (way faster to train, way smaller filesize), way more consistent and easier to combine way to teach an existing model extra things.
- A VAE is an extra model that fixes the colors of an existing model. A lot of models need one to not look desaturated.
- Note about filetypes: Be careful with
.ptand.ckptfiles. They may contain malicious code. That's what.safetensorsis for (it's safe by design).
How to prompt
Type a prompt into the big Prompt box, then press the big Generate button. It's pretty simple to use all things considered. Keep an eye on the console for more information.
...OK, that might not be enough info, so let me ride you through the main controls:
- Prompt: Enter a prompt here. This will decide which mininetworks to combine into the final network that will generate your image.
- On Stable Diffusion-type models, use Dalle-like longer sentences. Like "a painting of a dog in the sunset".
- On Booru-like models, use booru tags (separated by commas, using spaces instead of underscores). Like "1girl, solo, looking at viewer, red hair, red eyes, smile, sailor uniform".
- Use brackets to add or remove weight to an element of your prompt:
(text)adds emphasis (about 1.1x). You can (((((stack))))) them too to add more and more emphasis.[text]similarly removes emphasis (about 0.9x).(text:1.25)sets emphasis (I prefer this, easier to tweak). Note this also stacks, so((beans:2):2)has a weight of 4.
- There's some other tricks you can do too, like prompt editing (where the prompt changes over the course of the generation time). ...You won't generally need it, but it's fun to look into.
[textA:textB:n]changes fromtextAtotextBafternsteps.[text::n]removestextfrom the prompt afternsteps.[text:n]addstextto the prompt afternsteps.- For example,
a [fantasy:cyberpunk:16] landscapewill first paint a fantasy landscape for 16 steps, then switch to painting a cyberpunk one.
- Use quality indicators! For example, for Booru-like models, it's useful to add
(best quality, masterpiece, detailed lighting:1.1),at the start! - CAREFUL! Note the maximum length in the top right! While WebUI does have some tricks to allow you to go past 75 tokens (itll switch to 150), it's not perfect and may backfire.
- Negative prompt: This is the same as the main prompt box, except all the weights are negative. So if you don't want something to appear in your image, you add it here.
- This is a great place to dump a bunch of quality indicators, too! For example, for Booru-like models:
lowres, bad anatomy, bad hands, text, error, missing fingers, extra digit, fewer digits, cropped, (worst quality, low quality, normal quality:1.1), jpeg artifacts, signature, watermark, username, blurry, artist name - Again, mind the 75 limit. You can enter up to 150 here too, but it tends to backfire VERY often.
- This is a great place to dump a bunch of quality indicators, too! For example, for Booru-like models:
- Sampling method: Tends to change the way the image looks. I can't tell you which is better, but Euler a works well for me. Others tend to also like DPM++ and its offshoots.
- Sampling steps: How long to run the algorithm for. Running it for too short makes a blurry mess (it'll be too similar to the noise an image originally starts with, remember?), running it for too long doesn't tend to do much. For Euler a, you want 40~60 or so, for DPM++ and the like 30 is fine. Play with it!
- Hires. fix: Requires a lot of VRAM. Will not only make your output higher res, but also add detail. Very cool, but also very slow and inefficient. You should leave this off, then when you get a nice generation out (not all of them will be bangers!) upscale that one (Remember: it's an algorithm! Same inputs, same result.
- Width & height: Don't put it too high. Most models are trained on 512x512, 728x512, 512x728 and 728x728. So, you should stay around there. If you need more, use Hires. fix instead!
- Batch count & size: Try playing with the batch size! If your PC can handle a higher batch size, you'll be able to render more images at once (costs more VRAM, of course). If you want to generate a bunch, up the batch count, and it'll just render more. For example, 8 batches of 8 will render 64 images.
- CFG scale: Essentially just scales all the weights. Lower it, and your prompts will have less effect (letting the AI do its own thing). Raise it, and they'll have more effect. 6~10 is good. Again, feel free to play with it.
- Seed: -1 will use a random one (in the case of batching, each successive image will have seeds in sequential order). You can enter a seed here later if you want to upscale it, for example!
Other tools for prompting
AI sucks at hands and other fine details. But, there's a trick: you can ask the AI to repaint a specific part of the image. Simply click "Sent to inpaint" and itll take you to the img2img tab. There, you can draw over the image and essentially select an area to redraw. Try it out, it's quite neat!
In general, play around with the settings! There's a billion things you can change, and I can't go over them all here. The AUTOMATIC1111 Wiki is a great resource.
Using LoRAs
LoRAs are the most fun part of Stable Diffusion to me. LoRAs essentially add extra data to the model, Combining them and creating things it's never seen before is amazing fun! CivitAI is a great source of both models and LoRAs, so give it a look. Using a LoRA is simple:
- Place the file in
/models/Lora - In WebUI, find the third button under the Generate button. (The one that looks like a hanafuda playing card)
- In the Lora tab, you'll find your lora. Click it, and the LoRA will be added to the prompt.
- It'll appear in the prompt in the format
<lora:LORANAME:WEIGHT>.WEIGHTis preset to 1, but depending on the LoRA used, that weight may not be appropriate. Check the documentation for the LoRA to see what you should use. (Many sit a little lower than 1)- Note that the
<lora>tag isn't an actual part of the prompt, so its position doesn't matter, and it doesn't interact with any prompt syntax.
- Note that the
- It'll appear in the prompt in the format
- Many (but not all) LoRAs require some specific keywords to be used in the prompt in order to activate them. Again, check the instructions.
Combining LoRAs comes at a slight performance cost, but it's very fun so you should do it anyway.
Creating LoRAs
OK, so this is essentially an entire thing to study on its own, and something I am absolutely not pro at (I only made one Kagari LoRA) but I'll tell you how it works real quick...
You'll want to use https://github.com/bmaltais/kohya_ss, it comes with a GUI and is relatively easy to install. In short (for Windows again):
- Clone the repo and enter it.
- Run
setup.batin a command prompt. - Answer "No" to "Do you want to uninstall previous versions of torch and associated files before installing?"
- Use default values in the interactive installer. ("This machine", "None", "No"; etc.)
- Once installed, start the GUI with
gui.bat --listen 127.0.0.1 --server_port 7861 --inbrowser --share
Assembling a dataset
The most important part about creating a LoRA is assembling a dataset. In my case, a bunch of Kagari pictures. Quality over quantity. Put in shit images, get shit images out. Get only the best images. You only technically need 5 images to start a LoRA, but anything between 10 and 250 will do well. More images does help, but please don't try to target a high number.
Once you have a bunch of images, create a folder for your LoRA. Inside of it, create another folder, with the name WEIGHT_Name. Generally, a weight of 5 or 10 is fine. The name is just visual and doesn't impact anything. In my case: 10_Kagari. Inside of that folder is where your images go, named sequentially. So 1.png, 2.png, 3.png, ...
You don't need to resize or reencode your images. Although, if your image has an extreme aspect ratio, consider cropping it to a more normal ratio or removing it from your dataset.
Your directory structure should look like this by now:
- Lora
- Kagari_10
- 1.png
- 2.png
- 3.png
- etc...
- Kagari_10
Tagging your dataset
The second most important part of assembling a dataset is tagging it. How you need to tag your images depends on what model you are training against. In my case, I trained against Anything-v4.5, so I needed to tag with booru format.
When tagging, you essentially attach the things you do not tag, to the things you do tag. For example, take this image:
Here's a (very conservative) way to tag it: kagari, smile, looking at viewer, raised arm, closed hand, black dress, black choker, black criss-cross halterneck
The kagari tag is new and doesn't exist within the model yet, so it's very prone to picking up new information. This will become a trigger keyword. This trigger keyword will then associate itself with the picture, except for the things I tag.
What that means is: since I didn't tag white hair or purple eyes or white skin or hair ornament etc., those elements will become connected with the kagari tag. (Technically, they become connected with all the tags here, but since the other tags are already known to the model they won't have as much effect). However, I did tag black dress, black choker, etc. because I want to be able to change them later. I don't want to connect Kagari's outfit directly to Kagari herself, because else it will be very difficult to make the AI draw her in other clothing. (Note that by doing this, I do need to write these every time I want the AI to draw her in her own clothing.)
You want to write tags like that, and then save them in a .txt with the same number as the image file. So, your directory structure should now have 1.png, 1.txt, 2.png, 2.txt, etc.
By the way, the more tags the better, generally. Remember, anything you don't tag will become attached to your trigger words, so don't skimp on tags. My example here is very conservative, and I want to retry tagging with a bit more precision.
TIP!! If you are grabbing images from a booru to use as your input, why not use tags from said booru? They've already done the hard work for you! Just remember to remove all the tags you want to be inherent to the trigger keyword. For example, when training to draw a character, prune all the tags regarding say, her eye color, hair color, etc. (Also, make sure to convert underscores to spaces!)
If you can't do that, there's another way — in WebUI, under img2img, you can actually drop in an image and press Interrogate DeepBooru, and it will turn your image into booru tags. It's very neat, give it a try! (Once again, remove the underscores.) You can also do the same with Interrogate CLIP to turn an image into a standard StableDiffusion prompt. Note that this takes a moment to download models the first time you use it, so check the console. It's not stuck!
Setting up the training parameters
WARNING: parameter dump nobody understands, especially not me.
Open the kohya_ss GUI, and click to the second tab, Dreambooth LoRA. There's a bunch of tabs, so I'll go through them:
Source model
This is where you enter what model to train against. Set Pretrained model name or path to the model you want to train against. In my case, I trained against Anything-v4.5, so it has its .safetensors listed there.
If you're using a Stable Diffusion model, use the quick pick thingy I guess. Set output to safetensors because otherwise people won't trust you
Folders
Here you enter the important folders. For Image folder, select not the folder with the images in, but the one above it. So in my case not the 10_Kagari, but the one level above it. I know that name is confusing, but the training technically allows you to have multiple datasets and stuff in different folders so it has that extra folder.
It's easiest if you set the output folder to be within your WebUI, so you can use your created LoRAs right away. Again, the name doesn't matter beyond being a filename. It doesn't impact the prompt (that's what the tagging is for)
Training parameters
I don't know what most of these do, but these options gave good results for me. The options you want to pay special attention to are:
- LoRA network weights: If you want to resume training later, enter the path of your LoRA file here. This also allows you to add to a LoRA, if you want.
- Epoch: The amount of times to train. This directly linearly makes training longer. You generally want between 10 and 25, but it's hard to know beforehand. Therefore, you should set it to something higher like 20 or 25 and set it to SAVE every epoch, so you can compare and pick the best one.
- Save every N epochs: As said above, set it to 1 so you can compare and pick the best one!
- Caption Extension: Set it to .txt as you used that
- Max resolution: Depends on the type of inputs you have. If your inputs are mainly from boorus, it'll mostly be portraits, so 512x768 is fine there. Pick what you like.
Advanced
I'm pretty sure I left this all on defaults, but here they are anyway
Sample images
This is optional, but very useful: it'll autogenerate some sample prompts every time it saves an epoch. This allows you to quickly glance which epoch makes the best results.
Tools
doesn't matter. As long as your inputs are sane everything will run on its own
Running the training
Make sure you've got a LOT of spare RAM and ... start training! This will take a lot of time, you'll be wanting to run this overnight or something of the sort. You can keep track of the sample images it creates and see if it's degrading in quality and kill it earlier, if you need! The latest will always have the original filename, the others will have numbers after their names. Once you're happy with the result, you can start using it in WebUI and generate whatever you like!
Running under Windows 7
Unsurprisingly, everything essentially runs fine under Windows 7 but there's a bunch of random fuckyous placed everywhere to try and get you to Become Inspired by the adware bloatware spyware shitware that is modern Windows. Anyway, here's what I had to do in addition to get things to run on Win7:
- The Python installer tells you to go fuck yourself if you use Win7 despite it working fine on 7. Grab a patched installer from here.
- By default, torch (ML library for Python) ships with a version of
cudart64_110.dllthat doesn't work on Win7, despite there being a version of it that does and that works absolutely fine. Grab this one and place it in place of the existingcudart64_110.dll:- For the WebUI, place it in
/venv/Lib/site-packages/torch/lib - For the LoRA trainer (kohya_ss), place it in
/venv/Lib/site-packages/torch/libas well.
- For the WebUI, place it in
This isn't a full guide, I'm super new to all this. If you're interested in really learning the nitty gritty, check out the Automatic1111 Wiki! It's a good resource.
also don't spam your generations to pixiv etc, and esp dont try to pass them off as your own. don't become the reason people hate AI, thankies


annoyingly originally StableDiffusion was supposed to add an invisible watermark to its outputs (that survives compression etc) but it was never added, despite there being a toggle iin the options and a script deep in the source that allows you to find the watermark wonder why ...